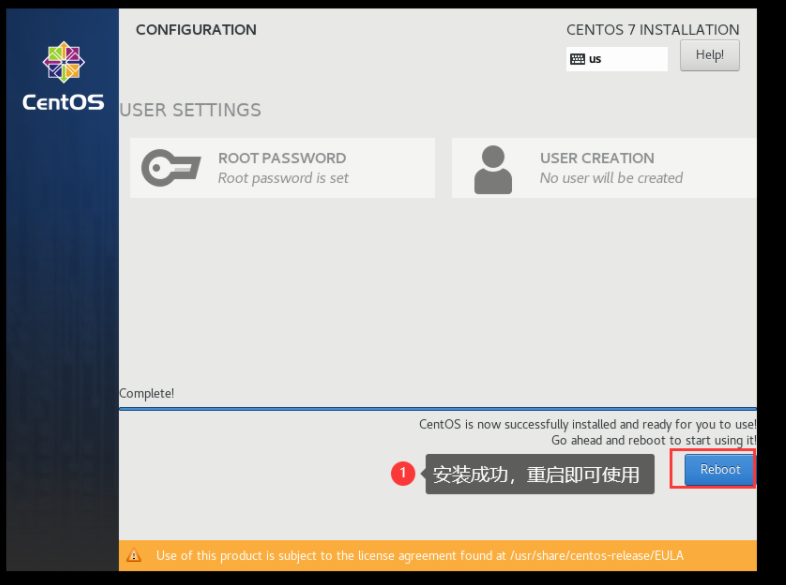
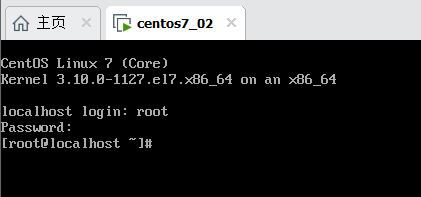
[TOC] > 本文安装的是 centos7.8 #### 1. 下载 centos7 镜像文件 --- 阿里云centos镜像站:[https://mirrors.aliyun.com/centos](https://mirrors.aliyun.com/centos) 本文章使用的镜像:CentOS-7-x86_64-Minimal-2003.iso [https://mirrors.aliyun.com/centos/7.8.2003/isos/x86_64](https://mirrors.aliyun.com/centos/7.8.2003/isos/x86_64) #### 2. 使用 centos7 镜像文件创建虚拟机 ---- **第一步:典型模式** 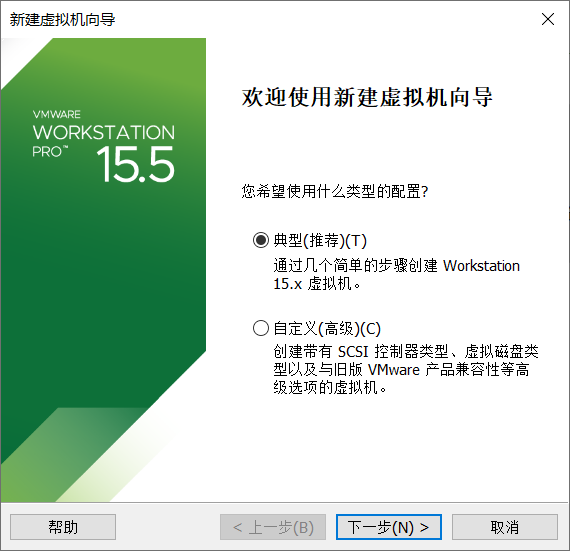 **第二步:稍后安装**  **第三步:选择将要安装的操作系统类型** 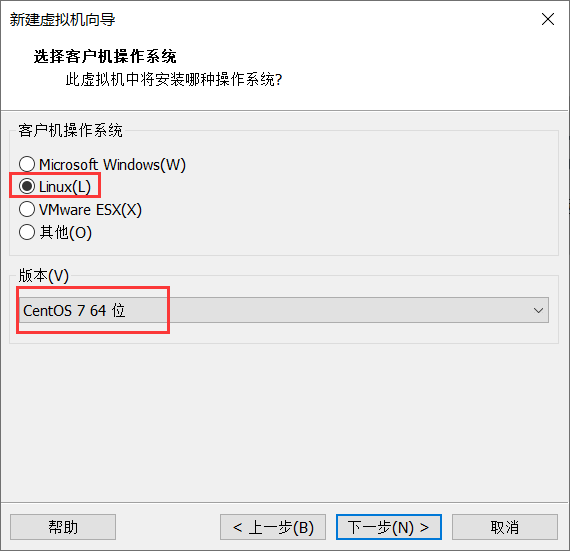 **第四步:设置虚拟机名称,虚拟机文件存放位置** 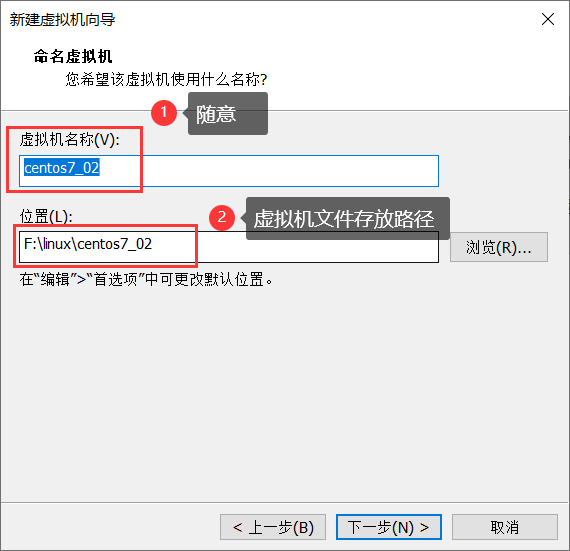 **第五步:使用默认的就行** 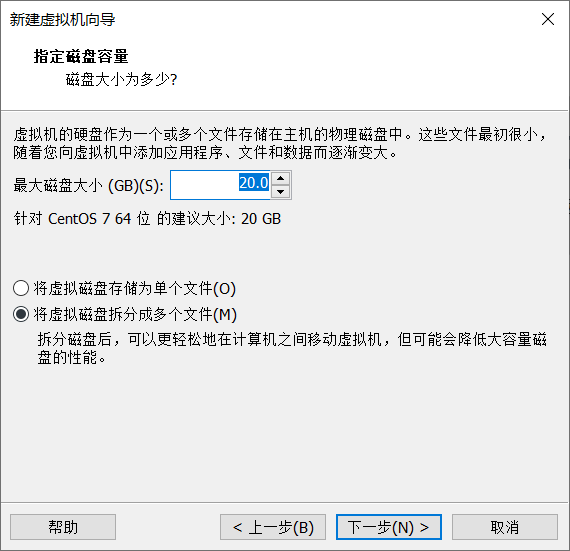 **第六步:点击 "完成"** 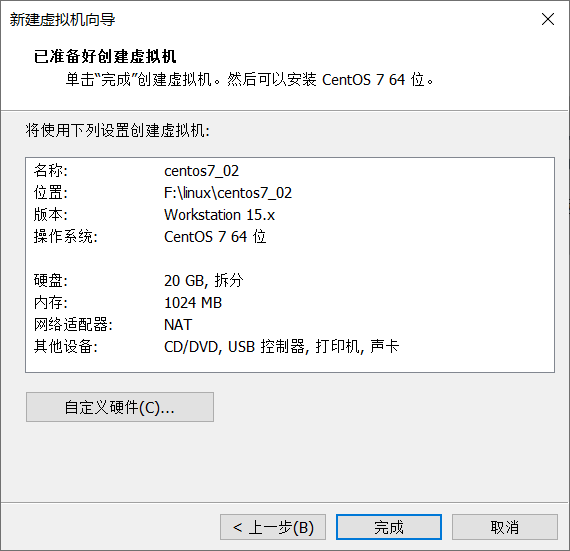 **第七步:编辑虚拟机设置,打印机一般用不到,可以移除,网络连接将默认的 NAT 模式改为桥接模式** 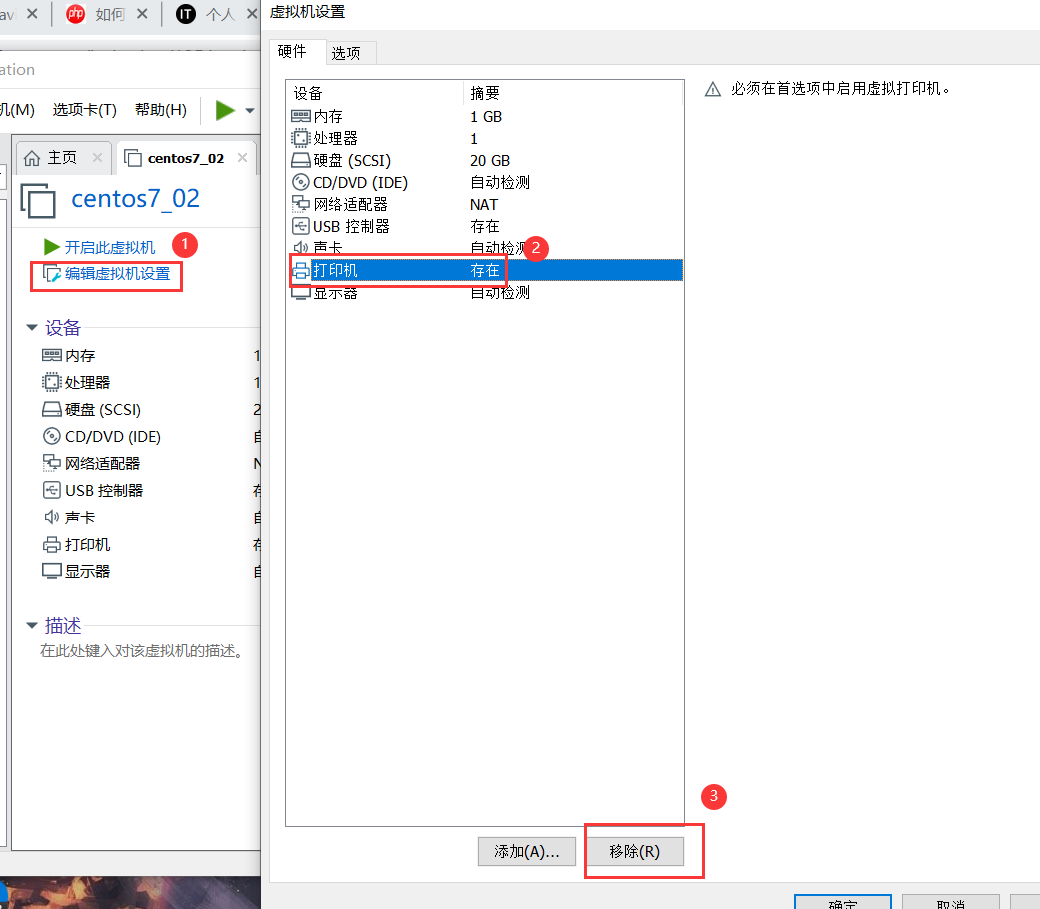 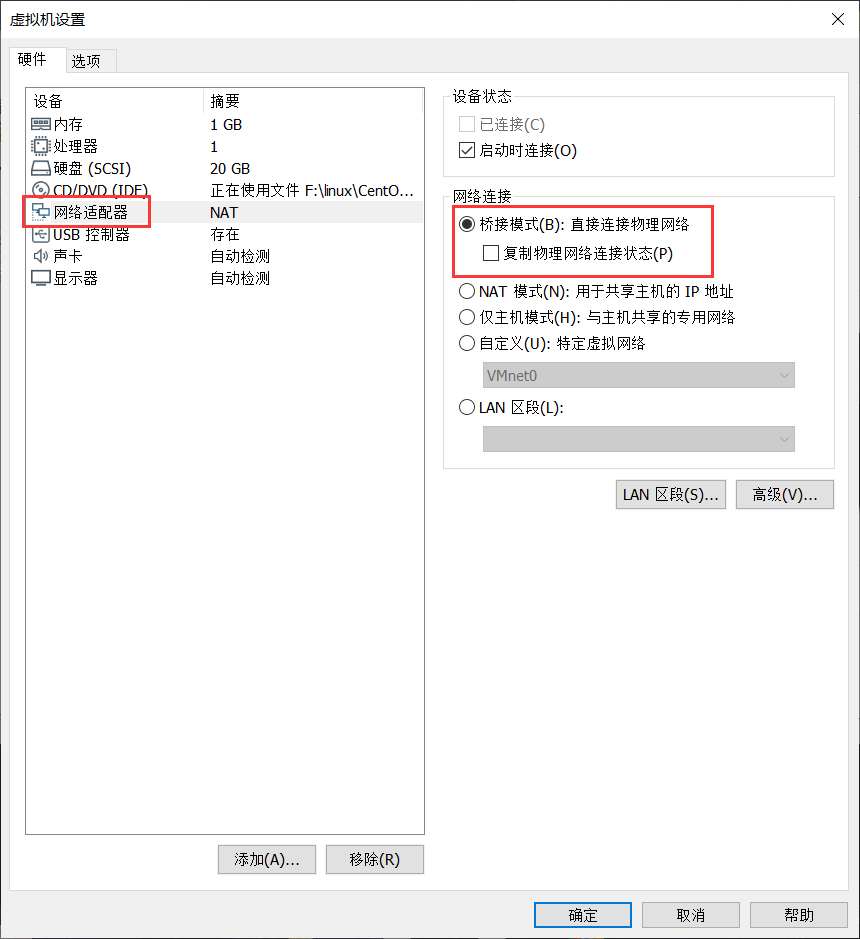 **第八步:选择镜像文件** 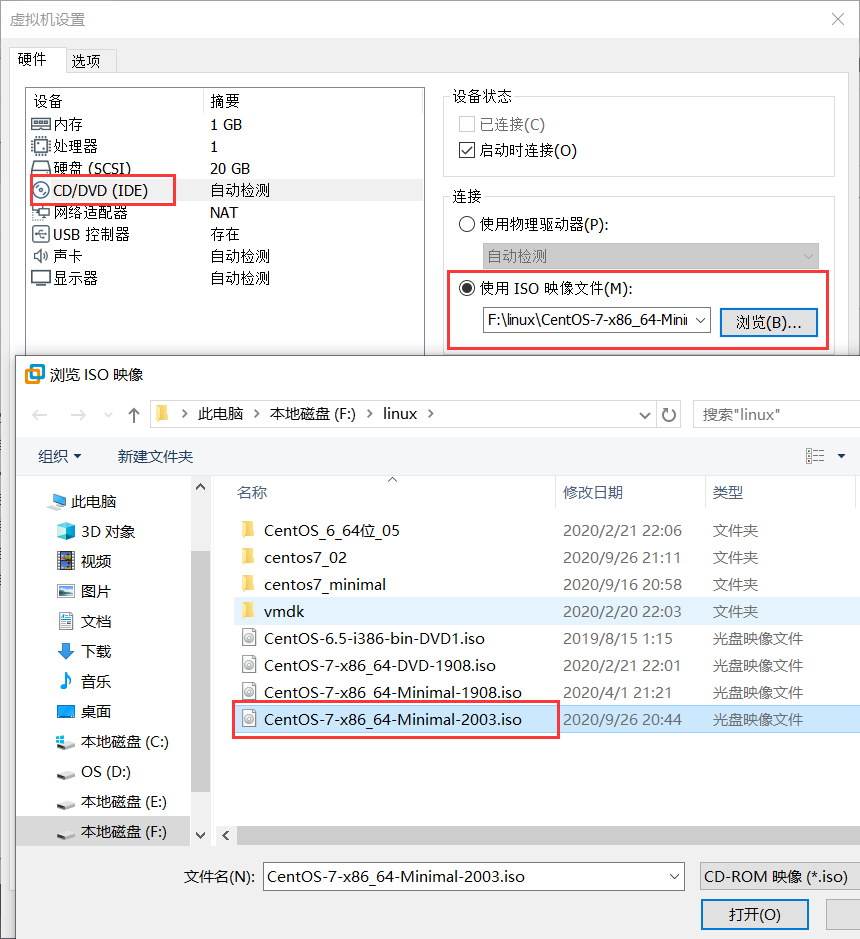 #### 3. 安装centos7操作系统 --- **第一步:开启虚拟机** 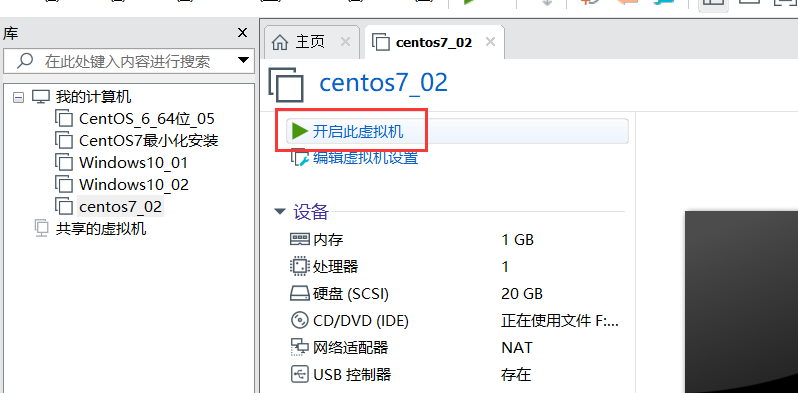 **第二步:选择界面语言,推荐使用默认的英文US,直接Continue进行下一步**  **第三步:选择时区** 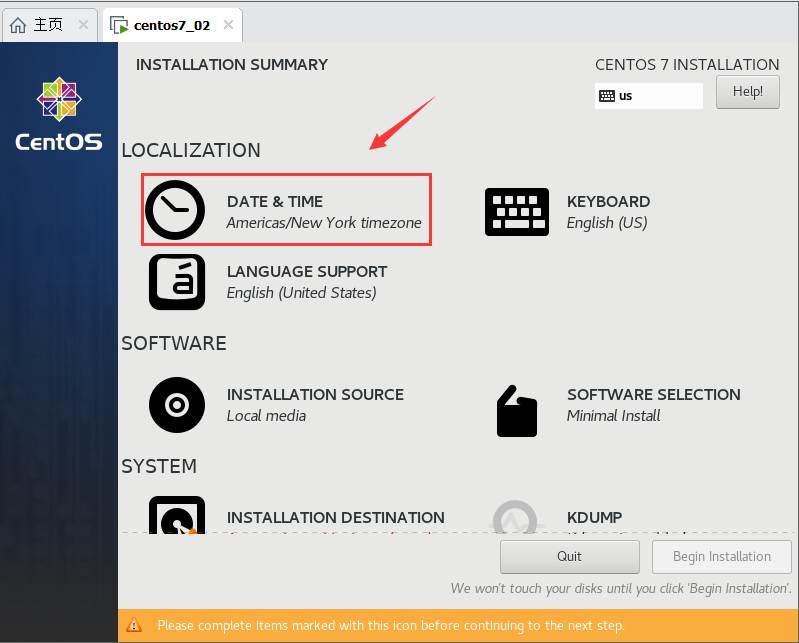 选择上海的时区 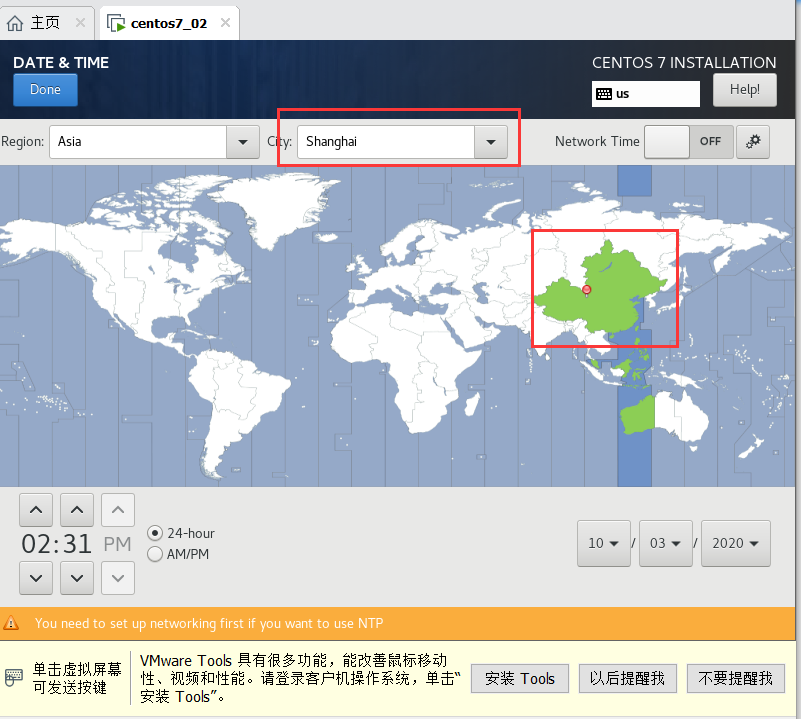 **第四步:选择分区** a. 进入分区设置 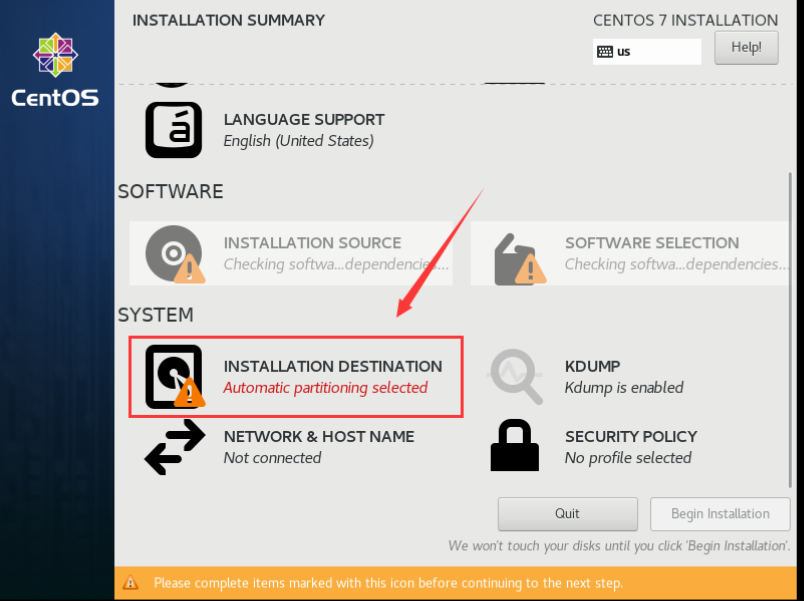 b. 选择自定义分区  c. LVM 切换为 标准分区,添加 `/boot` 分区 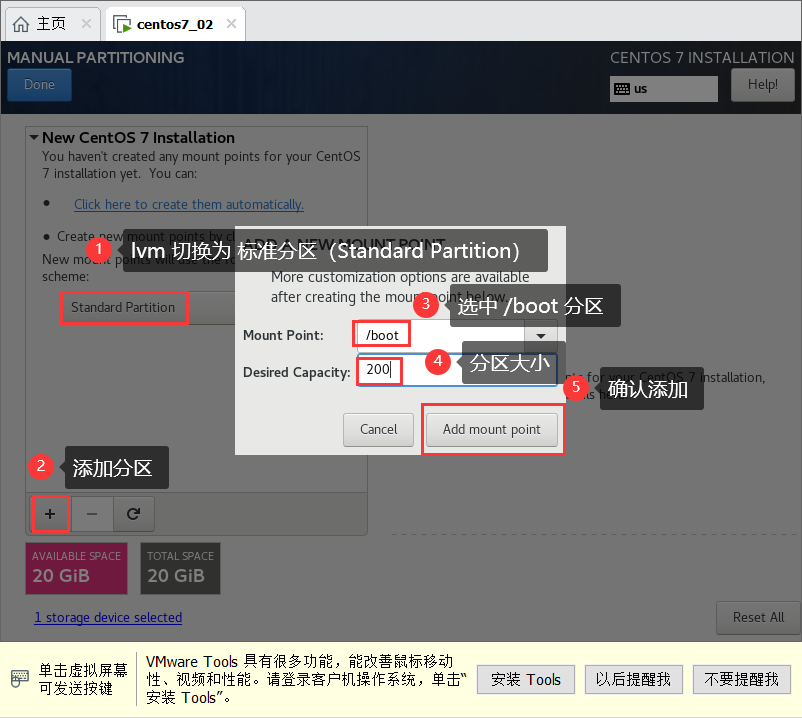 d. 添加交换分区 `swap`,一般为内存的两倍  e. 添加根分区 `/` 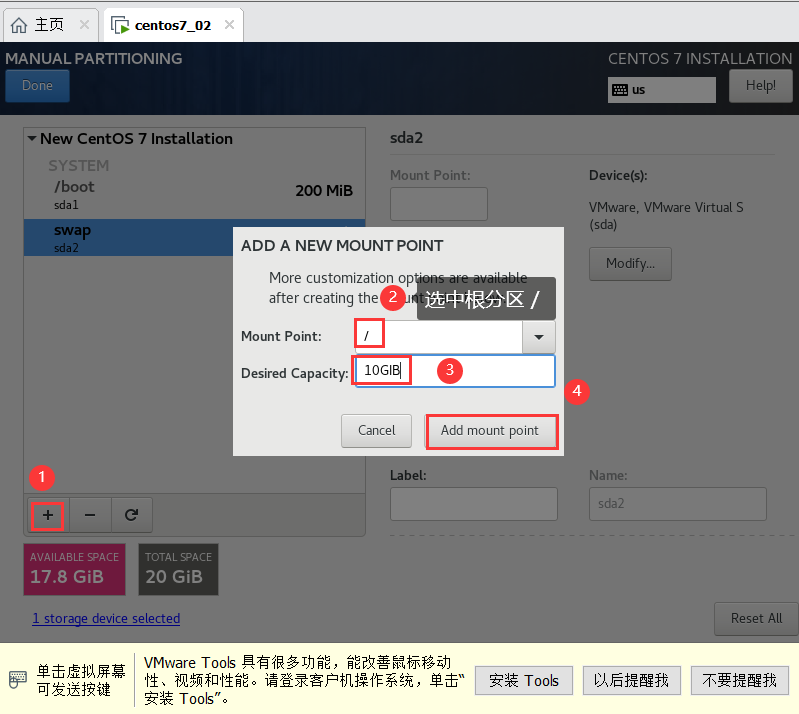 f. 分区创建完成 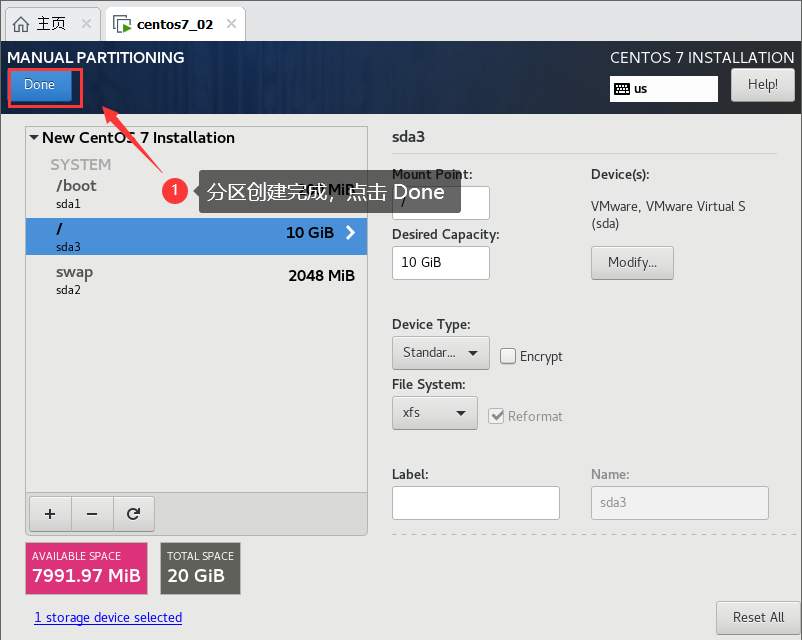 g. 提示对分区进行格式化,点击同意格式化 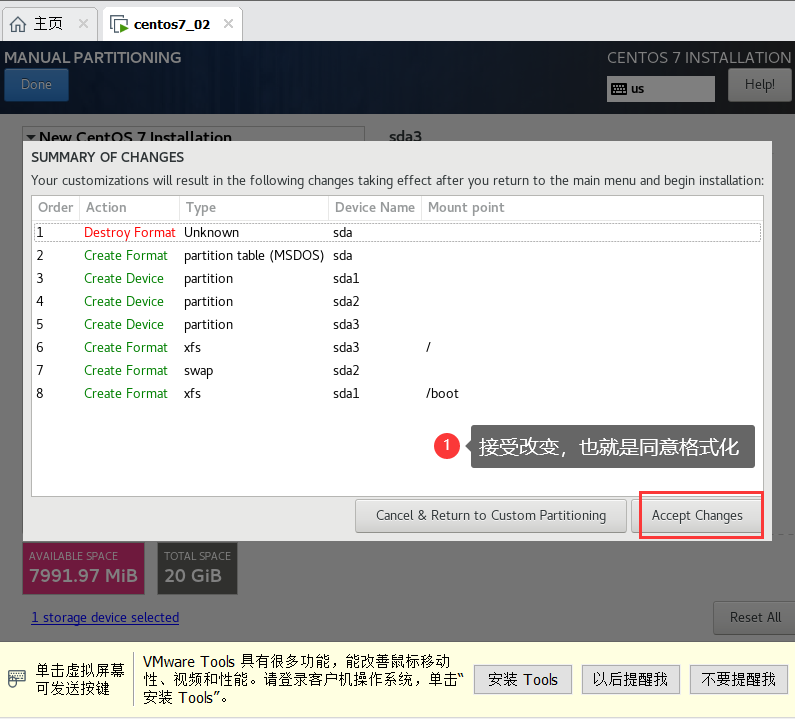 **第五步:关闭 kdump内核崩溃转储机制** 进入设置 kdump 的界面 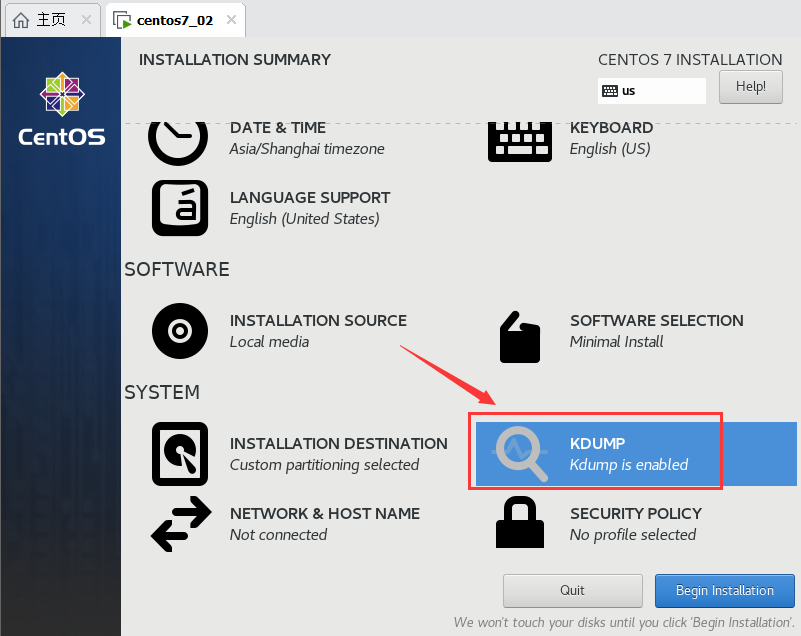 取消勾选 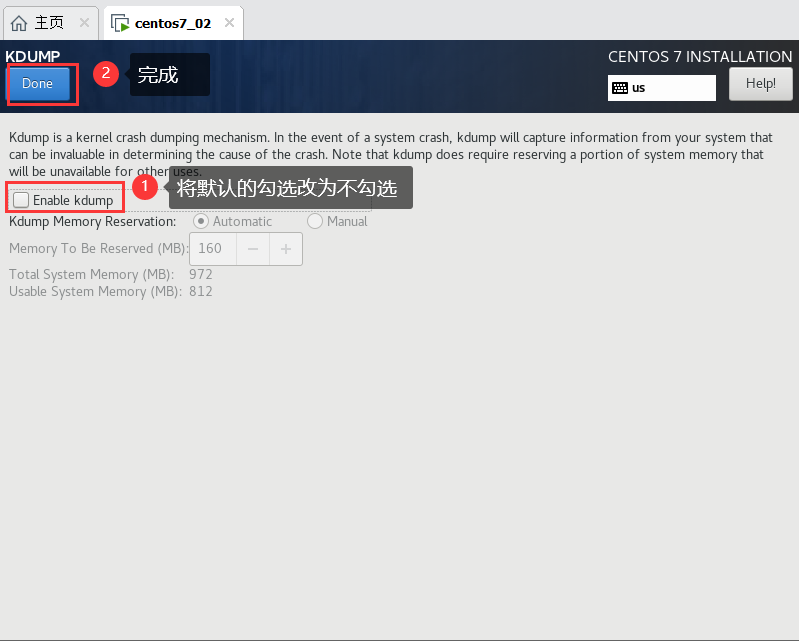 **第六步:网络和主机名** 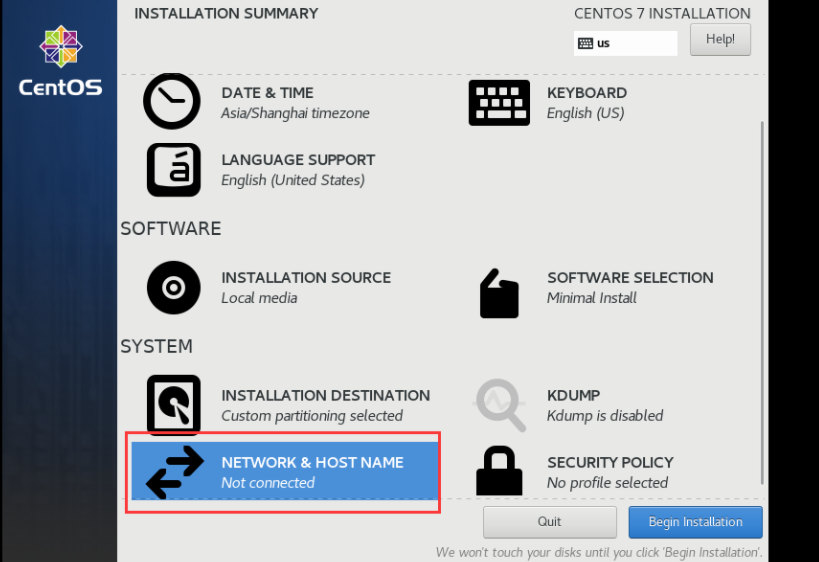 开启网络 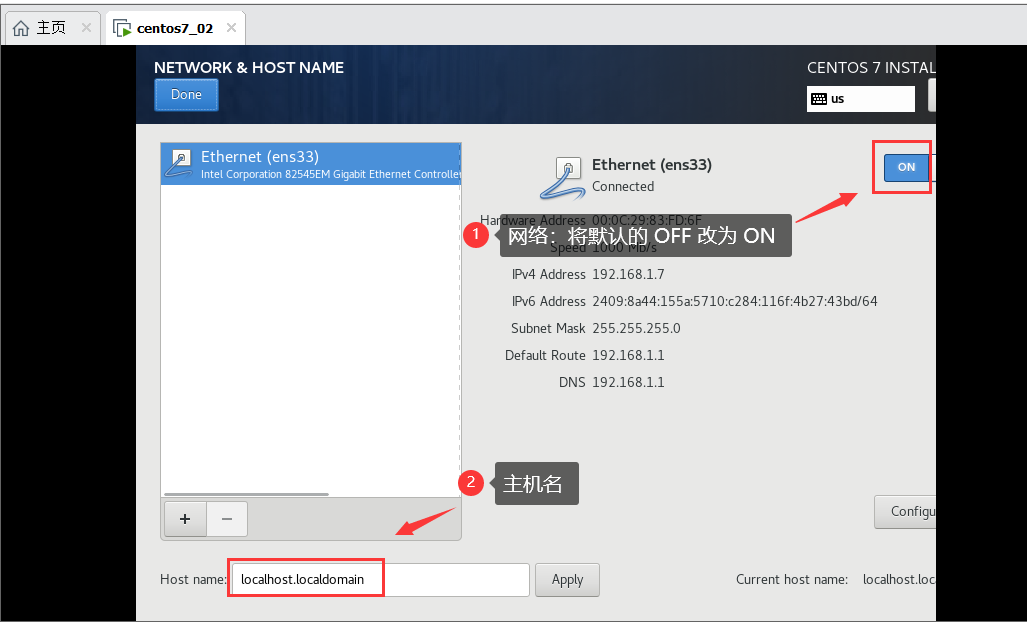 **第七步:配置完成,开始安装** 开始安装 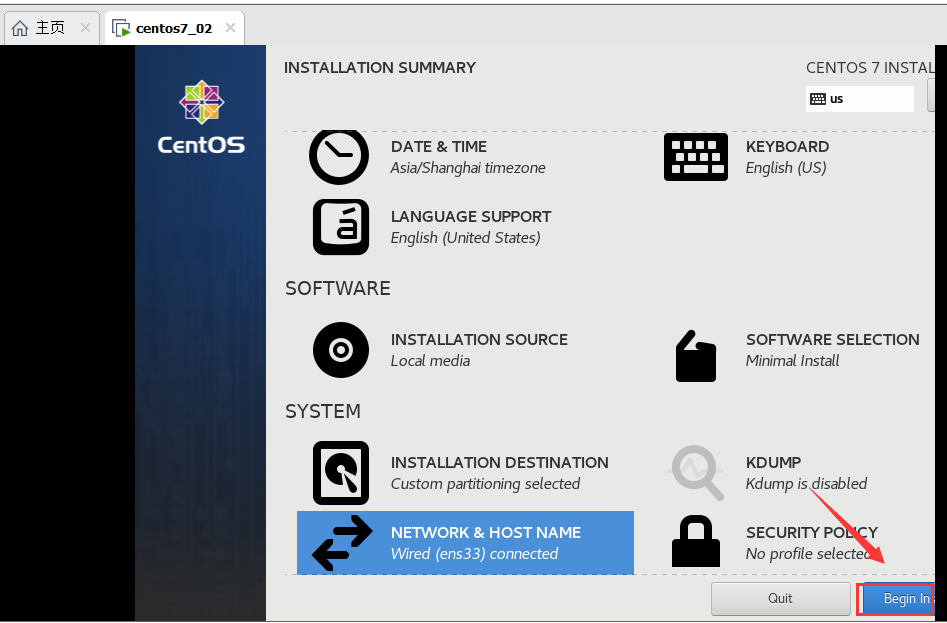 在安装的过程中设置超级管理员 root 的密码 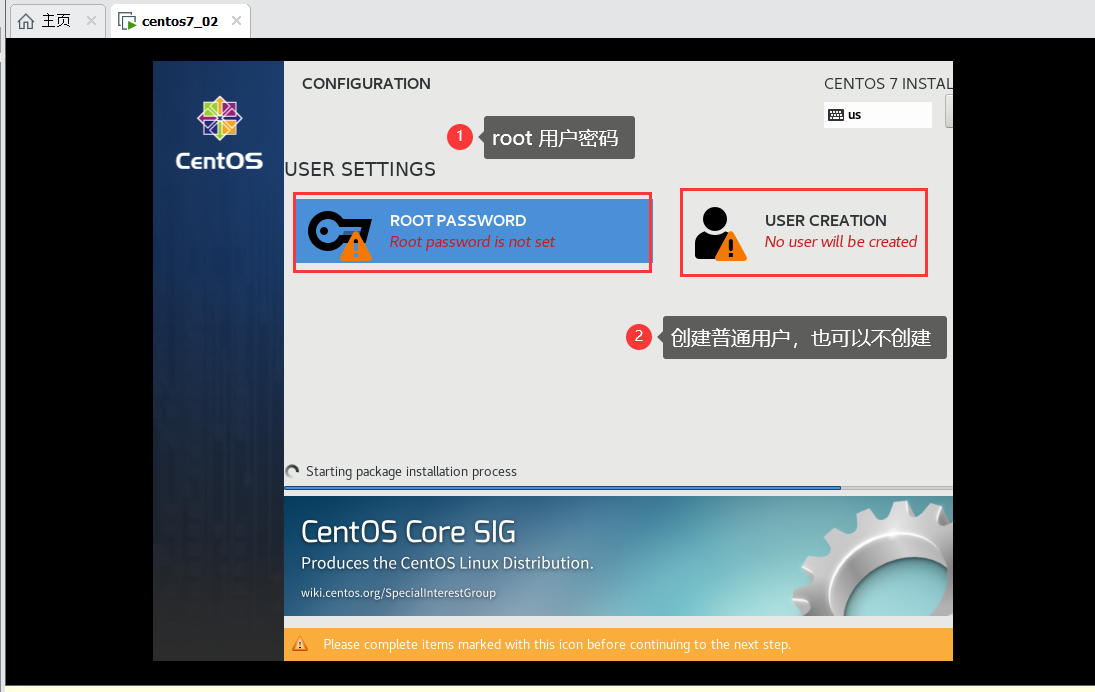 **第八步:重启后即可使用**