[TOC] #### 1. 开通对象存储服务 --- 进入阿里云官网:<https://www.aliyun.com> ,搜索 OSS 进入 `对象存储控制台`,首次进入会提示开通服务 **三种方式都可以找到阿里云对象存储** 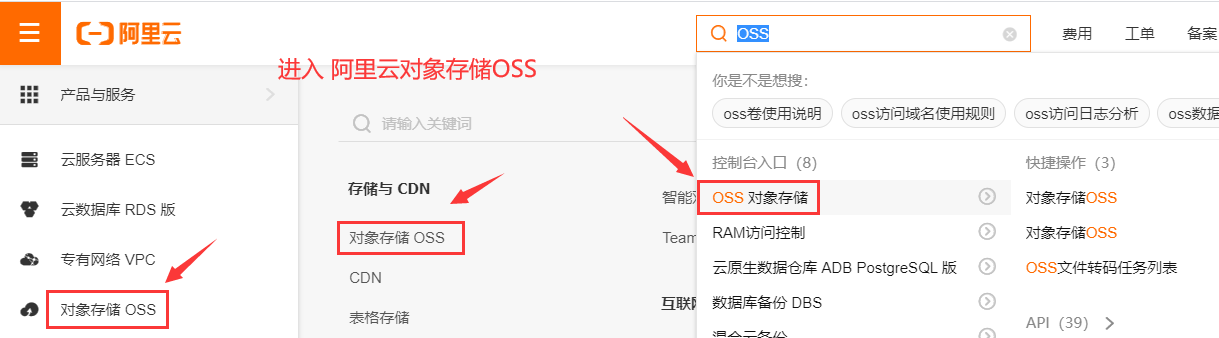 **第一次使用阿里云对象存储需要先开通该服务** 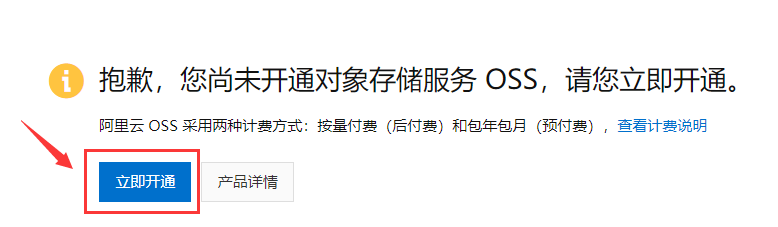 #### 2. 创建存储空间 --- 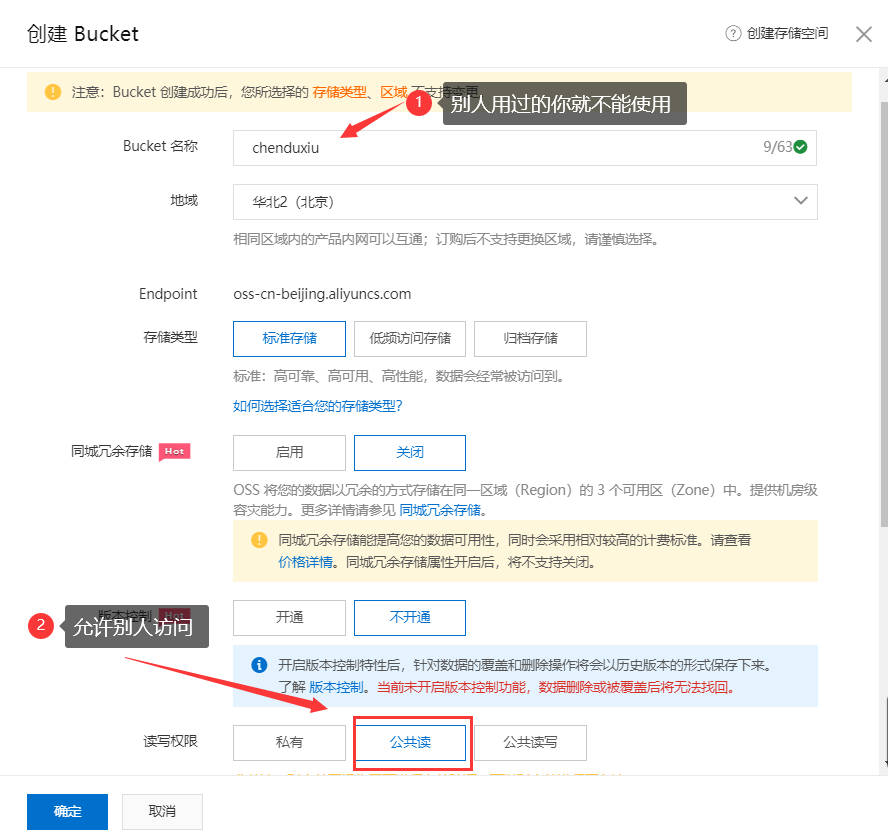 #### 3. 绑定自定义域名 --- **这里会自动添加 CNAME 记录,不需要自己去解析域名,此时就可以使用自定义的域名访问文件了** **此时需要等待几分钟,域名解析需要时间** 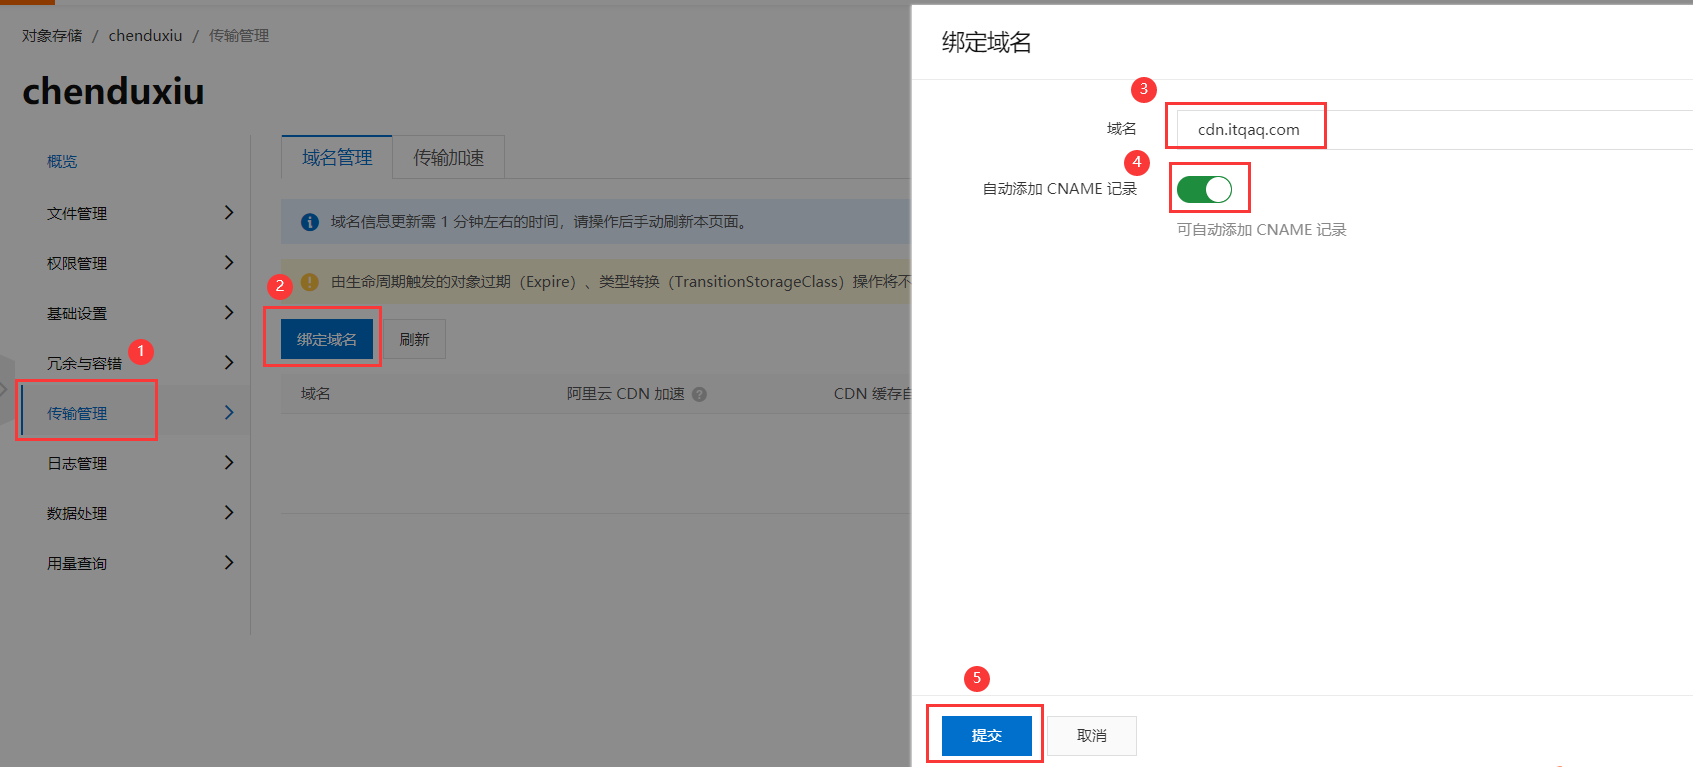 #### 4. 配置阿里云CDN加速 --- **点击 `未配置` 会跳转到添加CDN域名页面** 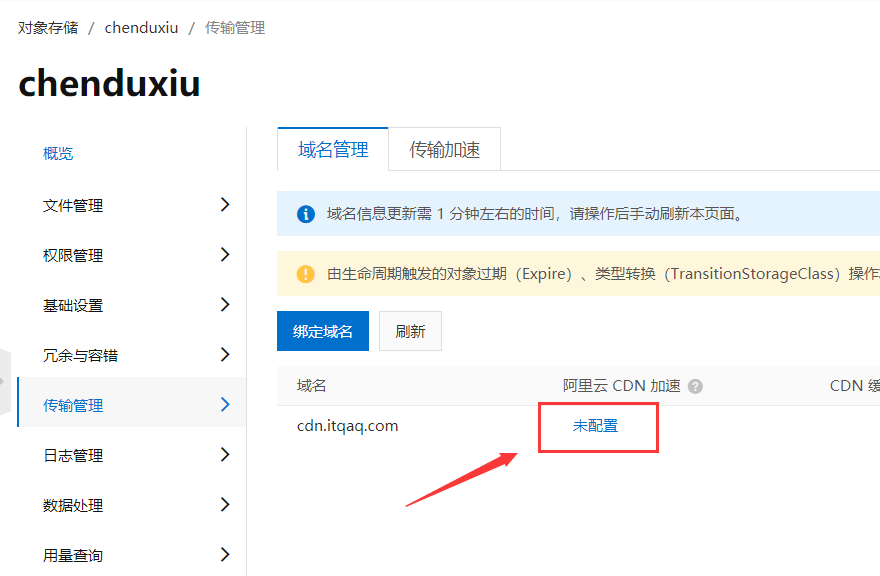 **资源分组:选择为默认资源组,其他选项使用默认的即可** **选择资源分组,点击下面的 `下一步`** 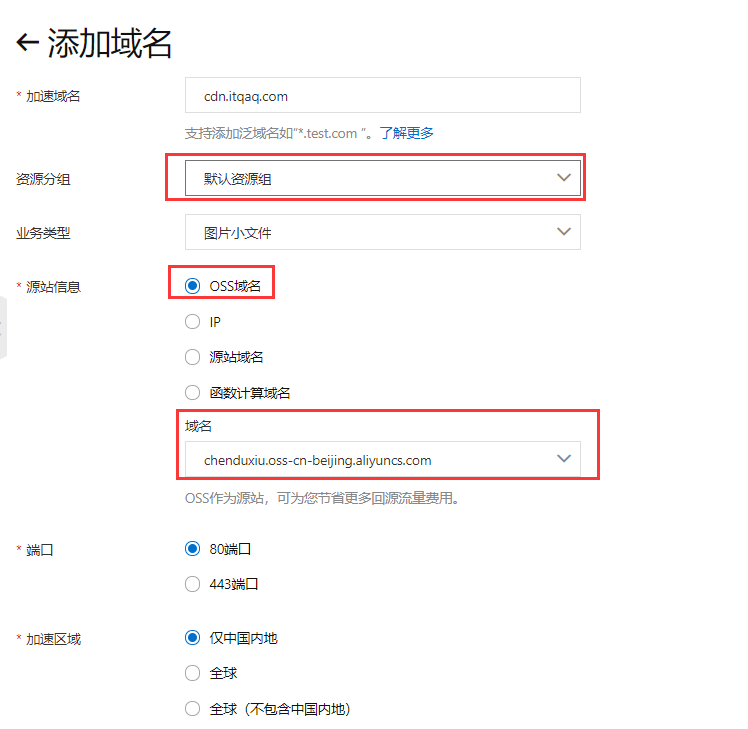 **提示前往解析CNAME,点击 `返回域名列表`** 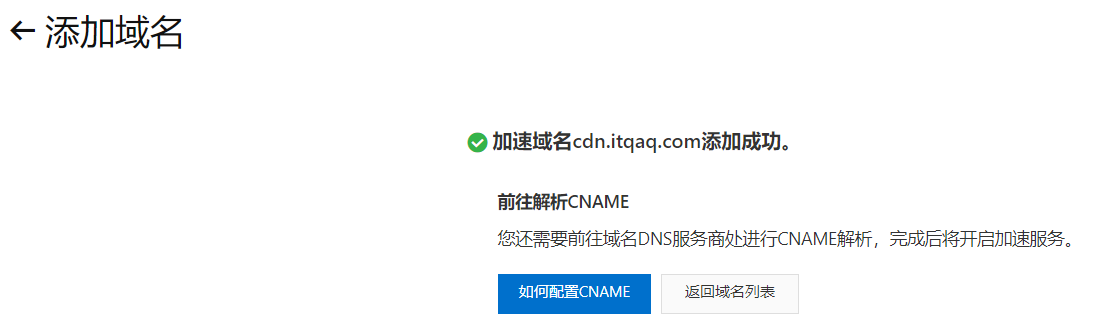 **复制 CDN 域名的 CNAME** 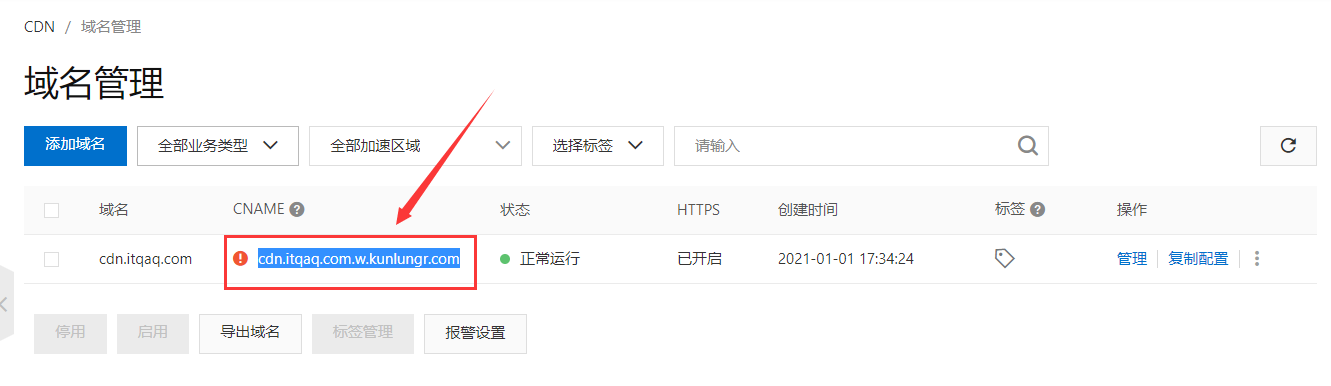 **修改解析的CDN域名的CNAME记录值,将刚才复制的CNAME粘贴上去** 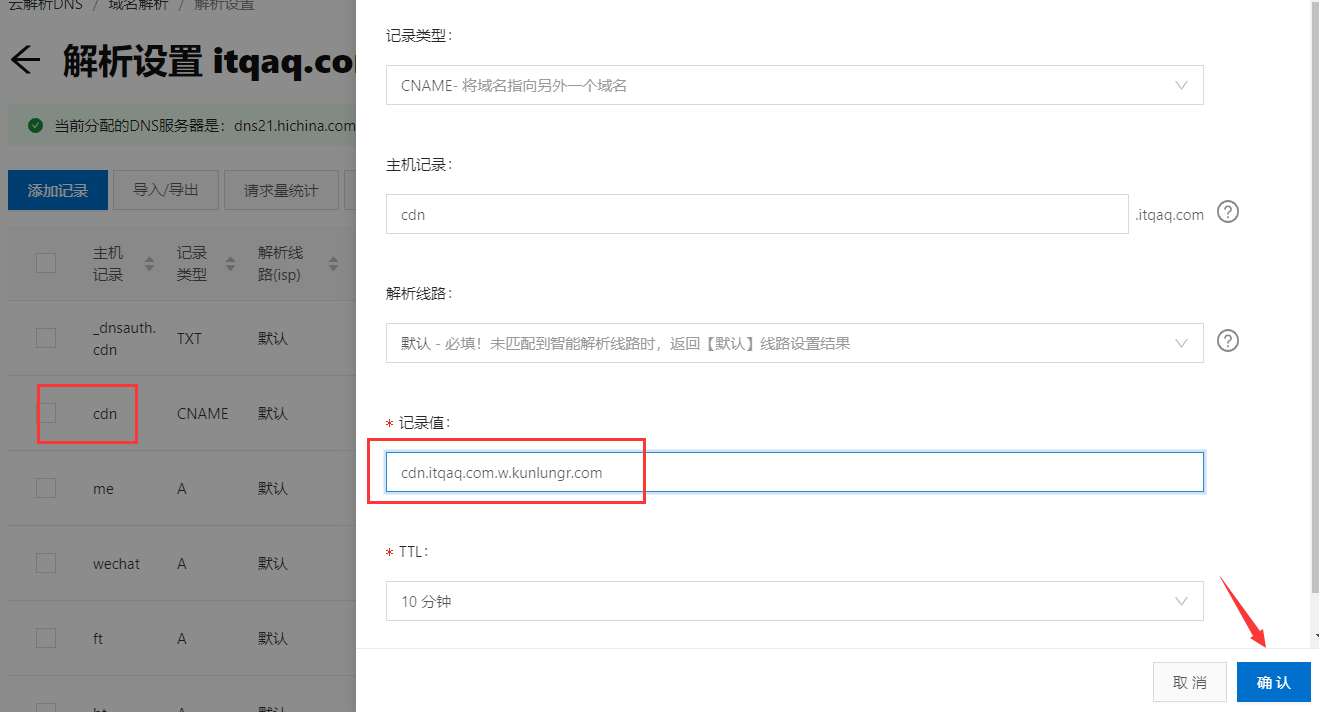 **等待几分钟,配置成功,点击右侧的域名绑定配置** 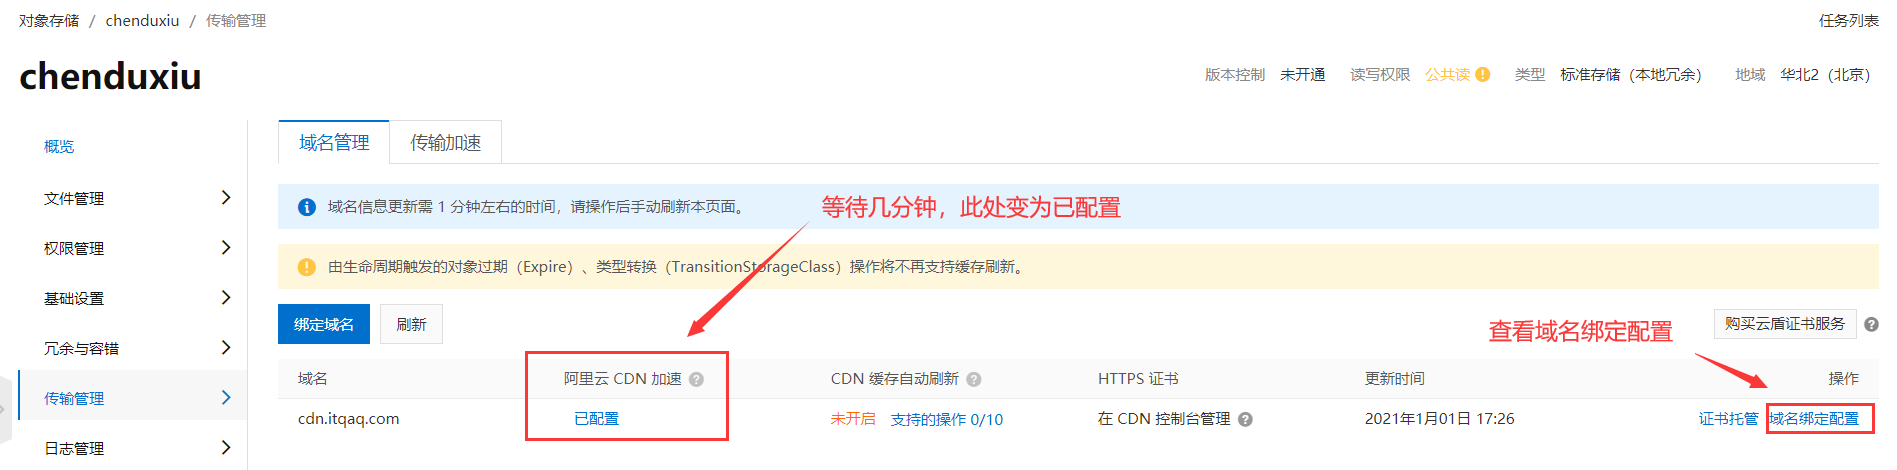 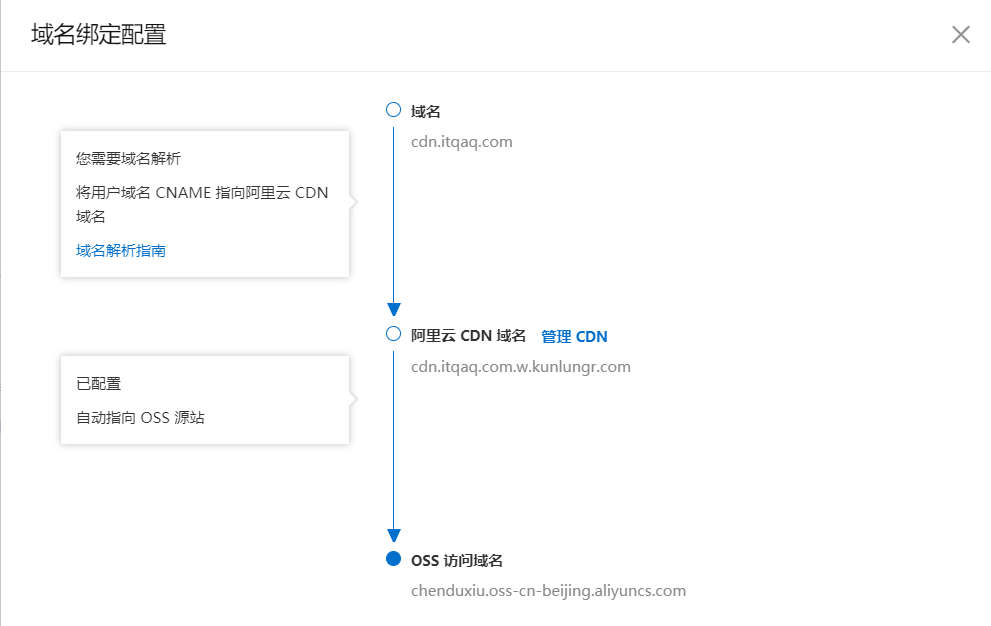 #### 5. 购买阿里云免费SSL证书 --- **进入 SSL 应用控制台** 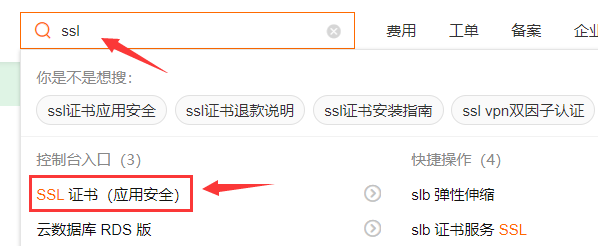 **购买免费的SSL证书** 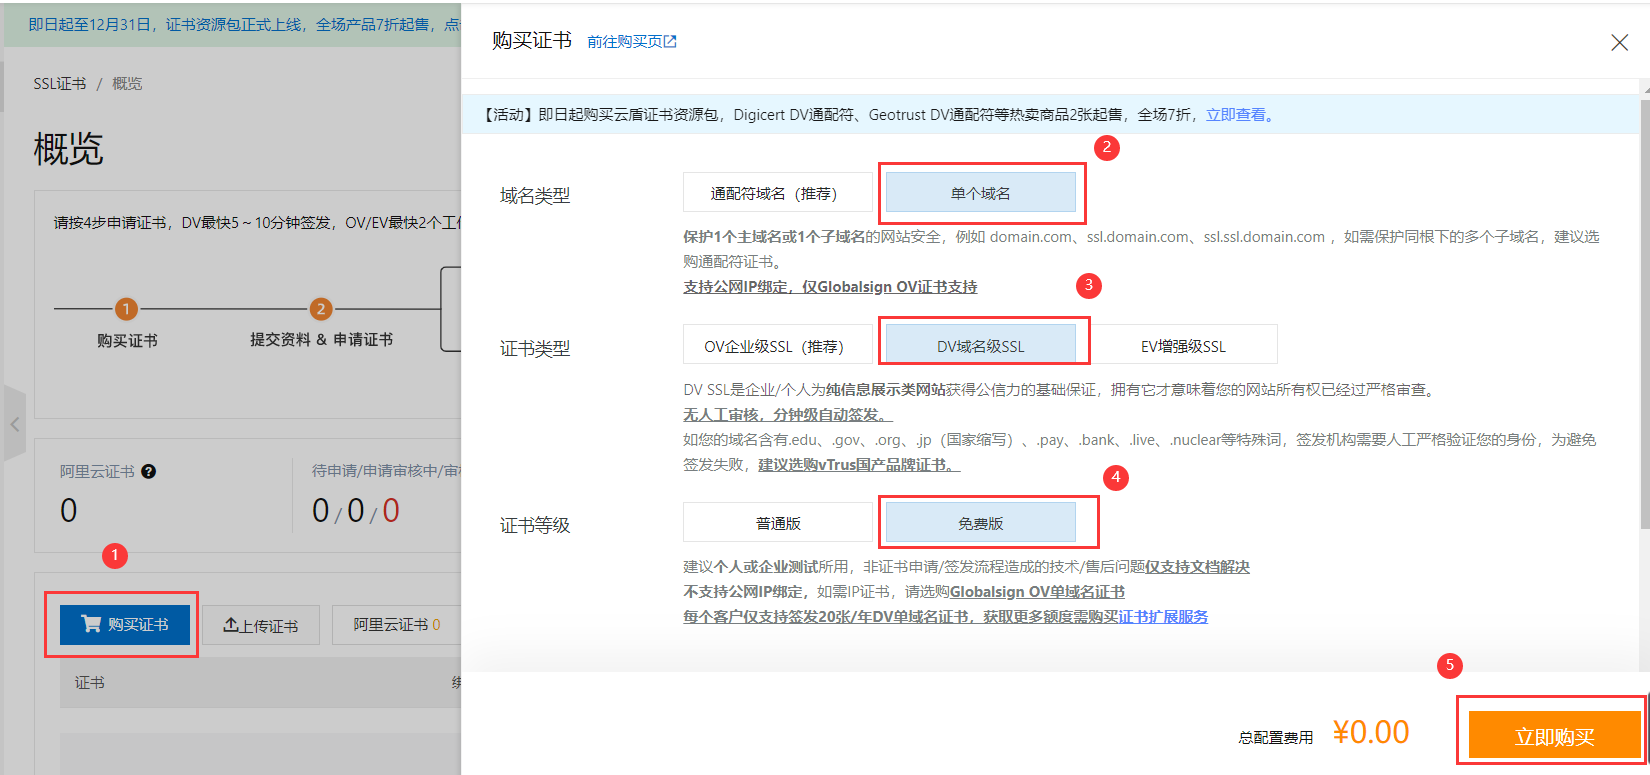 **购买成功** 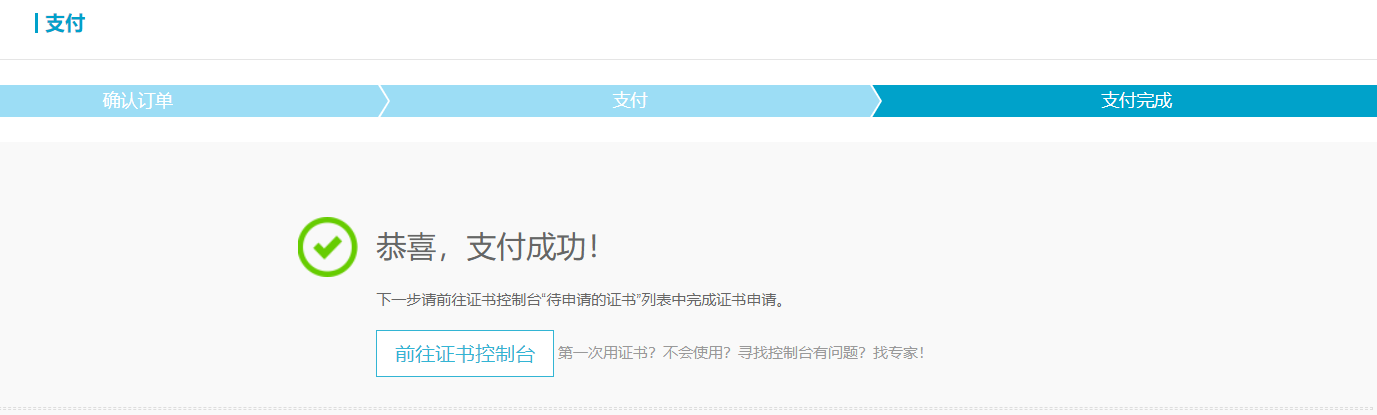 **申请证书**  **填写证书申请信息** 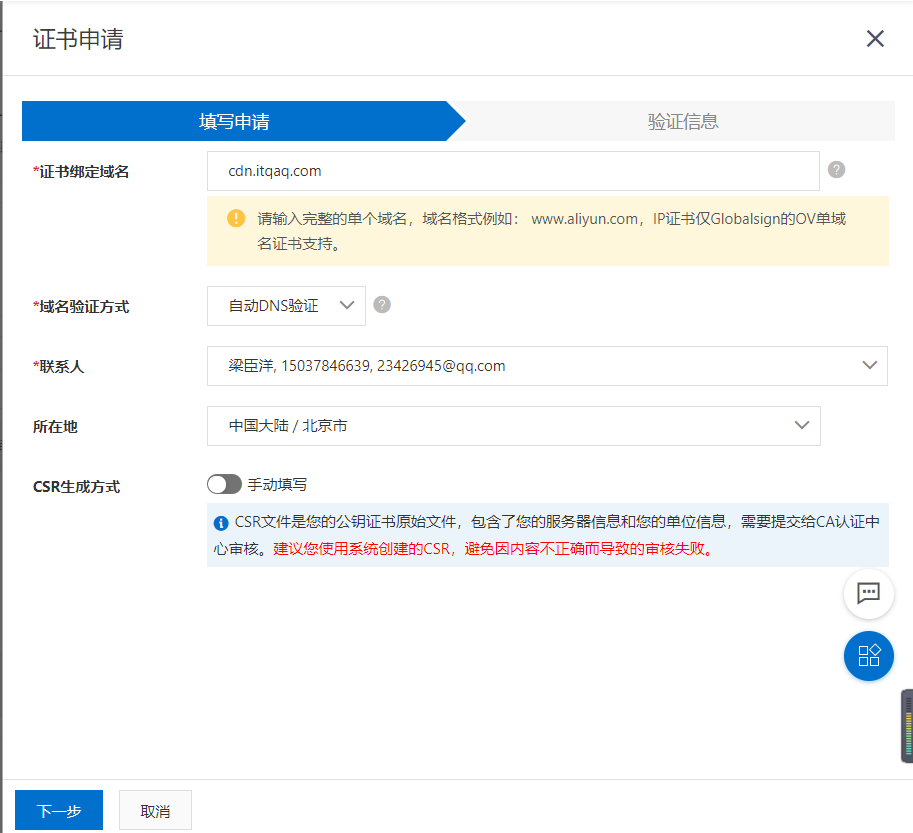 **验证信息,提交审核** 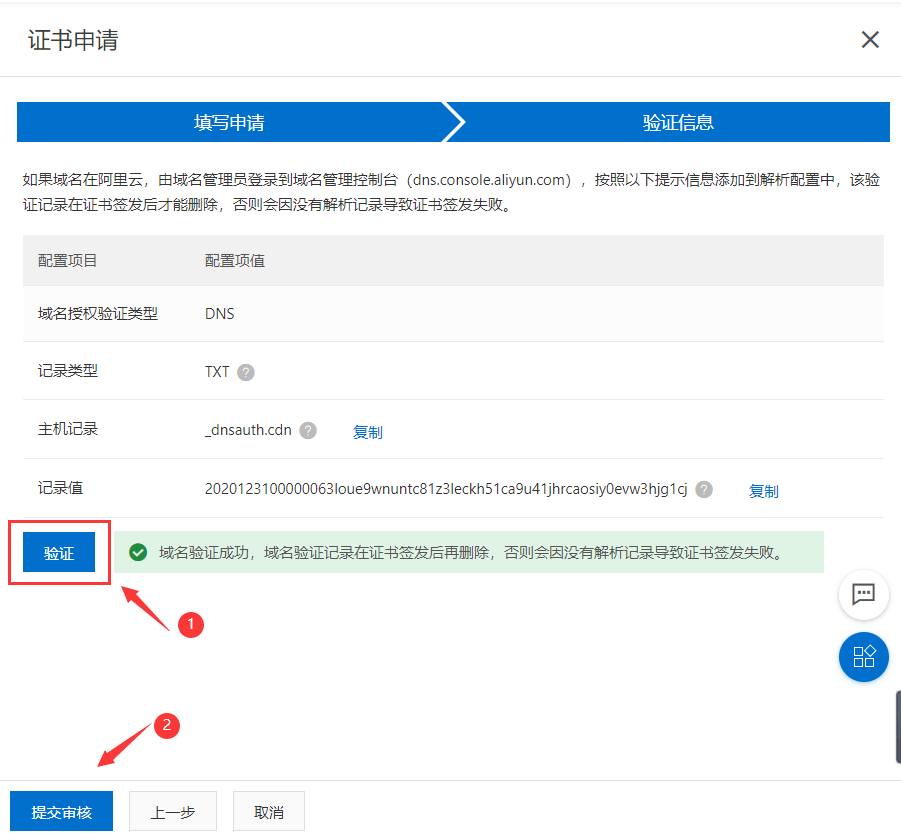 #### 6. 阿里云CDN配置HTTPS证书 --- **点击 `域名管理` 列表右侧的 `管理`** 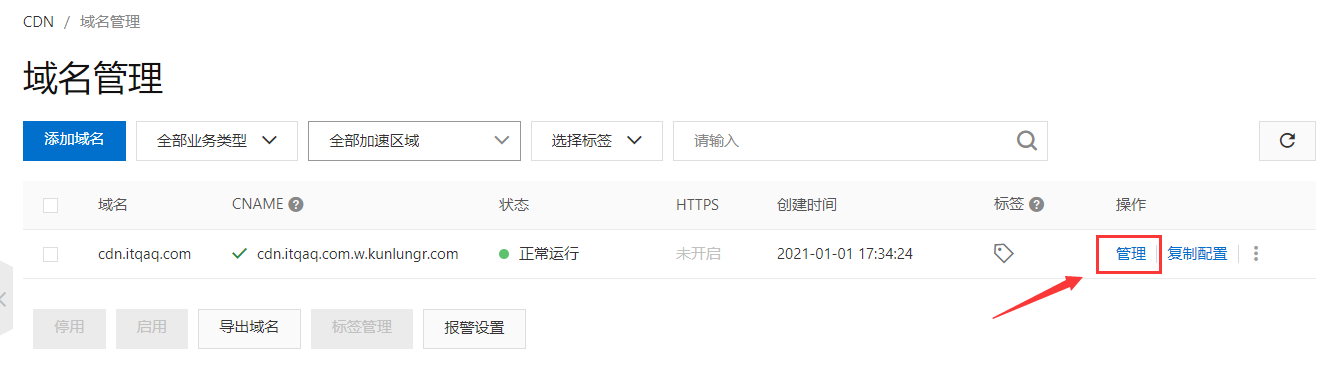 **点击 `HTTPS配置` 中的 修改配置** 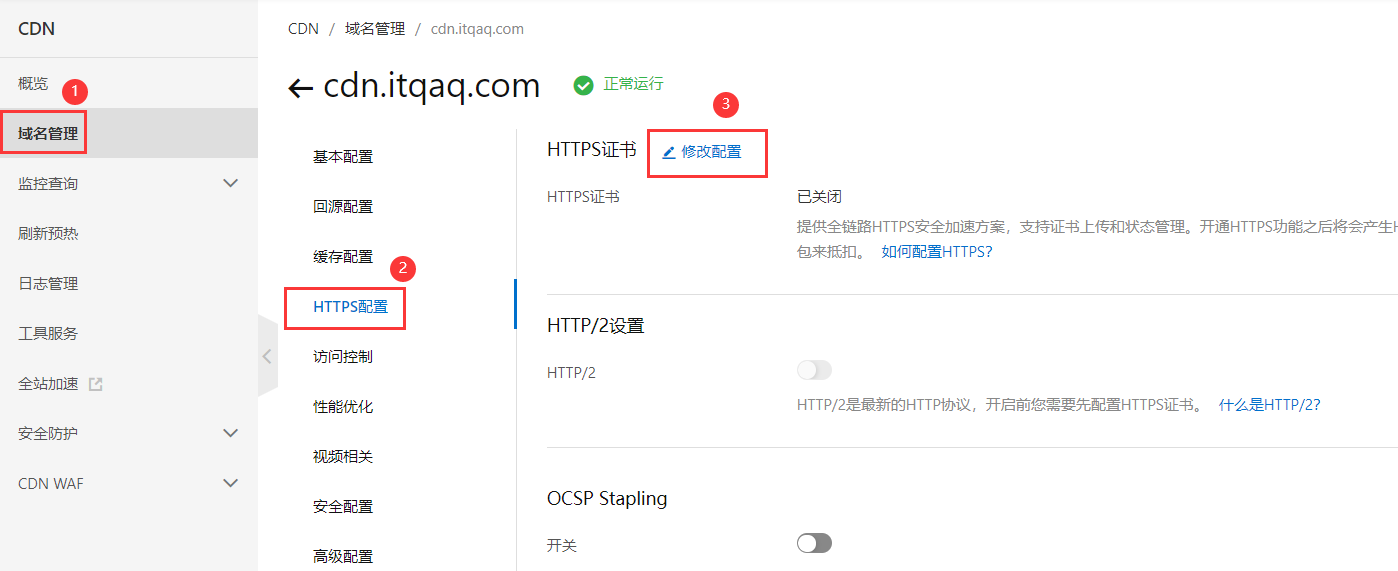 **配置 SSL 证书** 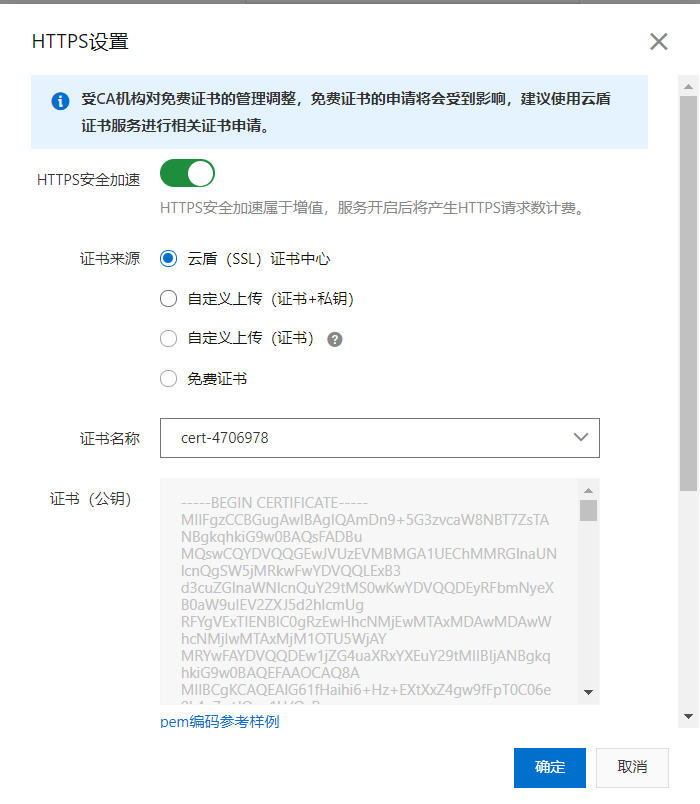 ** 强制 HTTPS 跳转 ** 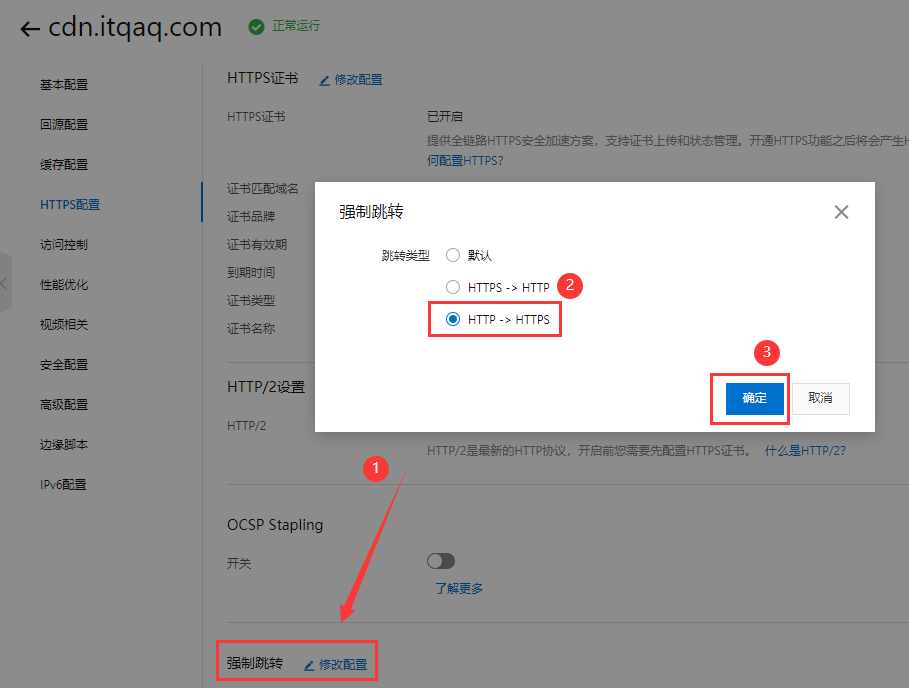 #### 7. 测试是否配置成功 --- **上传一个图片,用于测试访问**  **复制图片地址,在浏览器上直接访问即可** 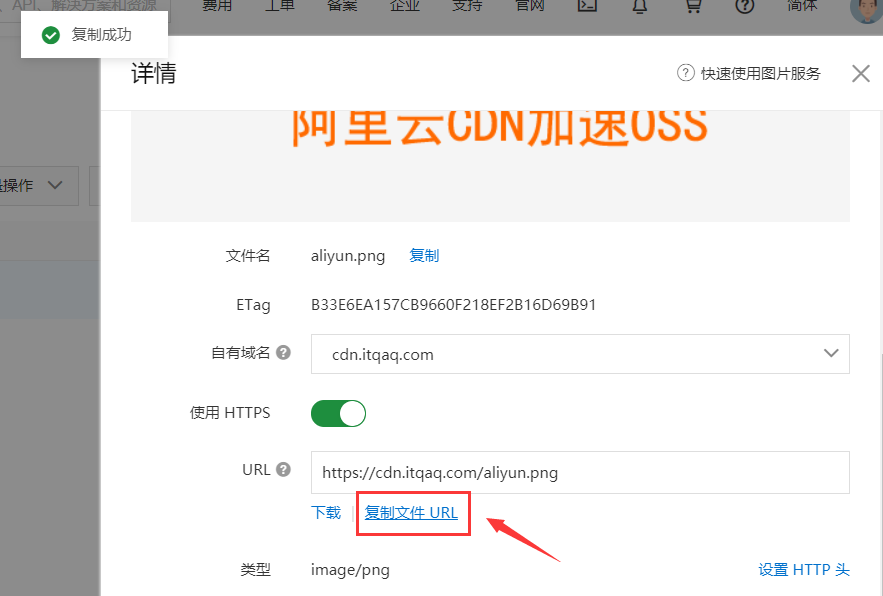 #### 8. 创建阿里云子账户,获取访问密钥 --- **进入RAM 访问控制台** 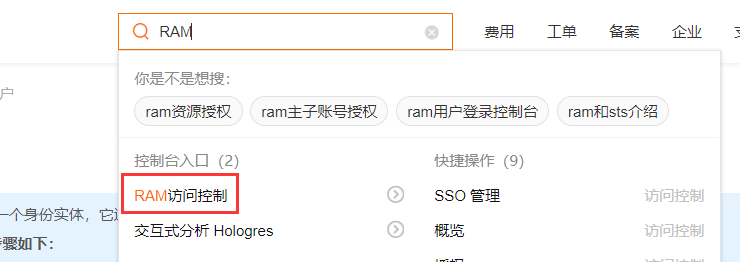 **创建子用户** 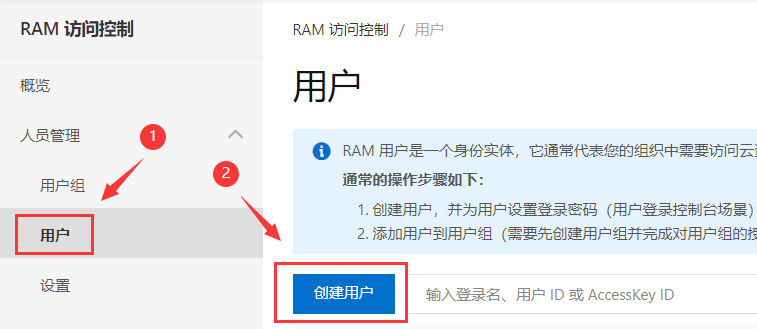 **访问方式: 编程访问 (下图截图时忘勾了)** 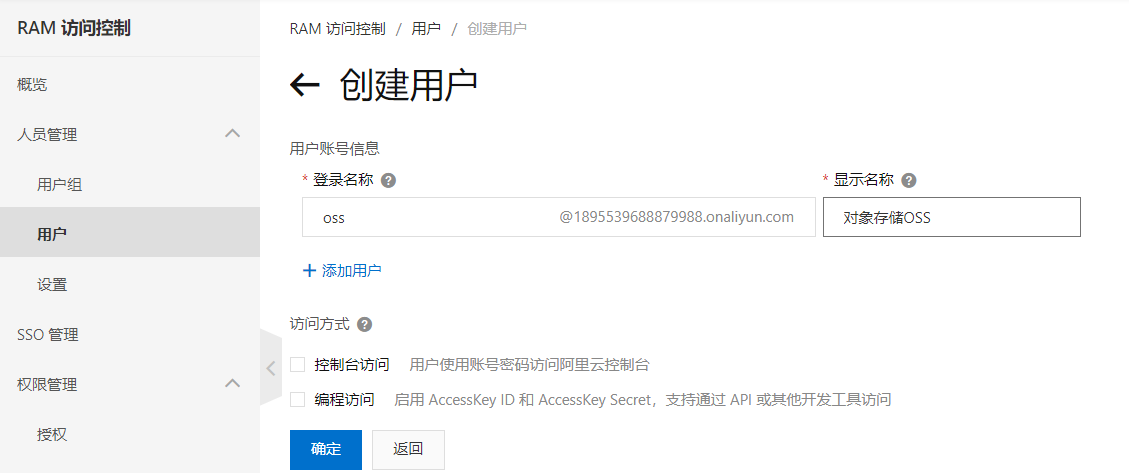 **给子用户仅仅添加对象存储OSS的权限** 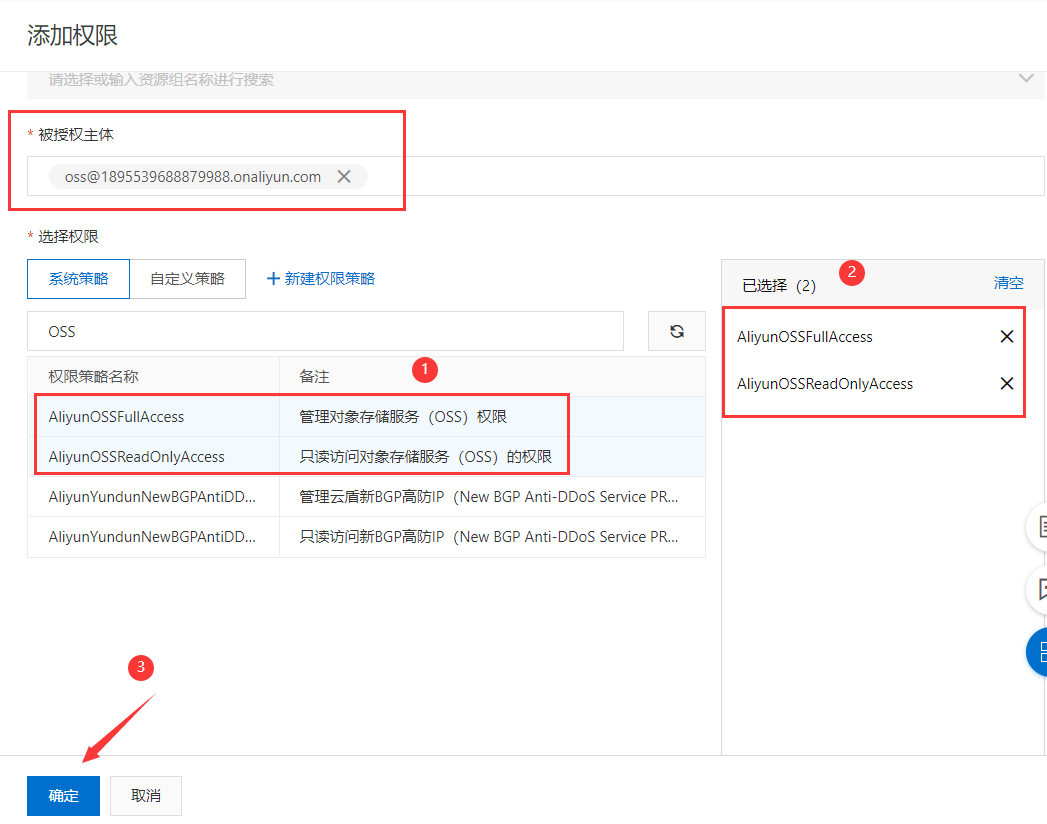 **点击用户名称,去创建访问密钥** 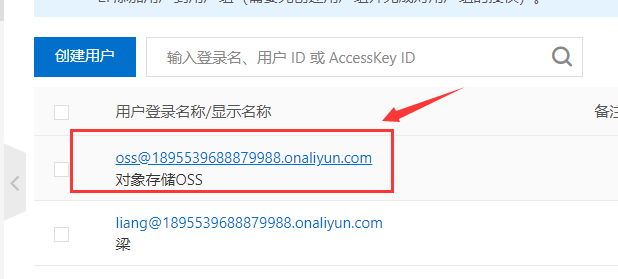 **创建访问密钥,记得保存好** 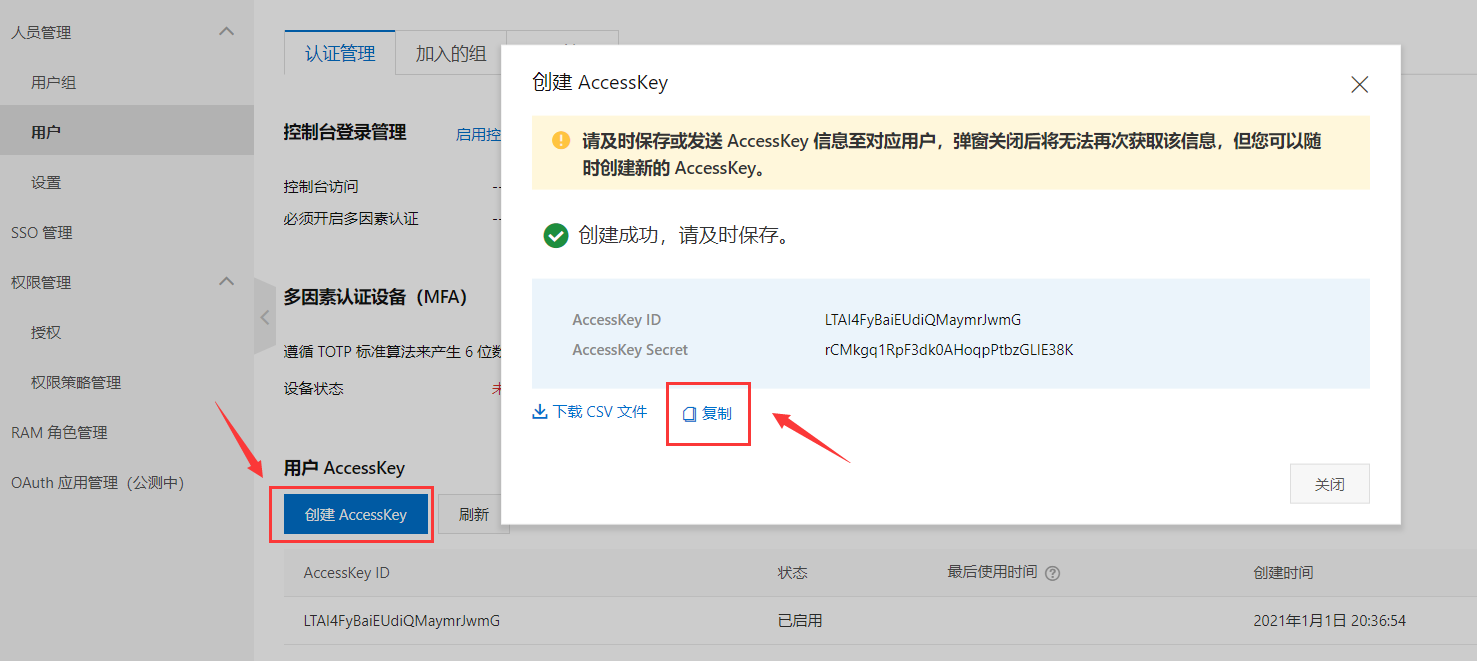 #### 9. 到此为止,项目中对接阿里云对象存储OSS所需参数都有了 --- ``` Access Key ID:LTAI4FyBaiEUdiQMaymrJwmG Access Key Secret:rCMkgq1RpF3dk0AHoqpPtbzGLIE38K Bucket:chenduxiu 自定义访问URL:https://cdn.itqaq.com ``` #### 补充 --- 适用于 windows 和 mac oss 客户端软件下载: <https://github.com/aliyun/oss-browser>