[TOC] #### 一、创建证书 --- 1、进入苹果开发者账号后台:<https://developer.apple.com> 点击右上角的[【Account】](https://developer.apple.com/account)进入以下界面,然后点击【证书(英文)】 ![](https://img.itqaq.com/art/content/8cd805662ff5488b1b323970d7b82c9f.png) 
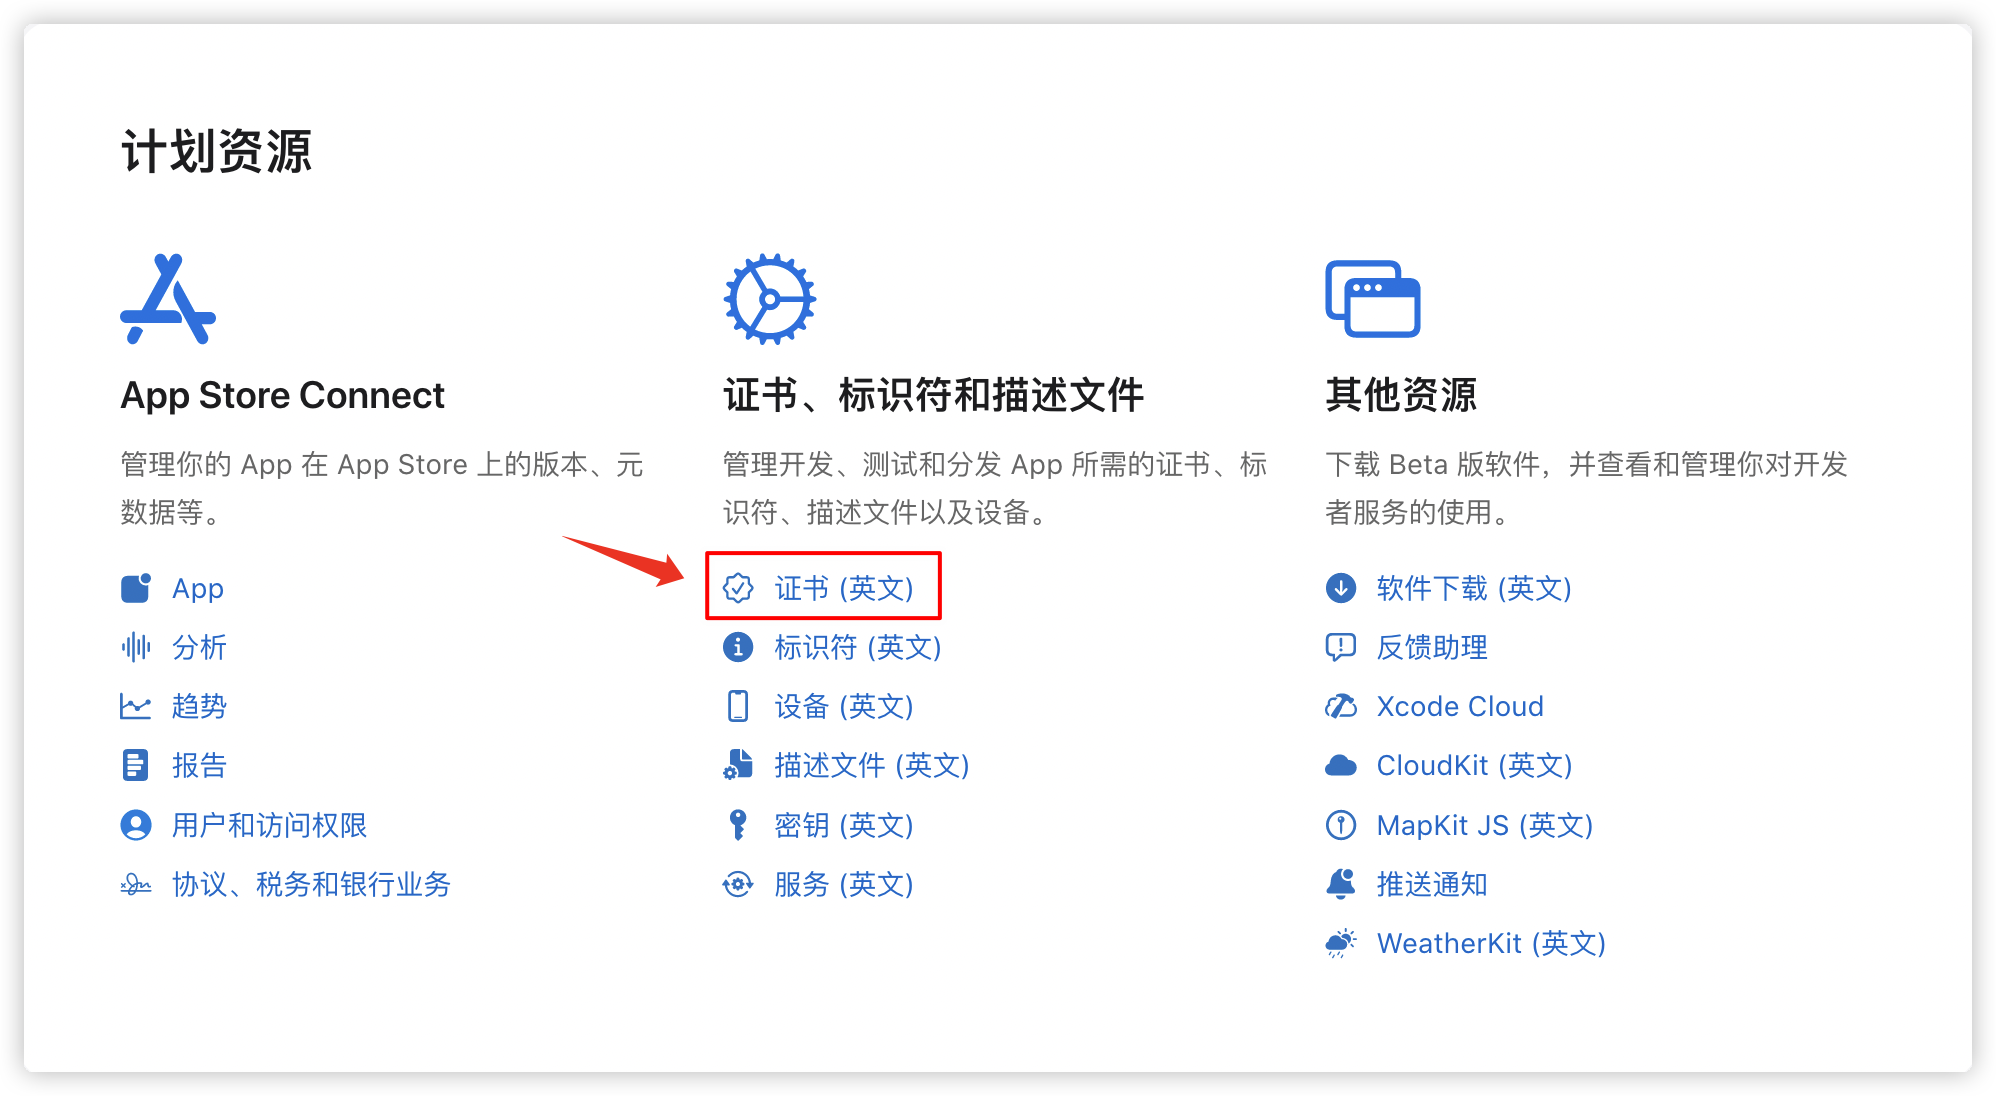
2、进入以下界面后点击 【Create a certificate】 ![](https://img.itqaq.com/art/content/c239ce2f06a25b1e21f085e3773476d7.png) 
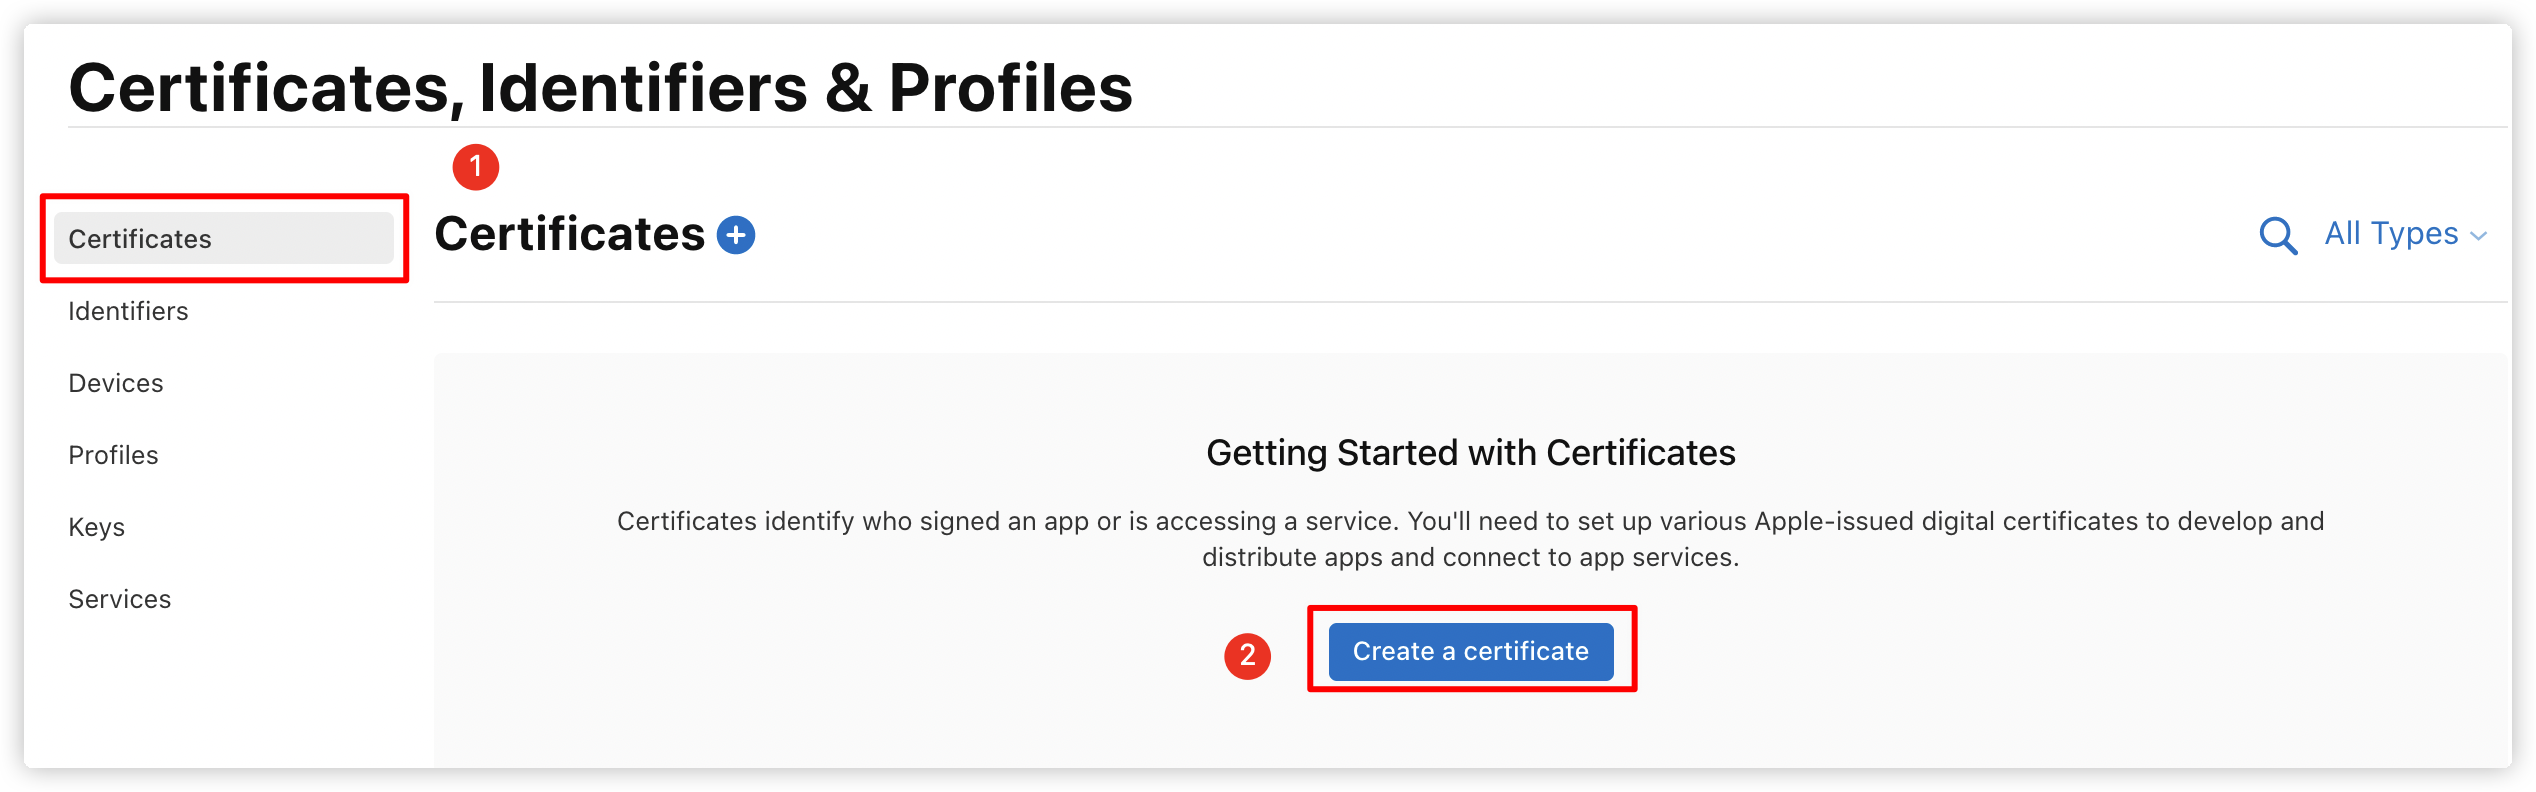
3、选择证书类型 + Apple Development:开发者证书 + Apple Distribution:发布证书 这里选中 【Apple Development】开发证书,点击【Continue】继续进行下一步 ![](https://img.itqaq.com/art/content/4e915a55ff2b7115d3fece3c23a9f0cb.png) 
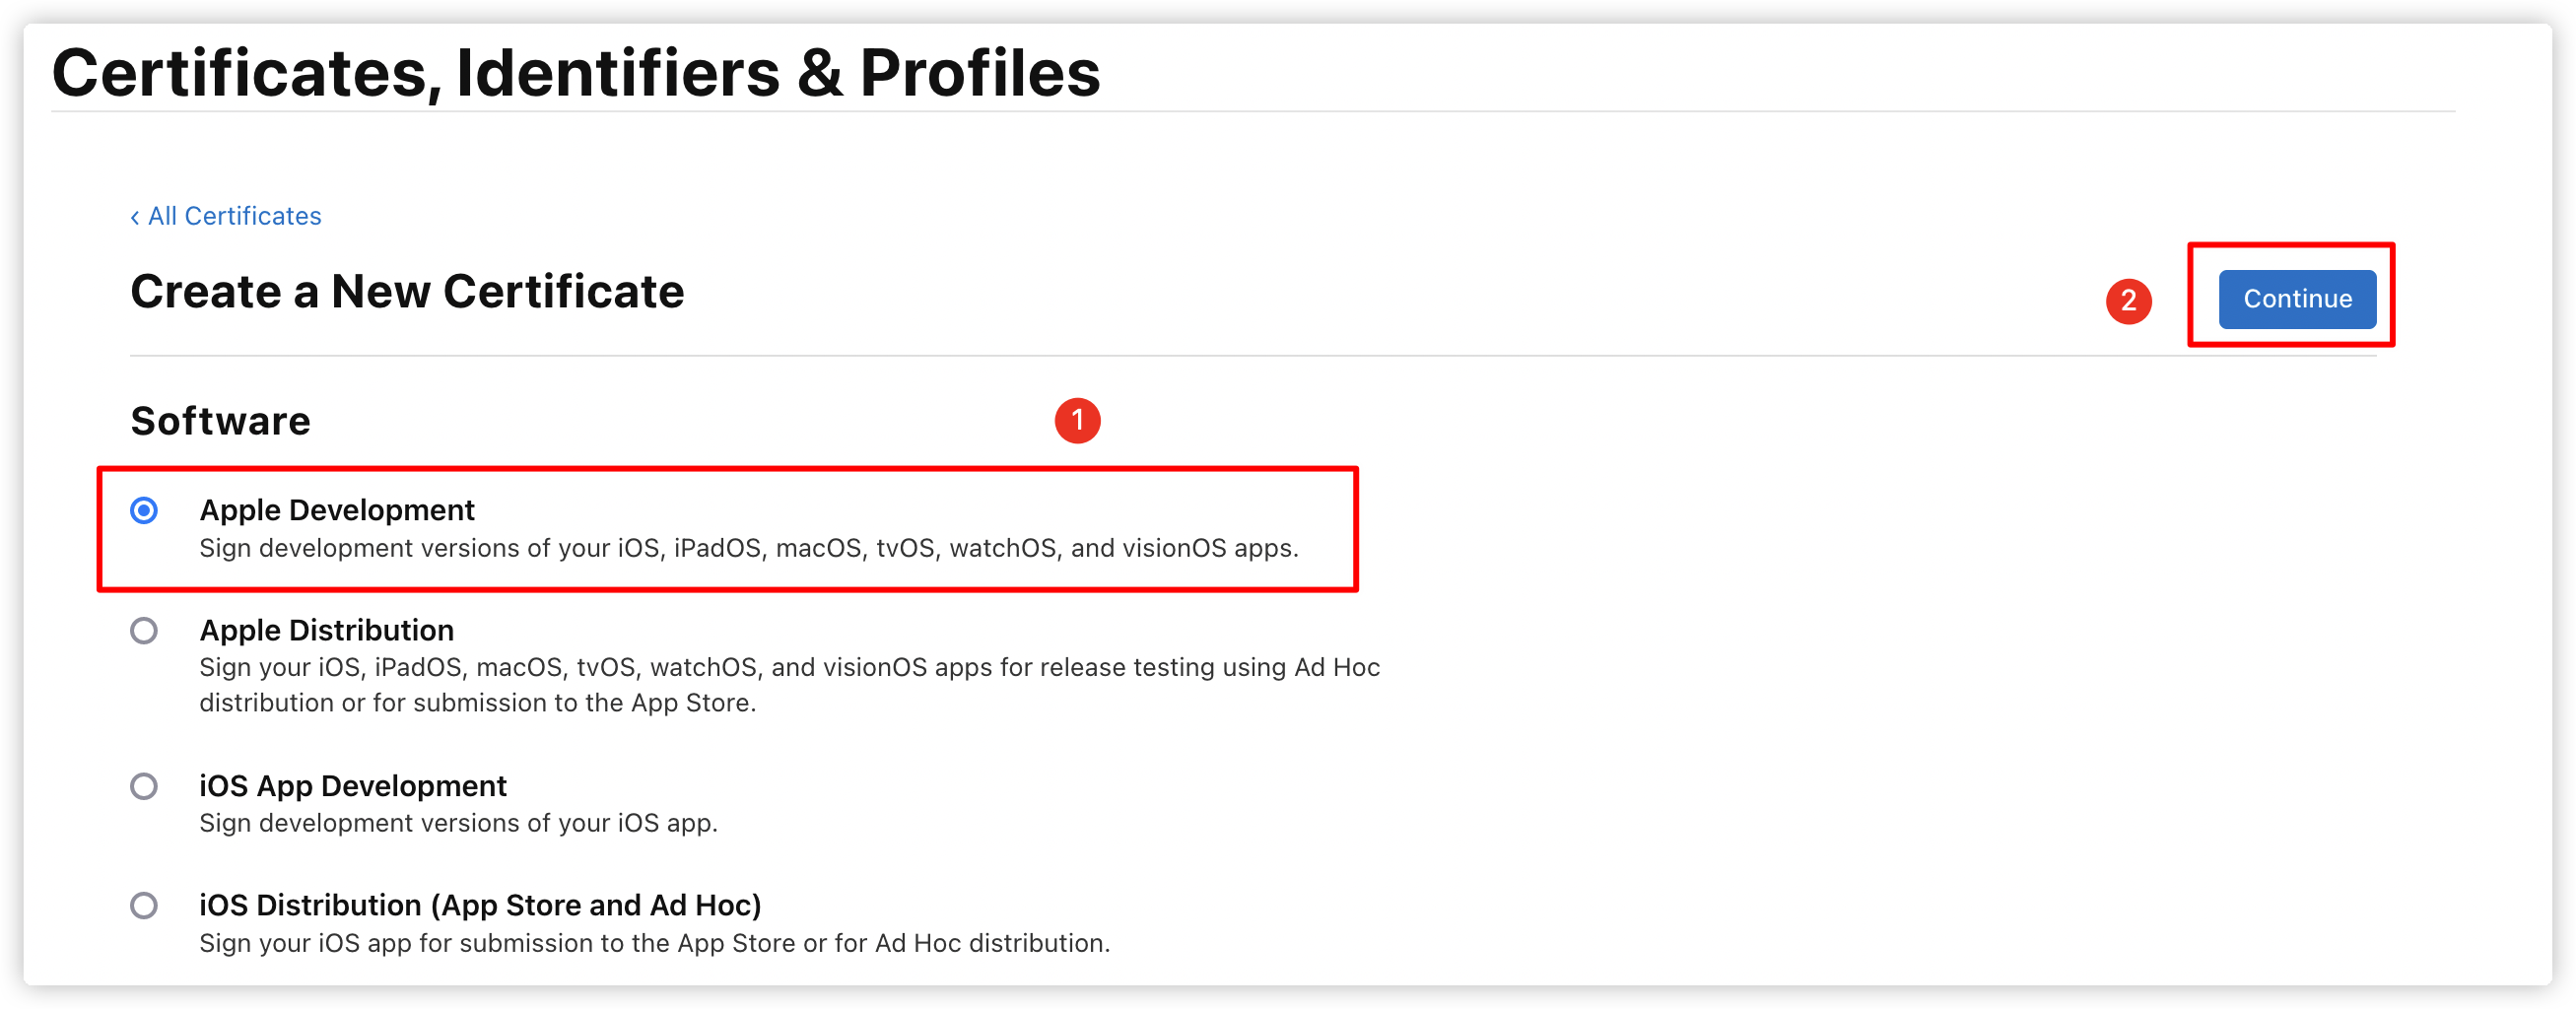
4、然后进入以下界面,这里让选择一个【请求证书文件】,那么就需要在【钥匙串】中创建一个该【请求证书文件】 ![](https://img.itqaq.com/art/content/84056f5cf0789da8f2a7c312c95ef27c.png) 
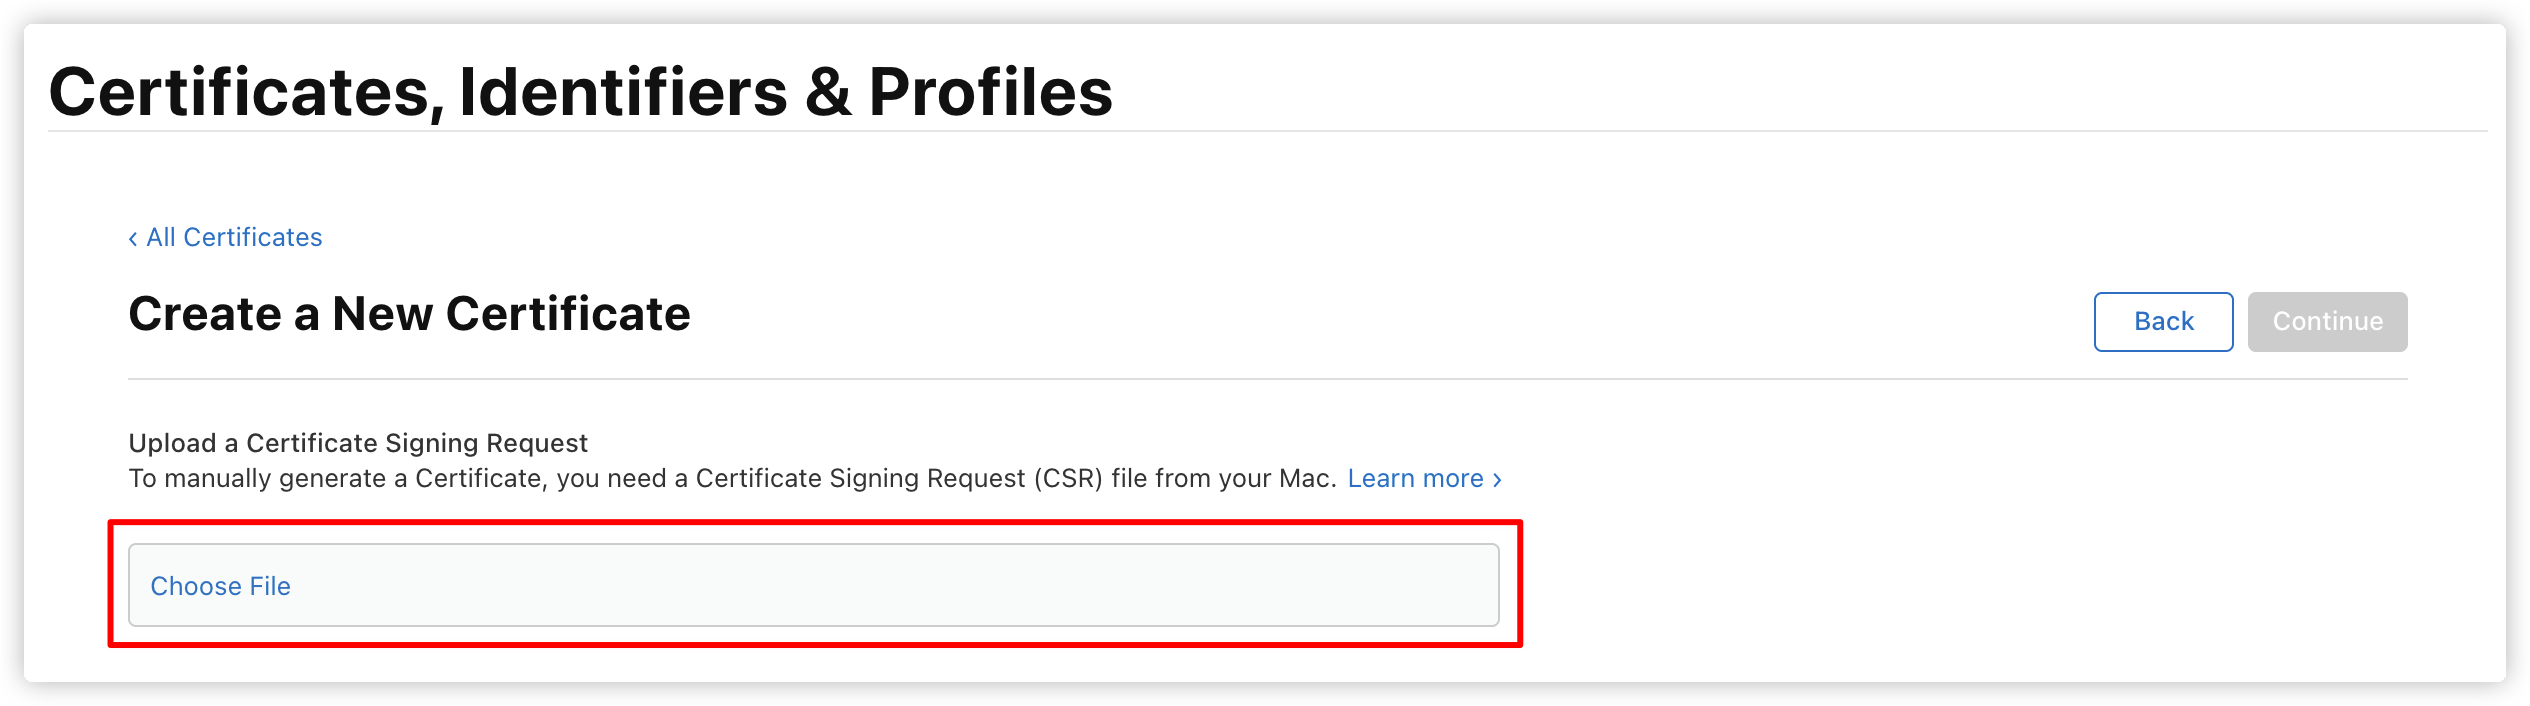
5、打开【钥匙串】,使用快捷键【command + 空格】,输入【钥匙串】,然后回车,会弹出以下界面 ![](https://img.itqaq.com/art/content/14b45ef4f3d34c6487e641cafb186a04.png) 
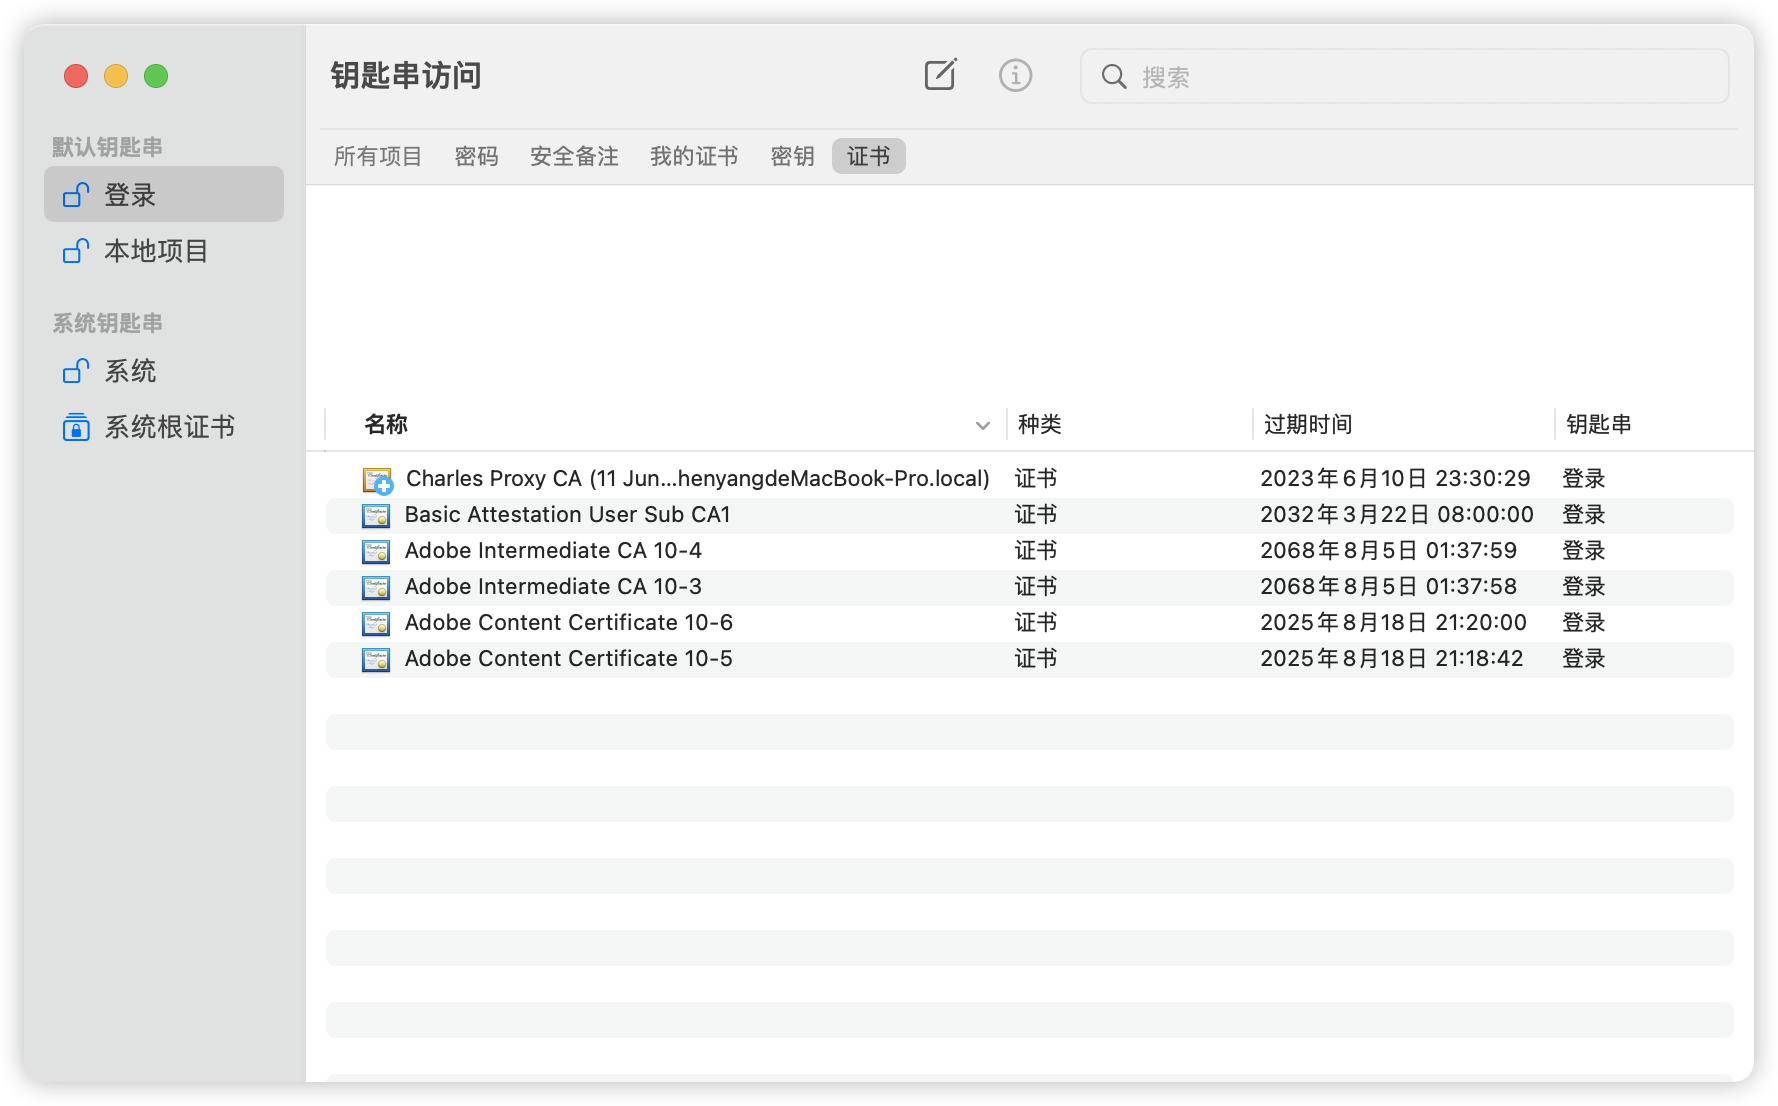
6、在左上角菜单栏点击【钥匙串访问】-->【证书助理】-->【从证书颁发机构请求证书】 ![](https://img.itqaq.com/art/content/241c98ecf08095194ddab8e113854f05.png) 
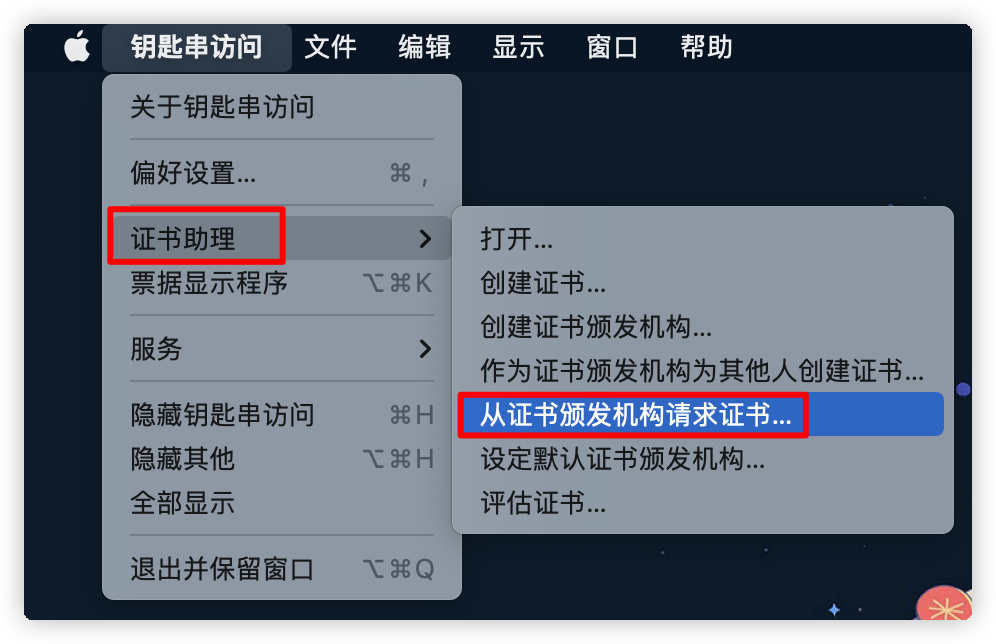
7、在弹出的证书助理界面,【用户电子邮件地址】输入苹果开发者账号的邮箱,选中【存储到磁盘】,点击【继续】 ![](https://img.itqaq.com/art/content/271c6084a4ab11ec58cd80fe3065daaf.png) 
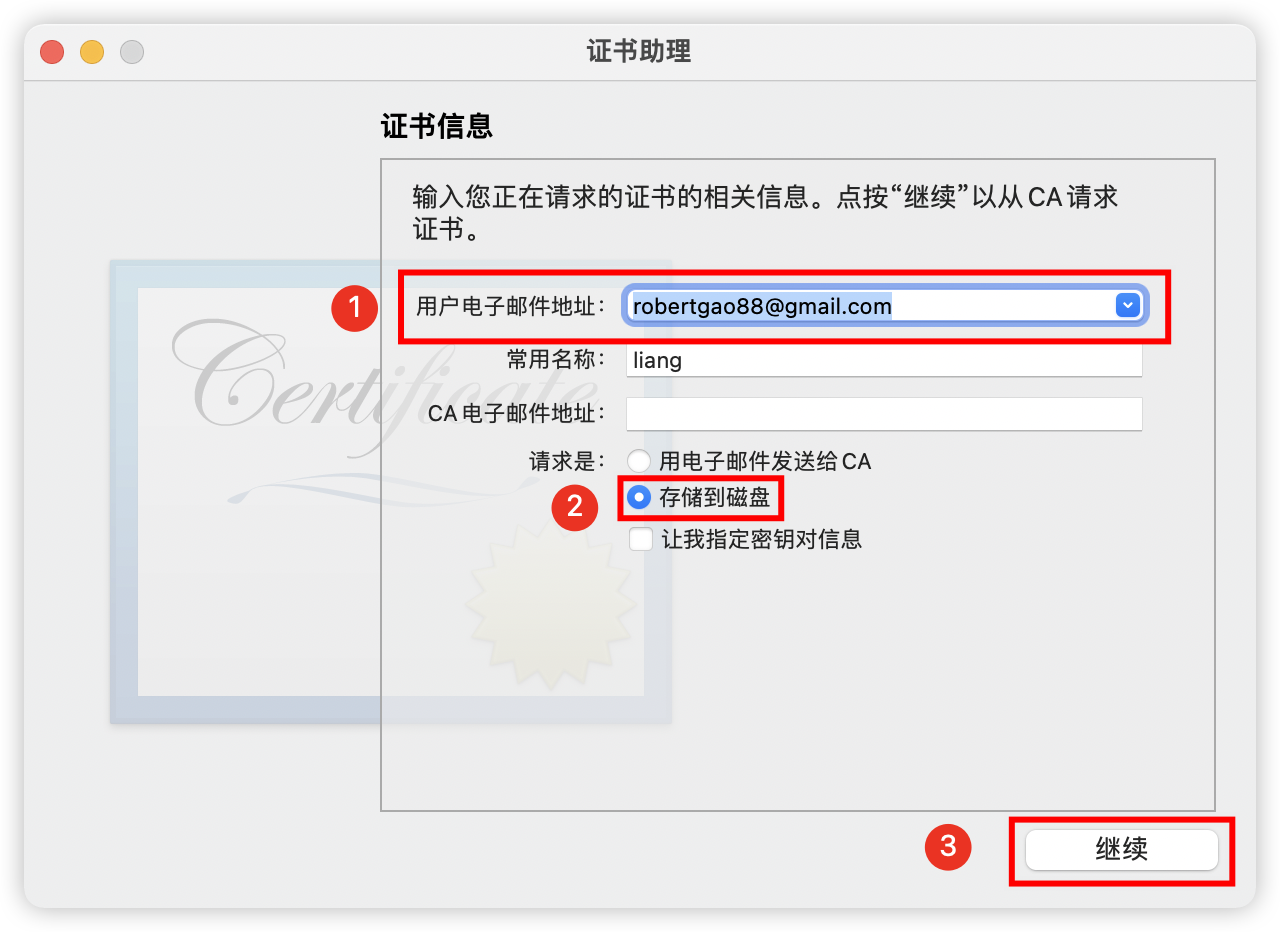
然后在弹出的文件位置选择中点击【存储】,生成的请求证书文件格式以【.certSigningRequest】结尾 ![](https://img.itqaq.com/art/content/f4a9e27275cfc8f729f8dcd2e74cf9ec.png) 
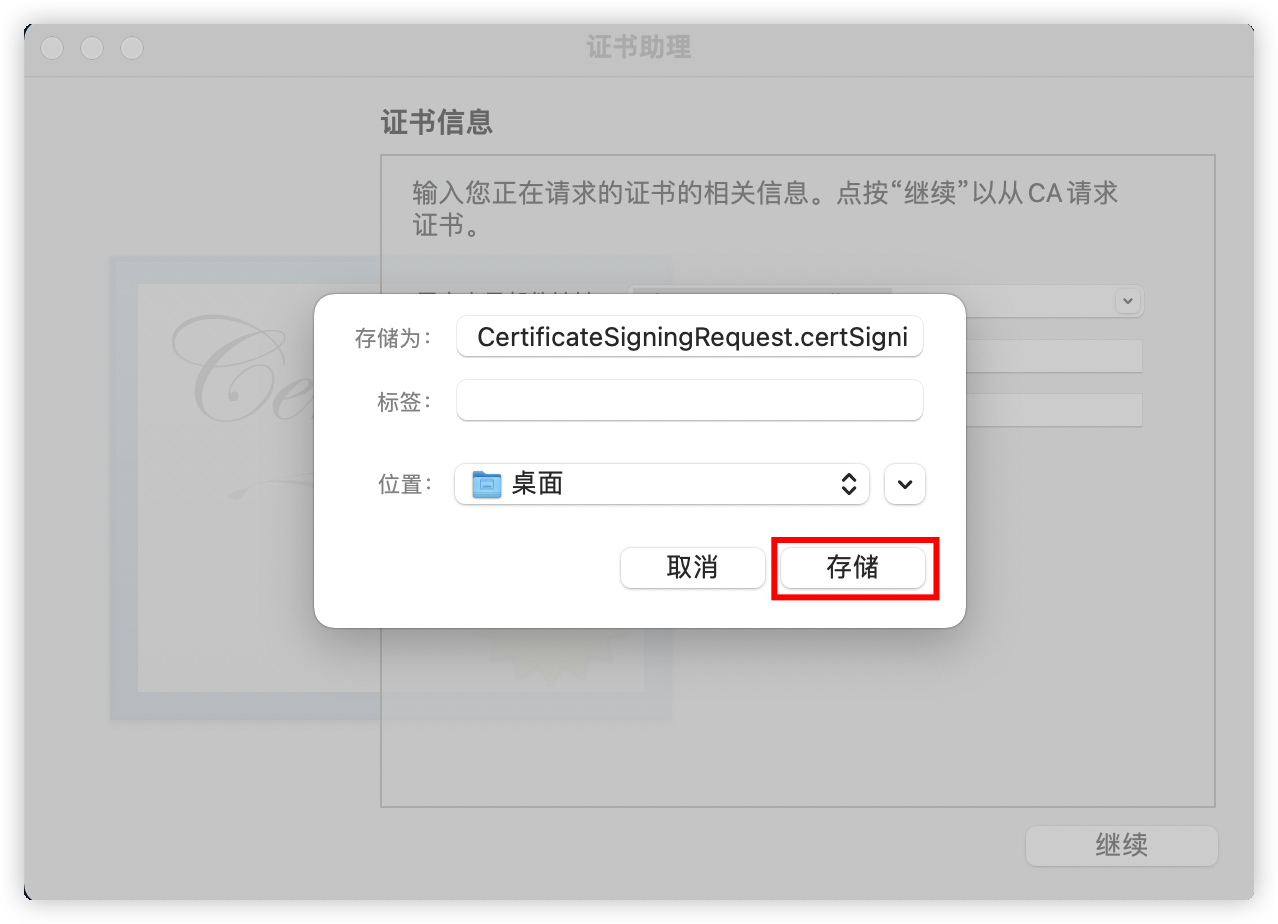
8、接下来回到开发者后台,继续上面的【第 4 步】,点击【Choose File】,选择刚刚创建的请求证书,点击【Continue】 ![](https://img.itqaq.com/art/content/dbf49ecbf28536dcfc8ef79e0c972a86.png) 
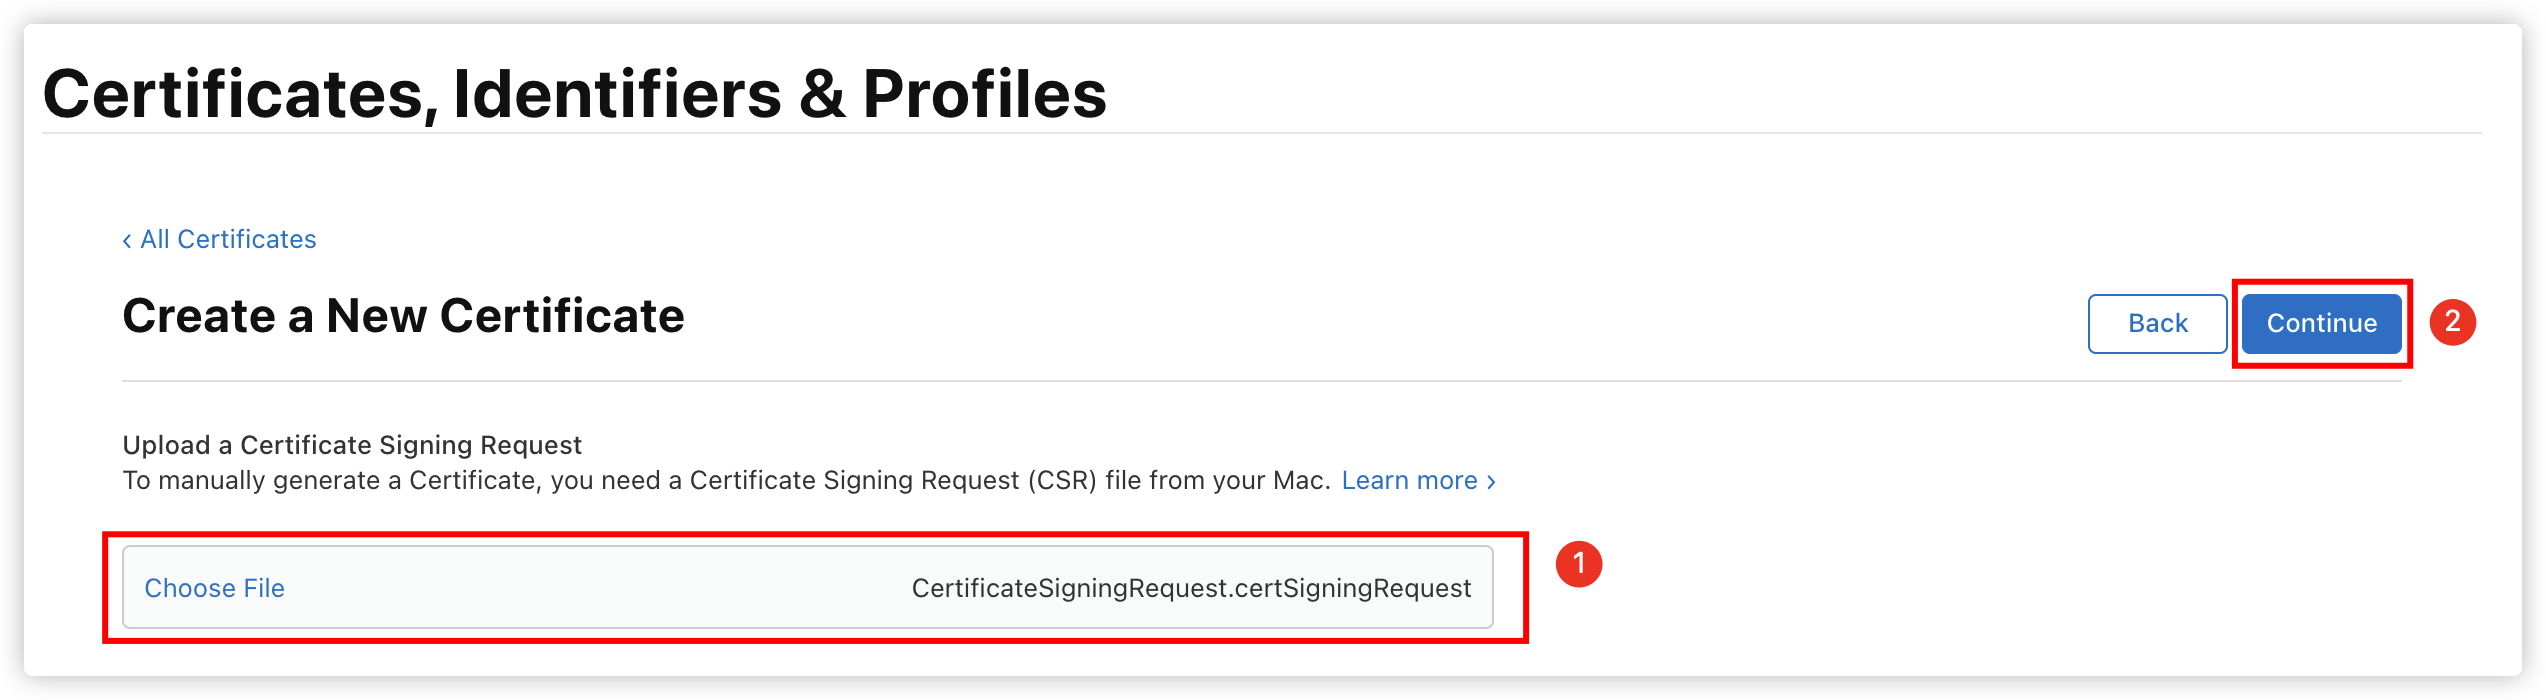
9、然后会进入以下界面,开发者证书创建完成。点击【Download】,下载证书到本机【development.cer】 ![](https://img.itqaq.com/art/content/9952c89c0bb5bd8e4b1ae399b1b69ad0.png) 
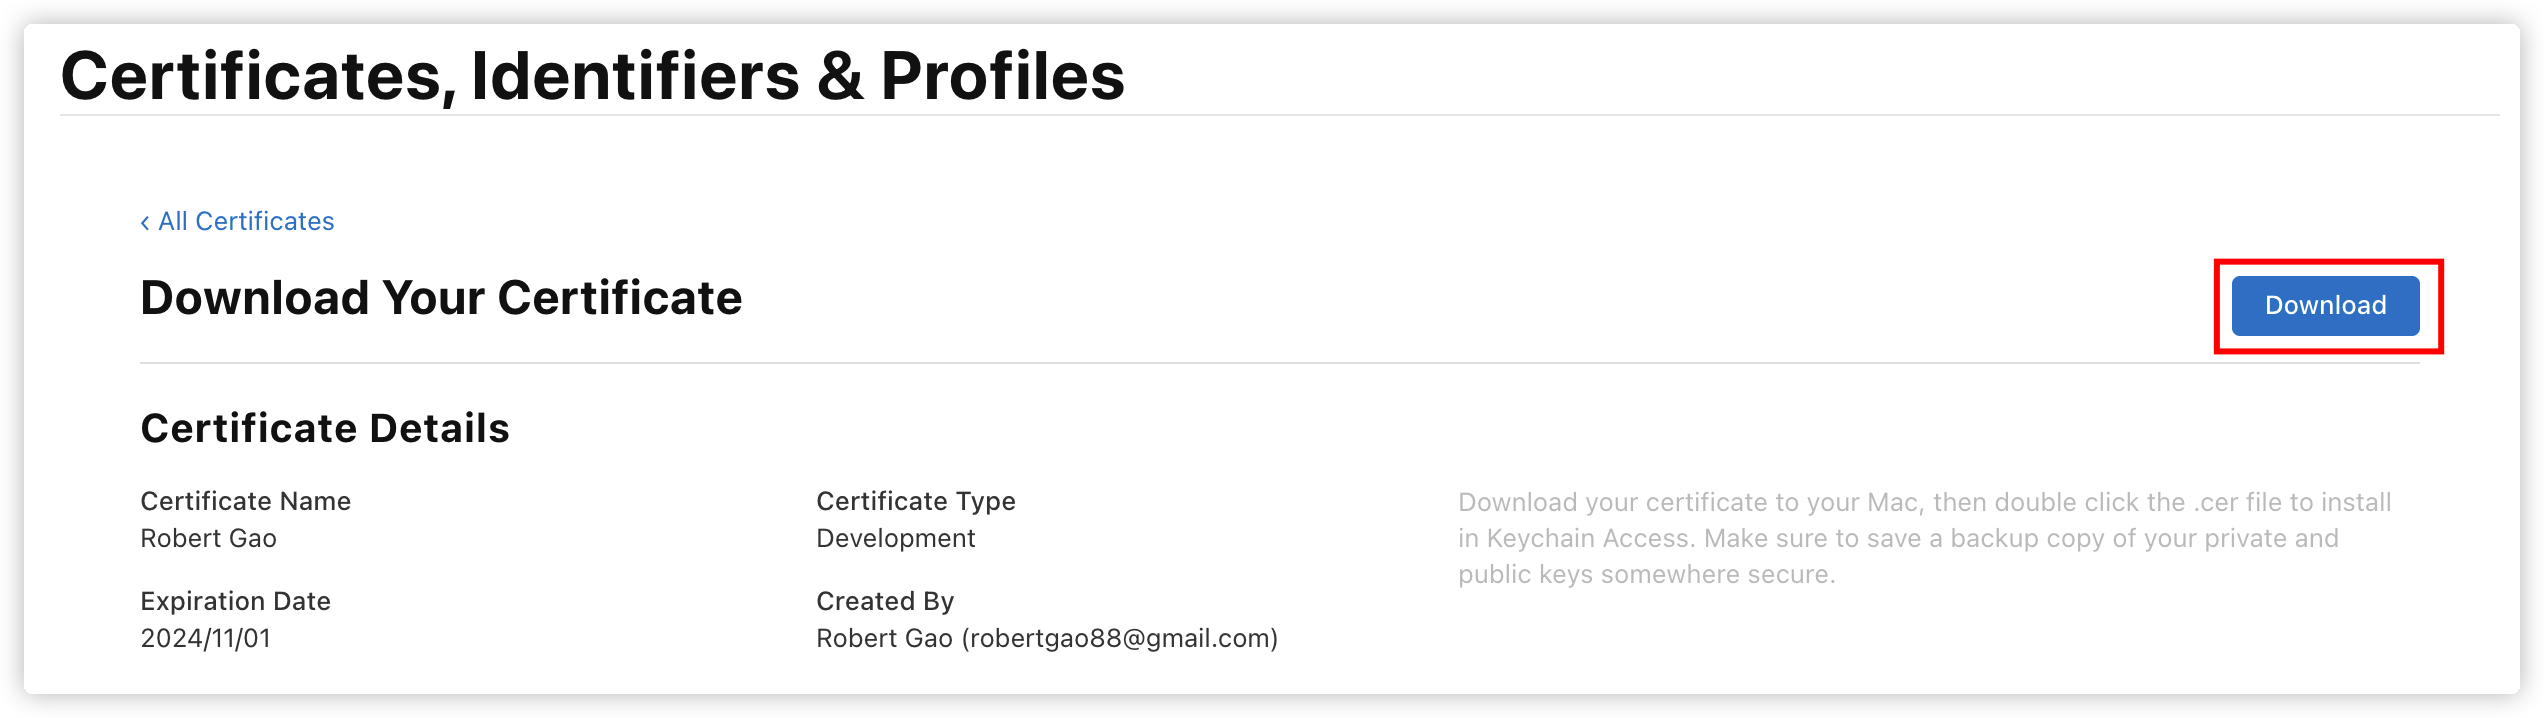
10、双击下载下来的证书即可安装,在钥匙串中可以看到刚安装的开发证书 ![](https://img.itqaq.com/art/content/cdac0da6d1eb25a3bae69ef2ff55d178.png) #### 
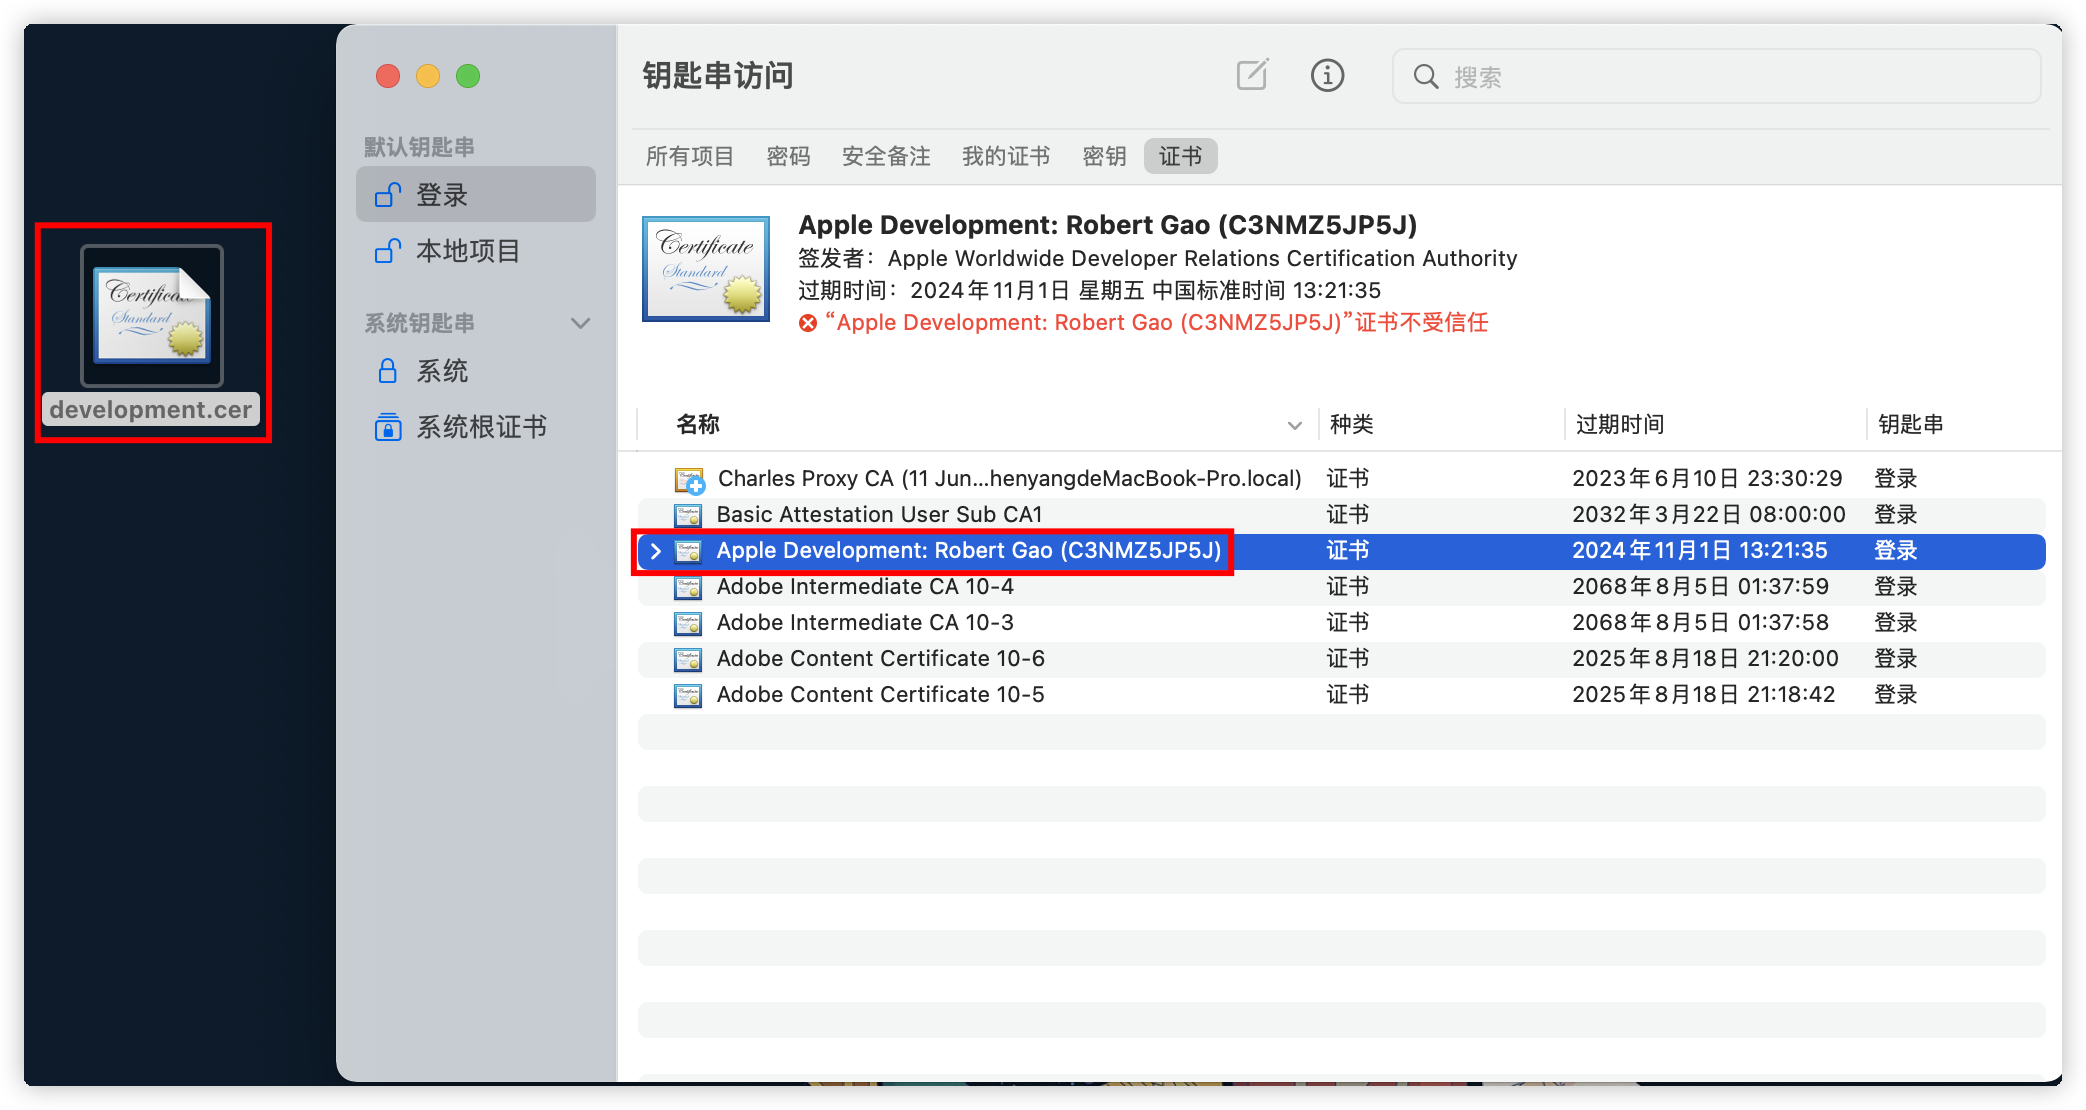
二、制作 p12 私钥证书 --- 1、在钥匙串的证书界面,选中刚刚安装好的开发者证书,【右键】选择【导出】 ![](https://img.itqaq.com/art/content/bdbad3d7ee8581a2731c233955c73d67.png) 2、在弹出的界面中选择保存位置,然后点击【存储】 ![](https://img.itqaq.com/art/content/ed25cdd9e0103877c7dc18266e5306bb.png) 3、在接下来的弹窗中输入 p12 证书文件的安装密码 ![](https://img.itqaq.com/art/content/e30f6324e34b7e55c15d692fcbd882d6.png) 
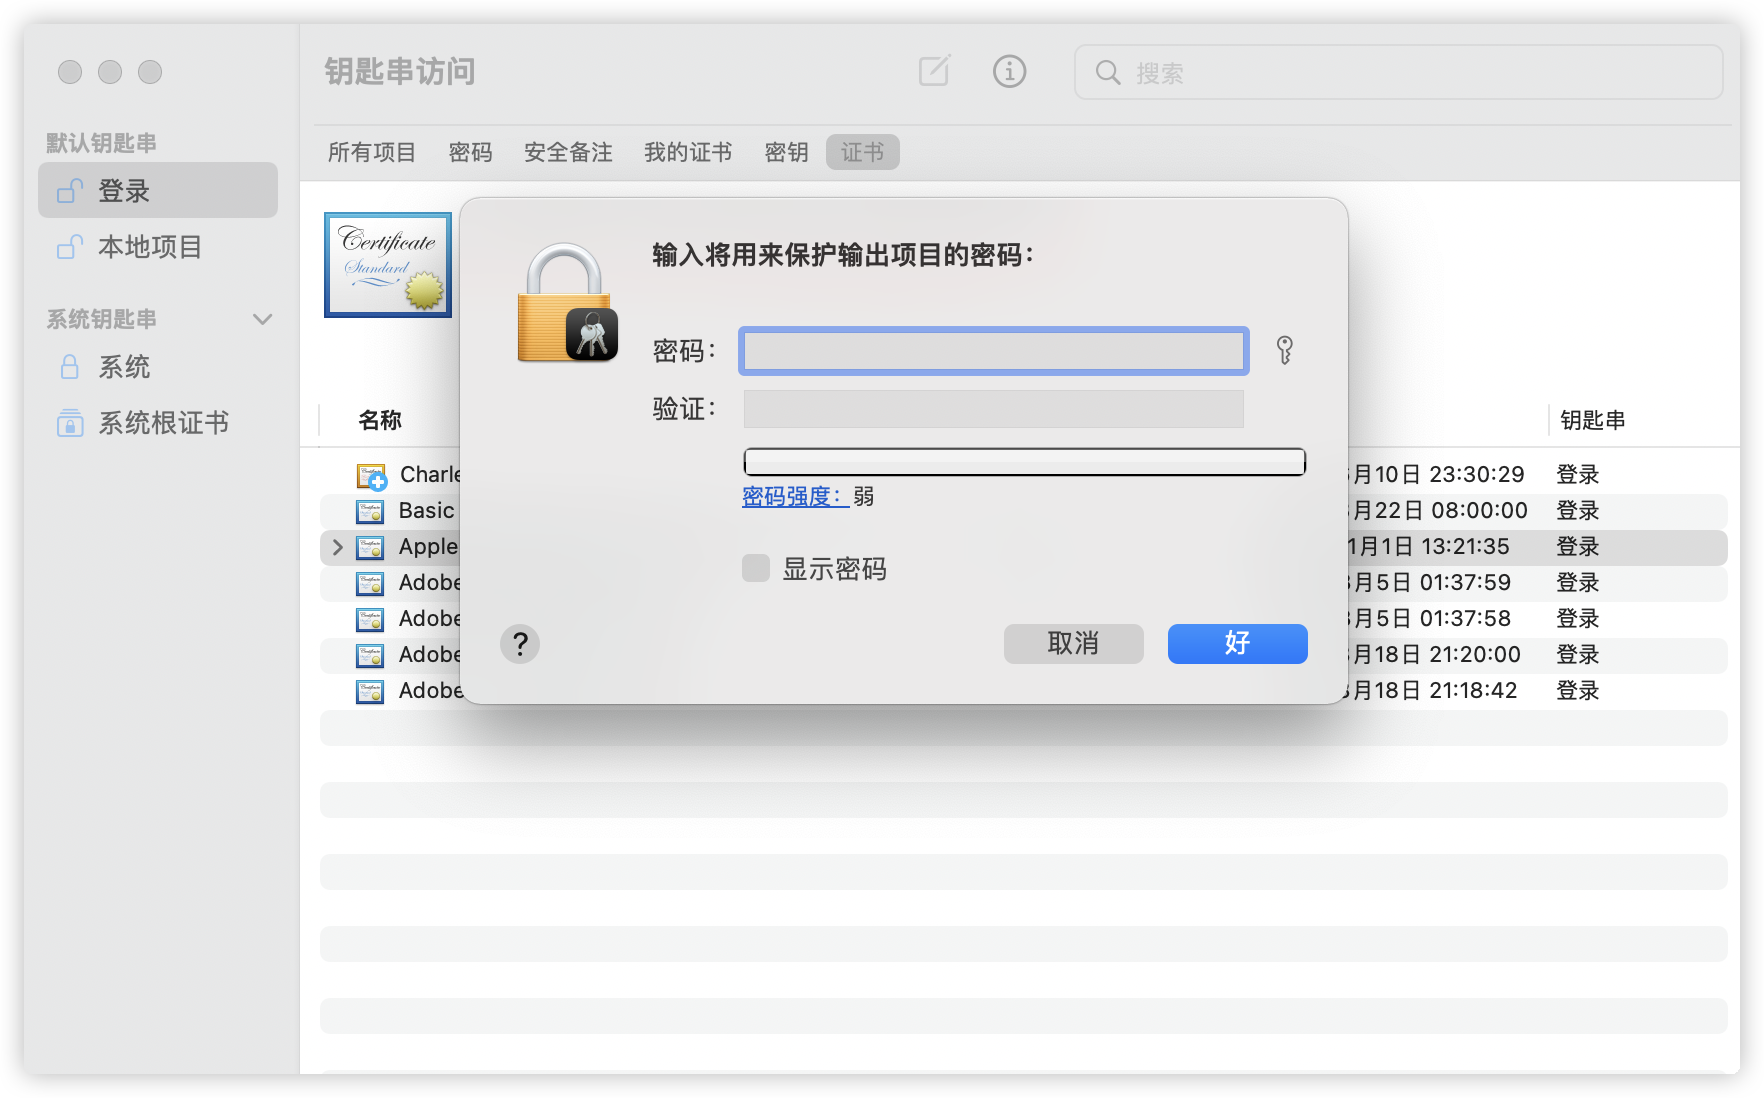
4、继续上面的步骤,输入电脑的开机密码,到这里 p12 证书制作完成 ![](https://img.itqaq.com/art/content/63e2669bf65d2fc97f11cce2914649eb.png) #### 
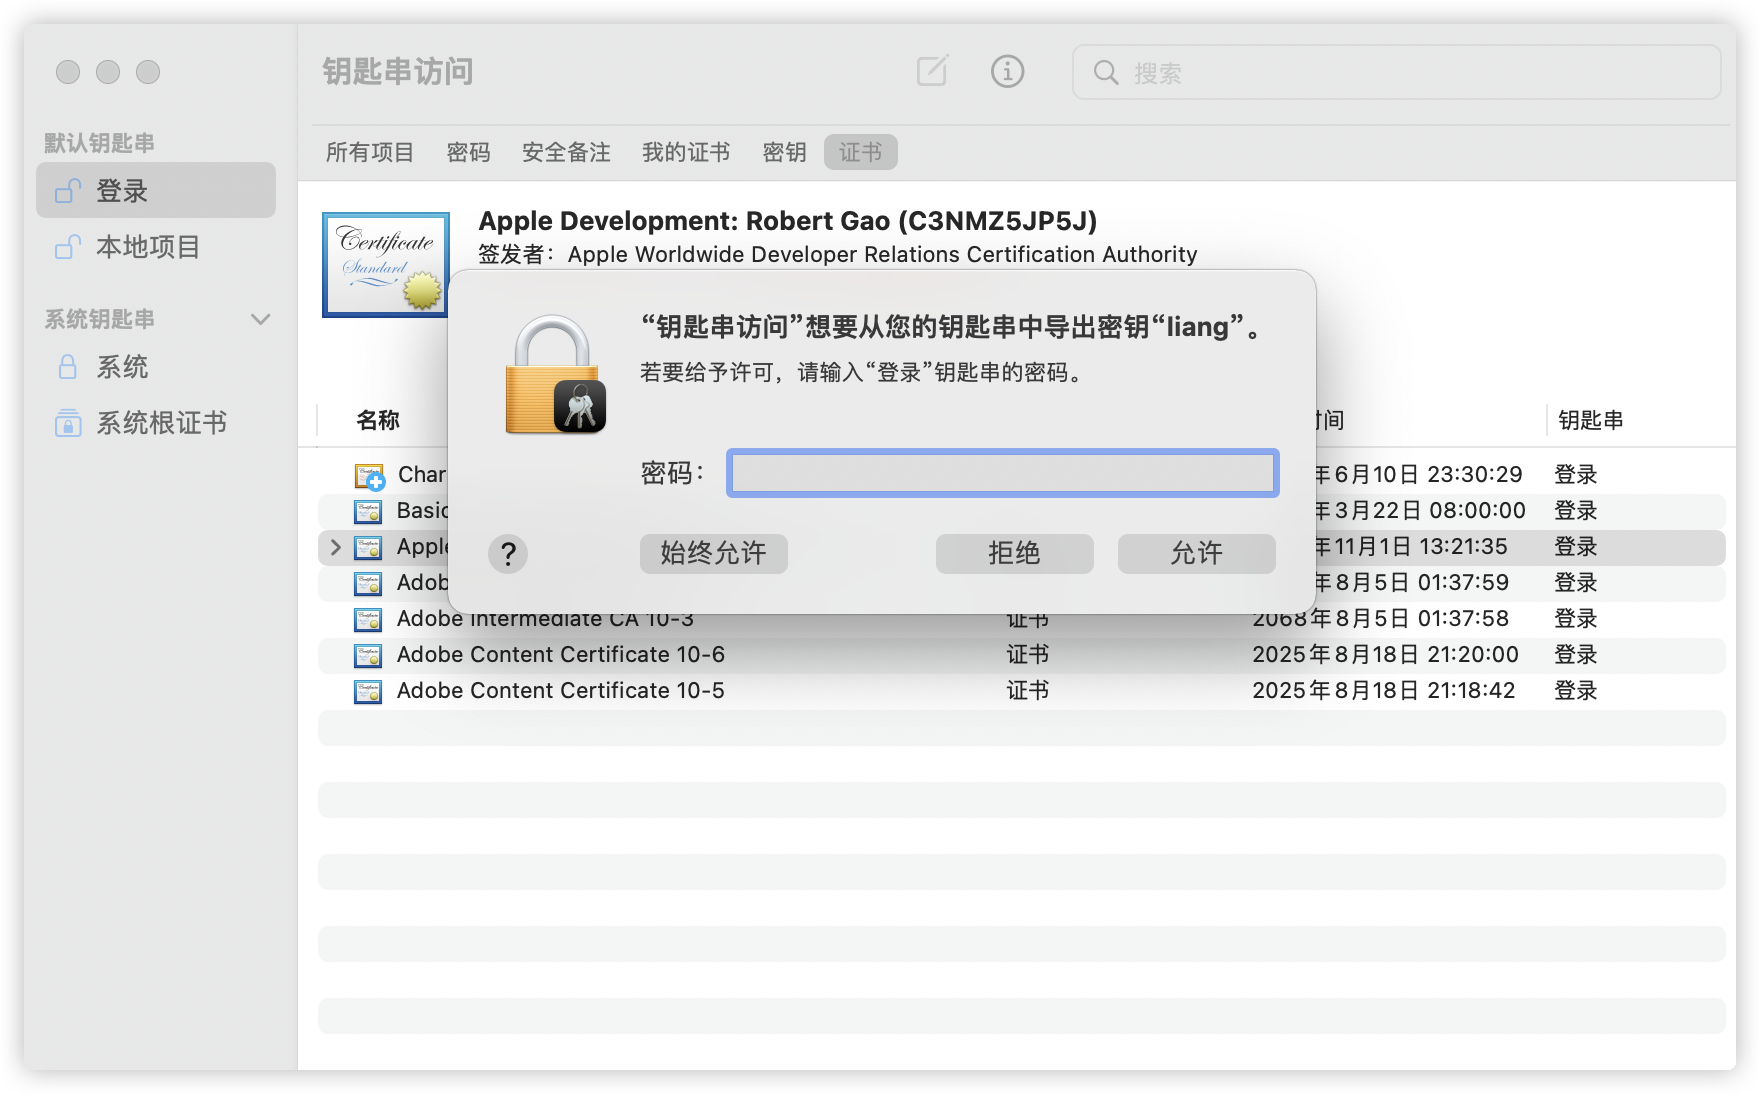
三、创建描述文件 Profiles --- 1、在【Certificates, Identifiers & Profiles】选择【Profiles 】,然后点击【Profiles +】 ![](https://img.itqaq.com/art/content/272c42c6d0e1361499dd081247dcb7fc.png) 2、在接下来的界面中选择【iOS App Development】(开发描述文件),然后点击【Continue】 ![](https://img.itqaq.com/art/content/ddb7484d2c10b5c91976df09721c3716.png) 
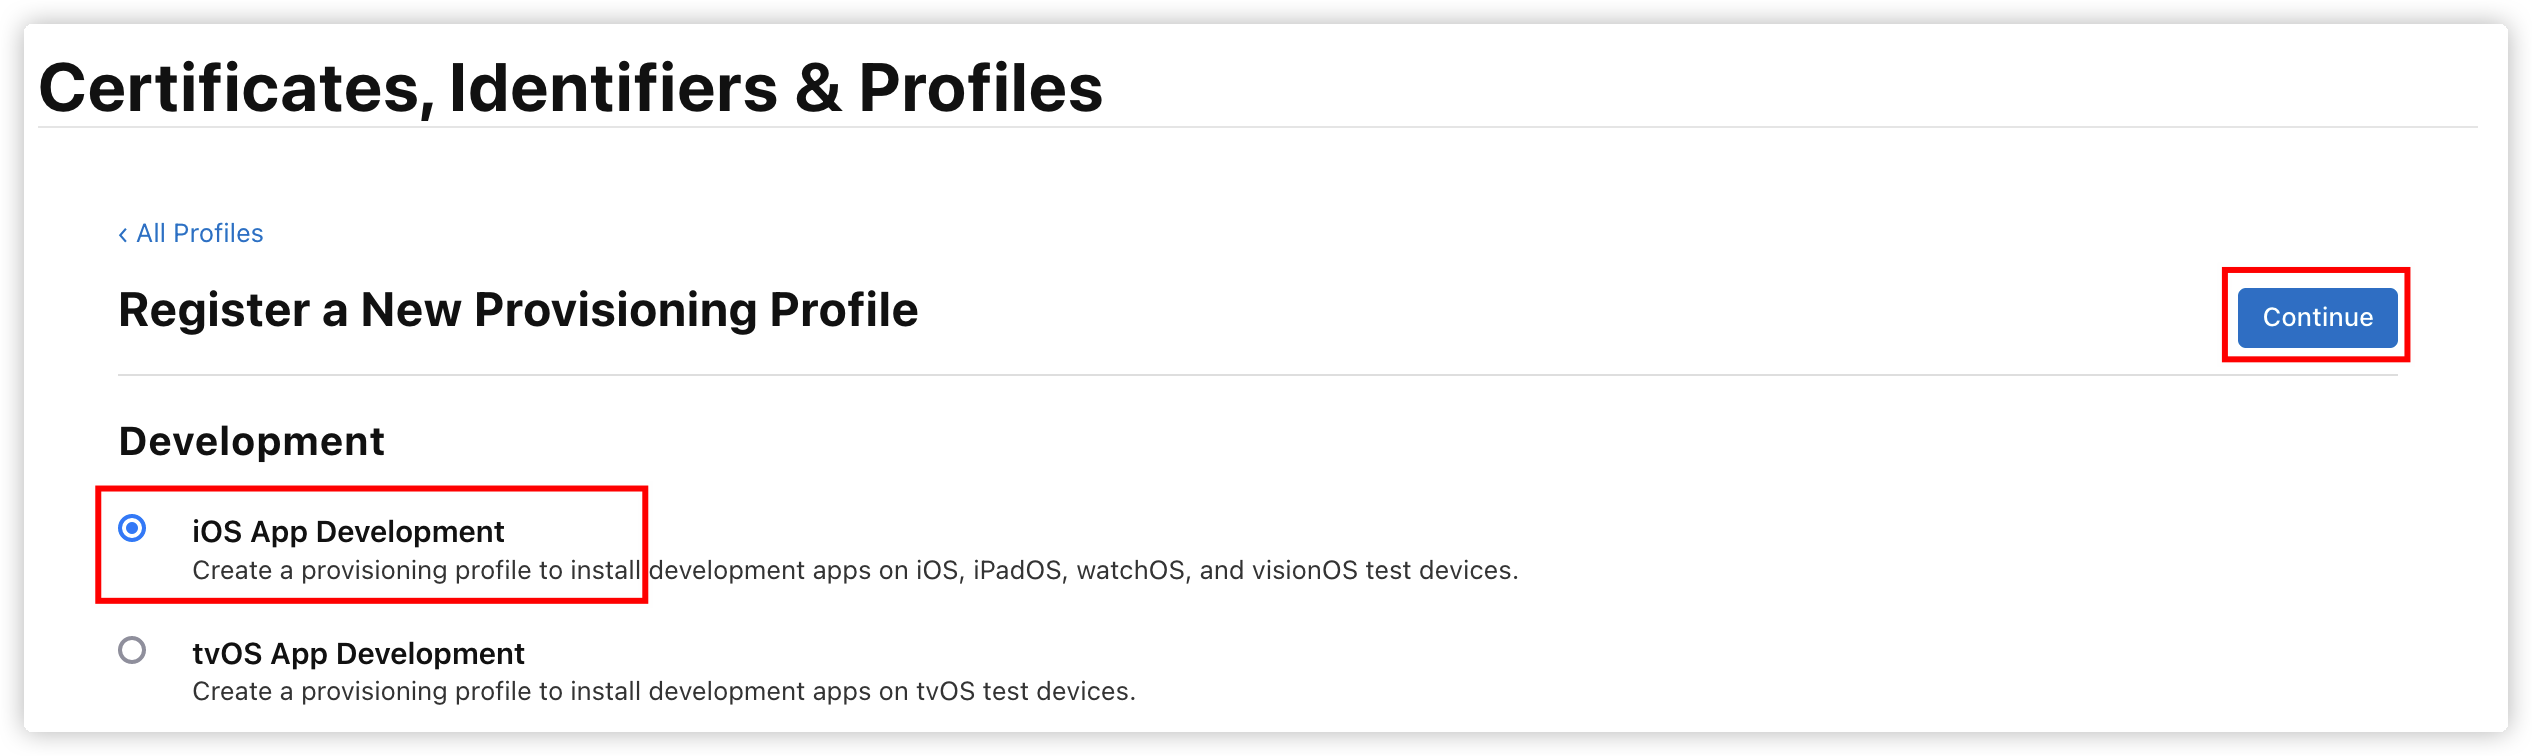
3、在以下界面中选择描述文件要包含的 BundleId 应用,然后点击【Continue】 ![](https://img.itqaq.com/art/content/412daf43d13865ac3fac37a4b7282058.png) 
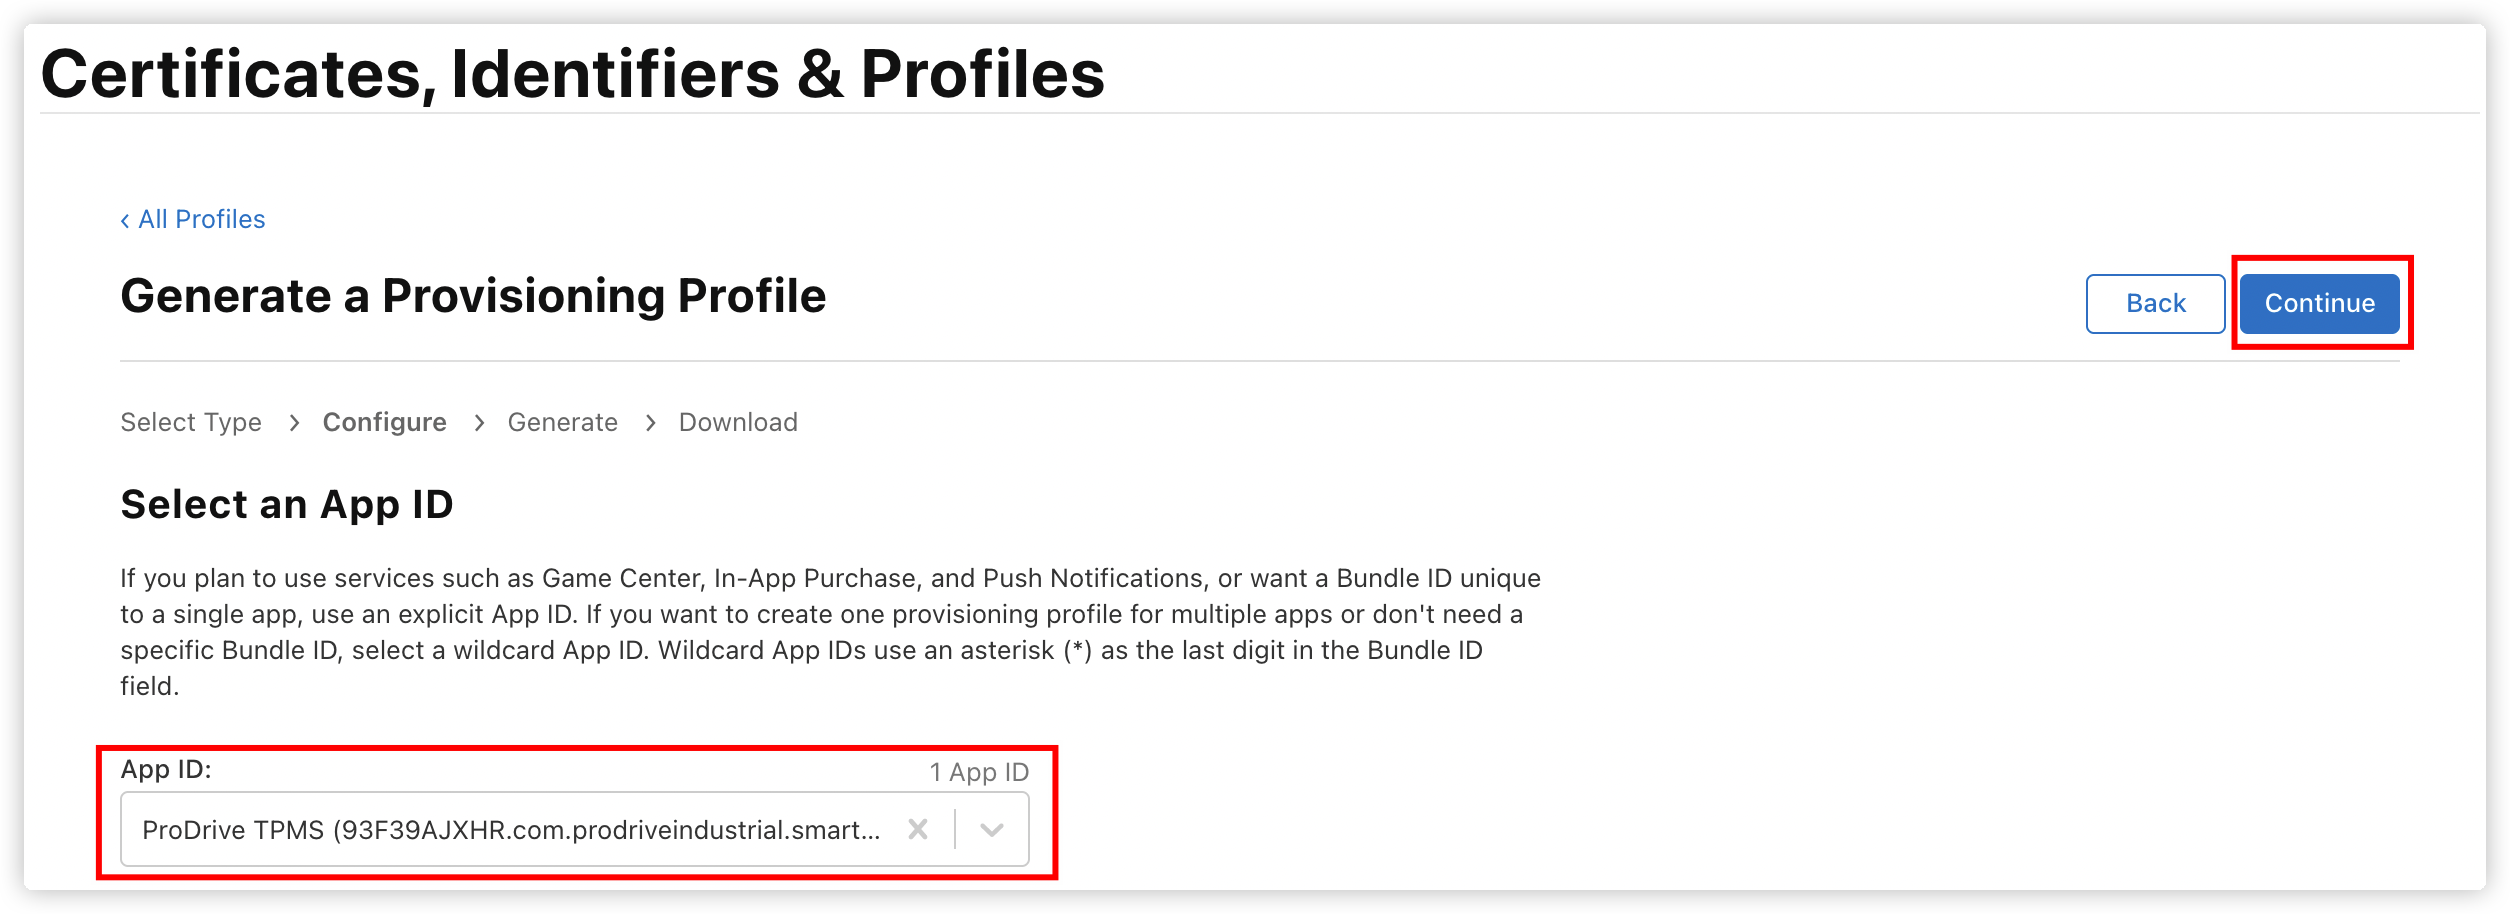
4、然后选择描述文件要包含的证书,开发描述文件选择开发证书,发布描述文件选择发布证书,然后点击【Continue】 ![](https://img.itqaq.com/art/content/546d0f9398d43df4d79911ed0e72ac44.png) 
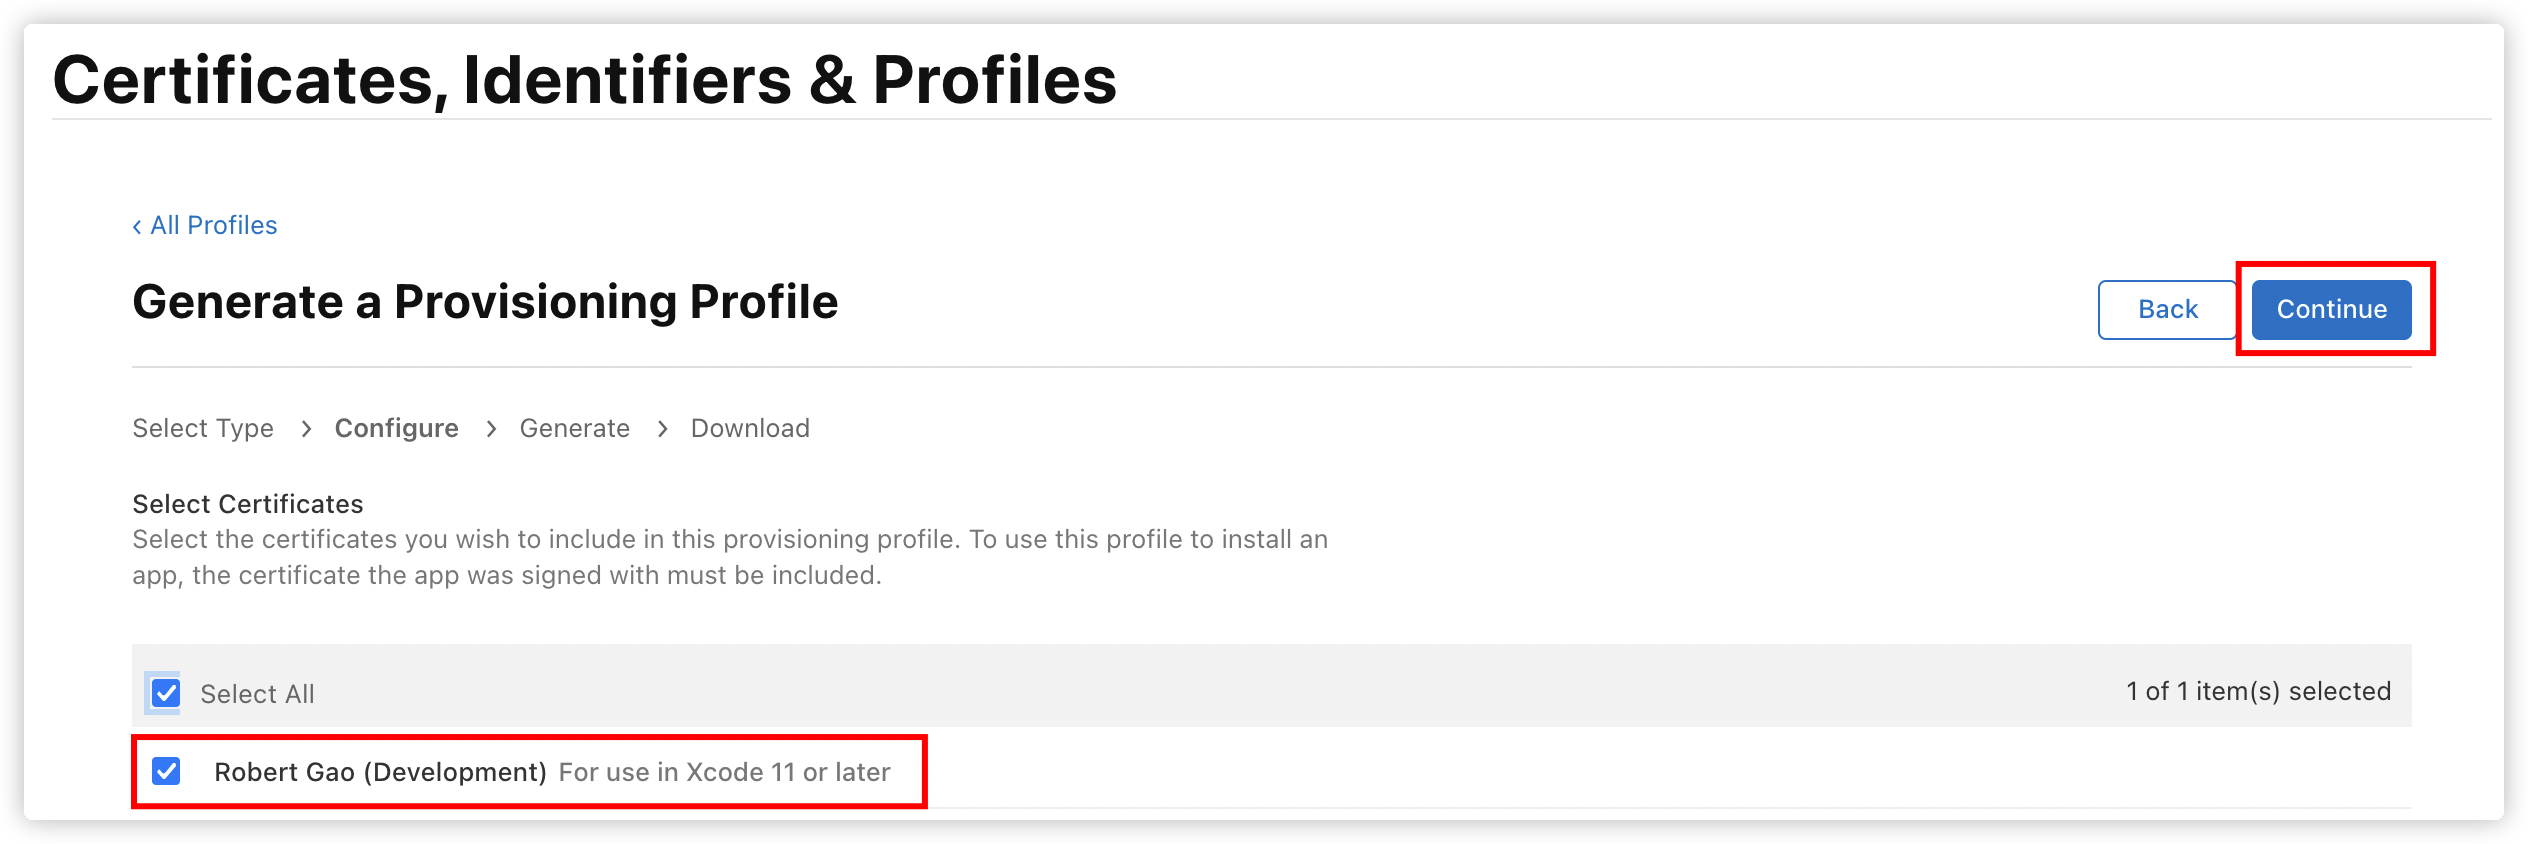
5、接下来在该界面中选择描述文件要包含的调试设备,然后点击【Continue】 ![](https://img.itqaq.com/art/content/d904346edbac4419d9dee6b9d6cf43da.png) 
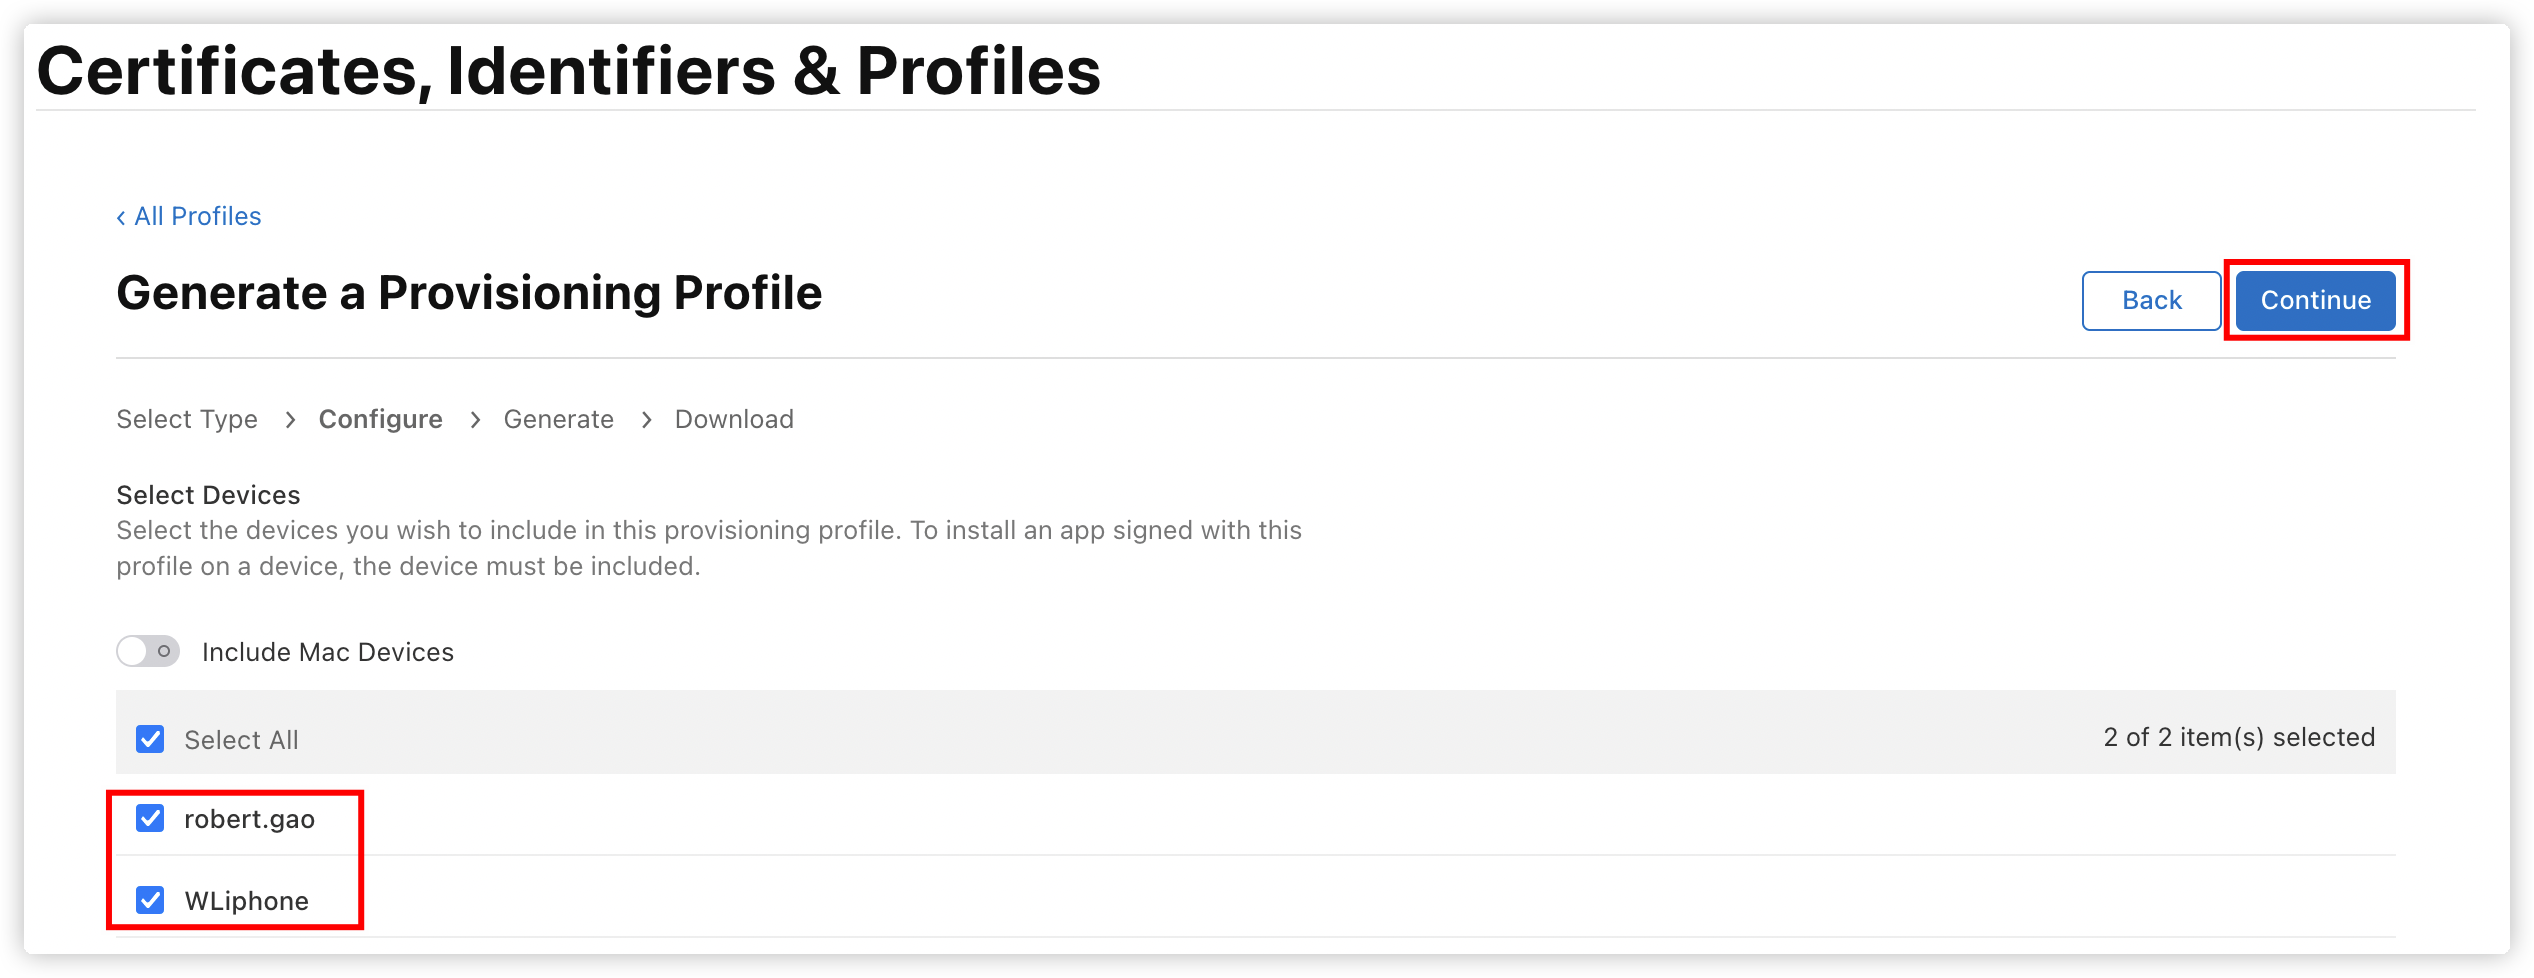
6、输入描述文件名称,点击【Generate】描述文件即可创建成功 ![](https://img.itqaq.com/art/content/ab5672900350c5e0b42cd5cf416485f1.png) 
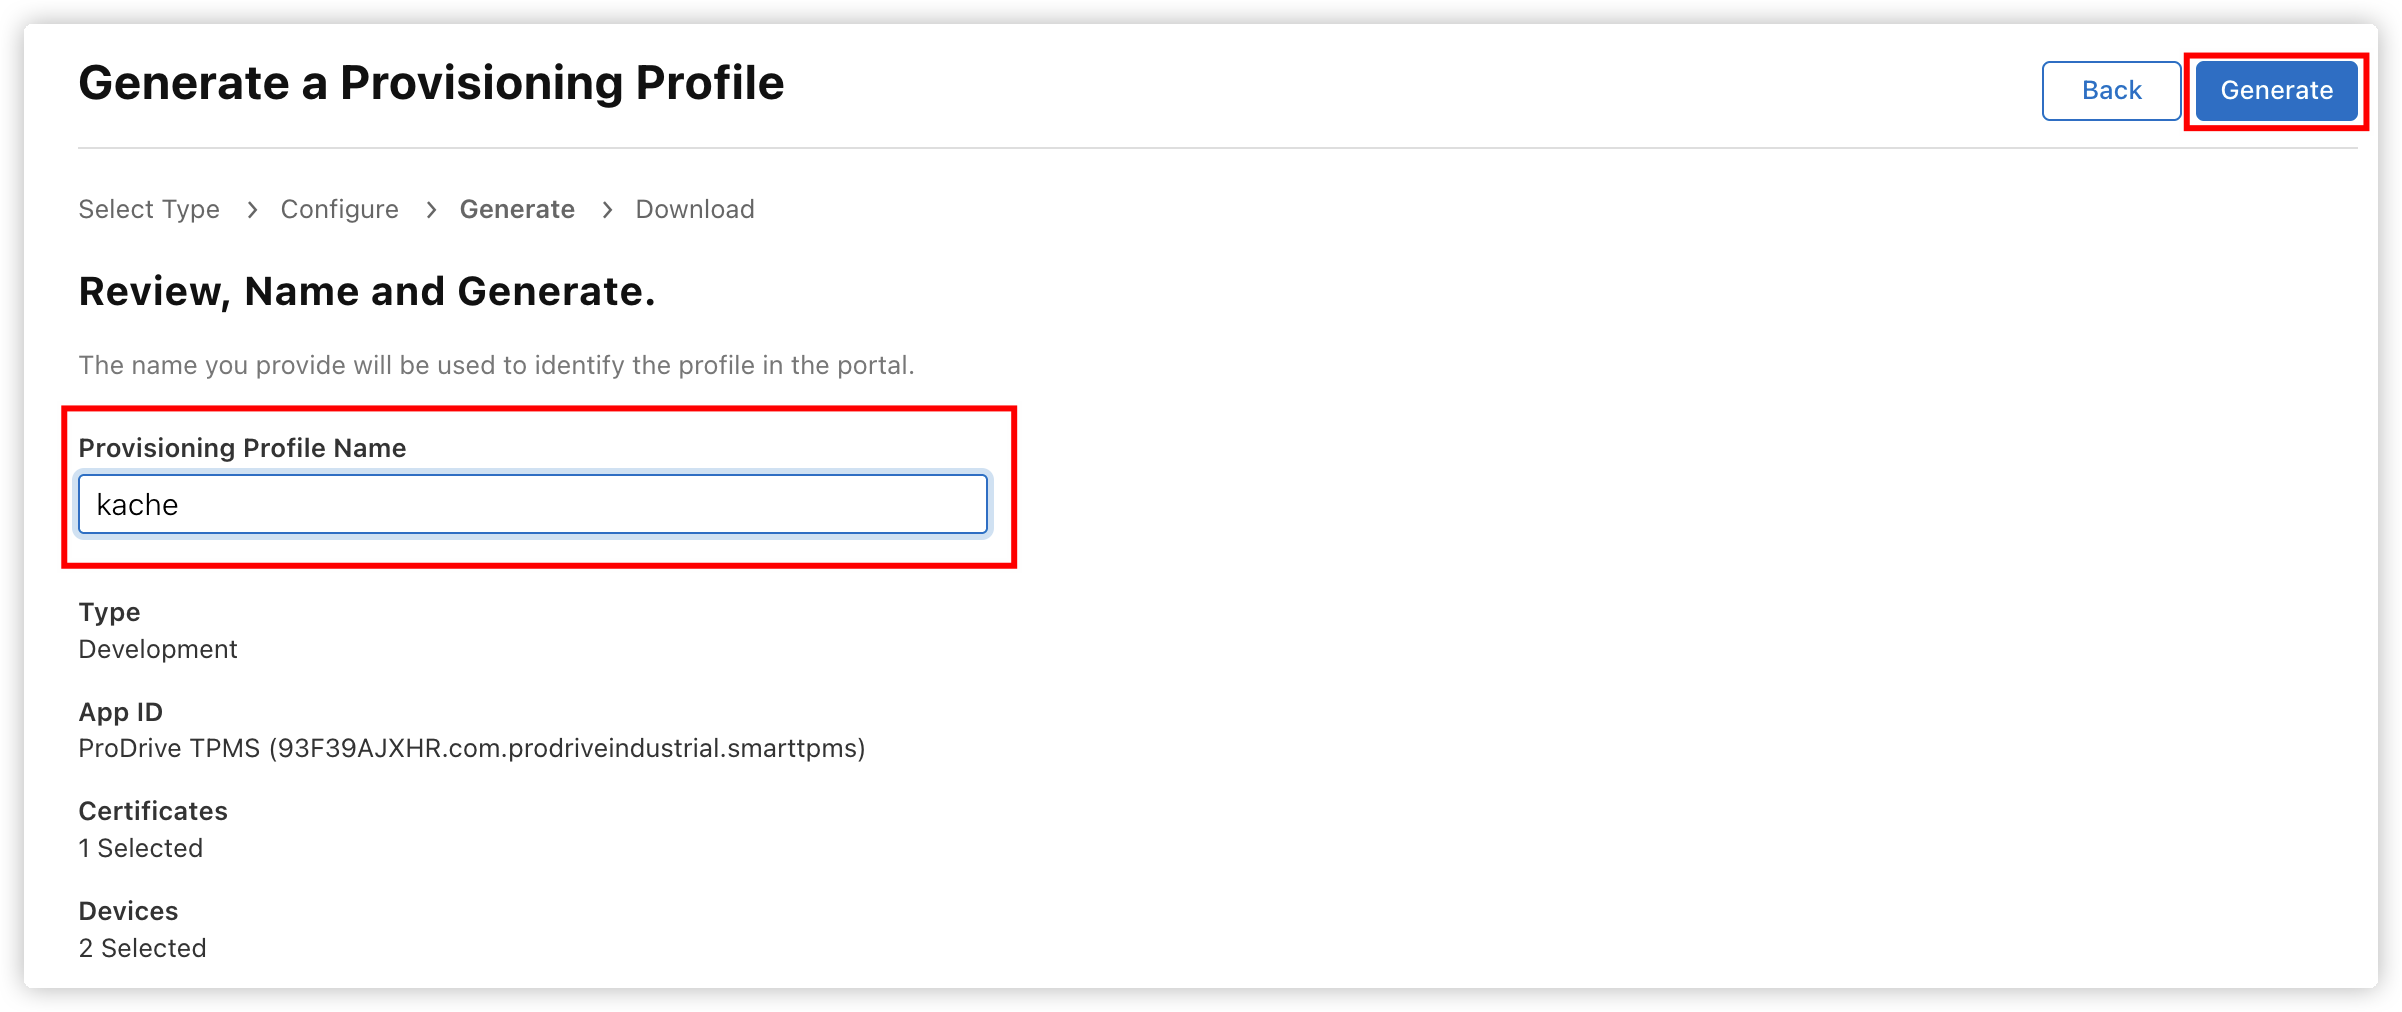
7、描述文件创建成功,点击【Download】将描述文件下载到本地,描述文件以【.mobileprovision】结尾 ![](https://img.itqaq.com/art/content/7e9324701c47bc4bdb6950a1dcf68aeb.png)