[TOC] #### 1. 前言 --- VirtualBox 官网:<https://www.virtualbox.org> 以 Centos 7 为例,可以从 [阿里云镜像](https://mirrors.aliyun.com/centos/7.9.2009/isos/x86_64/) 或 [我的百度云网盘](https://pan.baidu.com/s/1Pl8xU31GiKuW6m32ZaI5BA?pwd=schw) 下载 Centos 操作系统的镜像文件 本文使用的镜像文件是 `CentOS-7-x86_64-Minimal-2009.iso`,也就是最小化安装的镜像文件 #### 2. 创建虚拟机 --- **启动 VirtualBox 软件,点击界面中的【新建】** 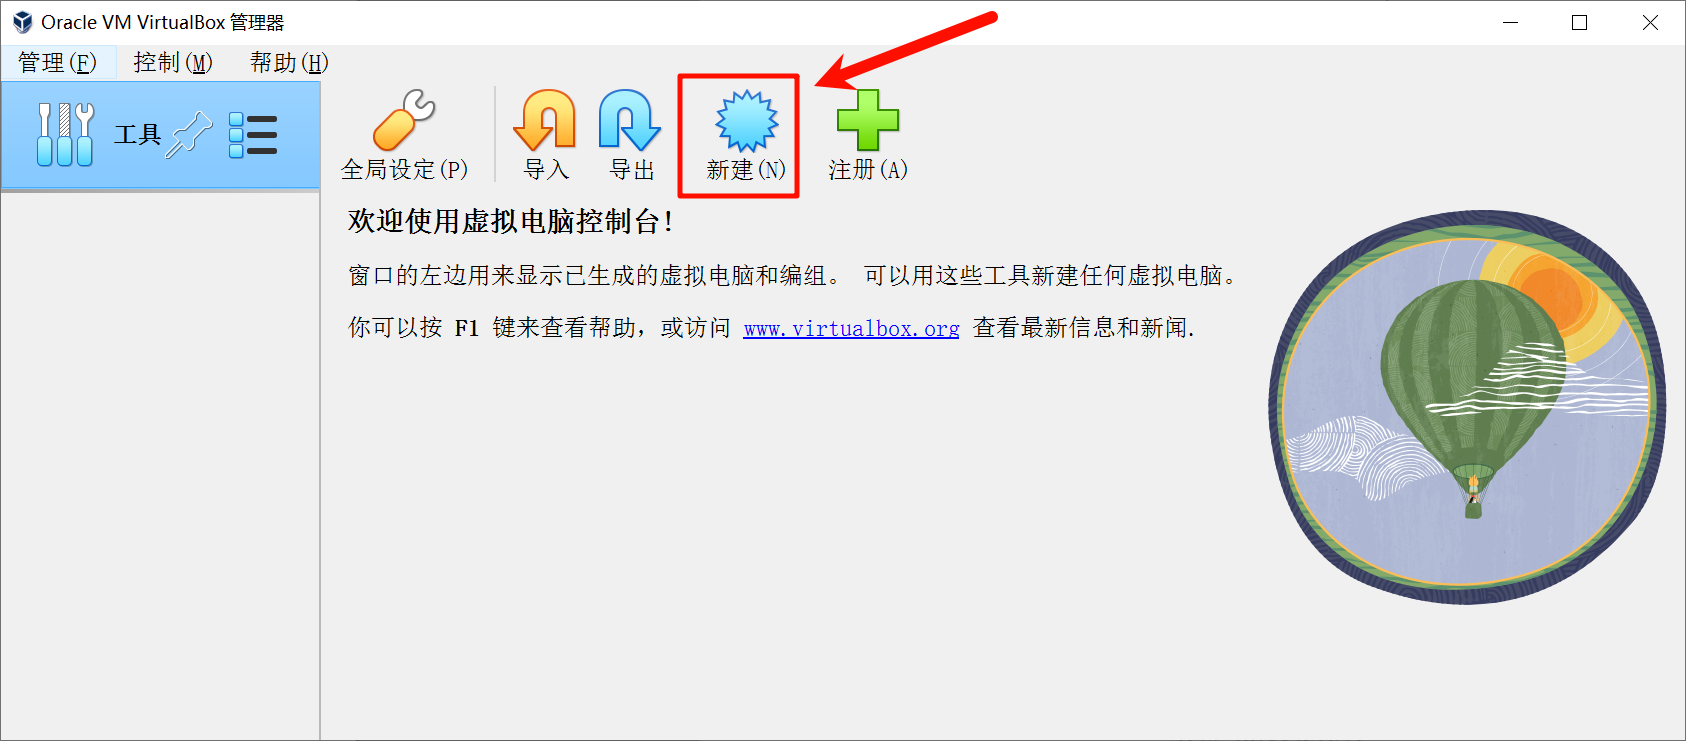 **输入虚拟机名称、设置虚拟机存放文件夹、选择镜像文件** 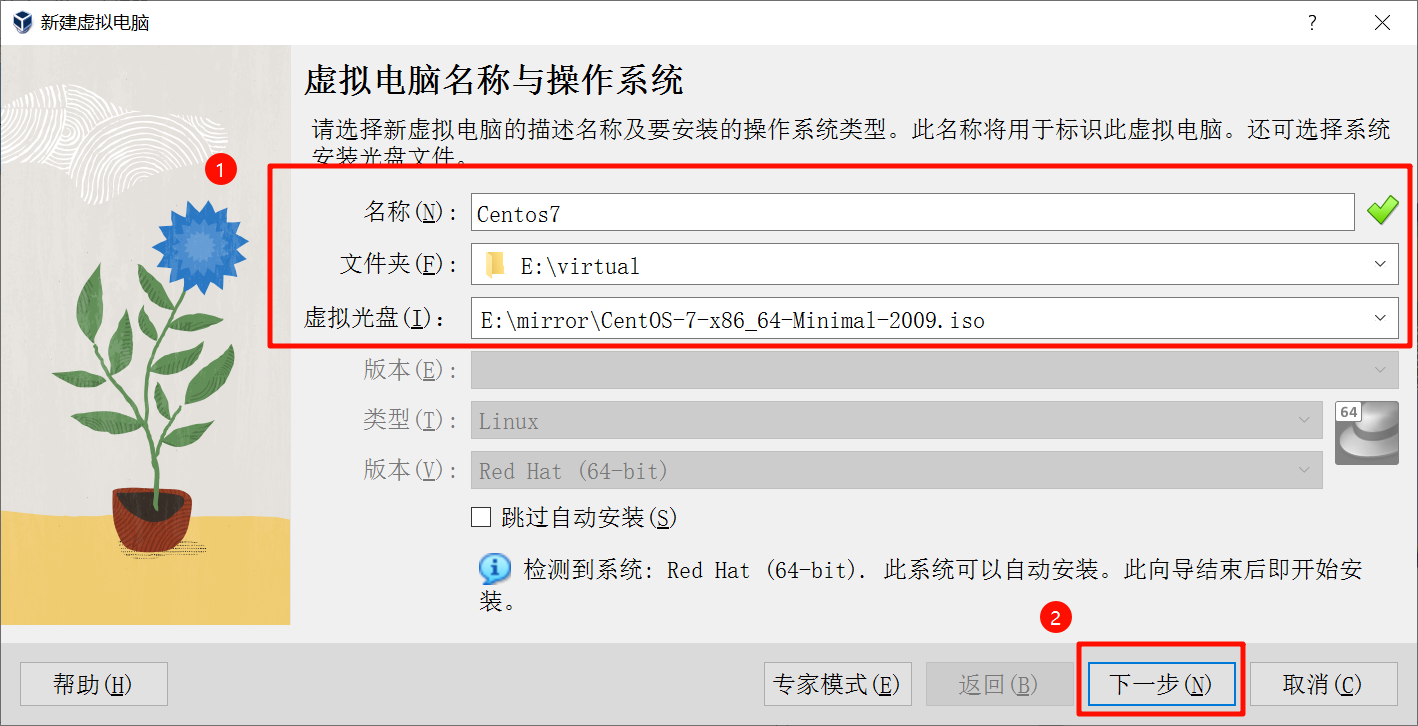 **使用自动安装,有默认的用户名和密码,以及主机名和域名,使用默认的就行** 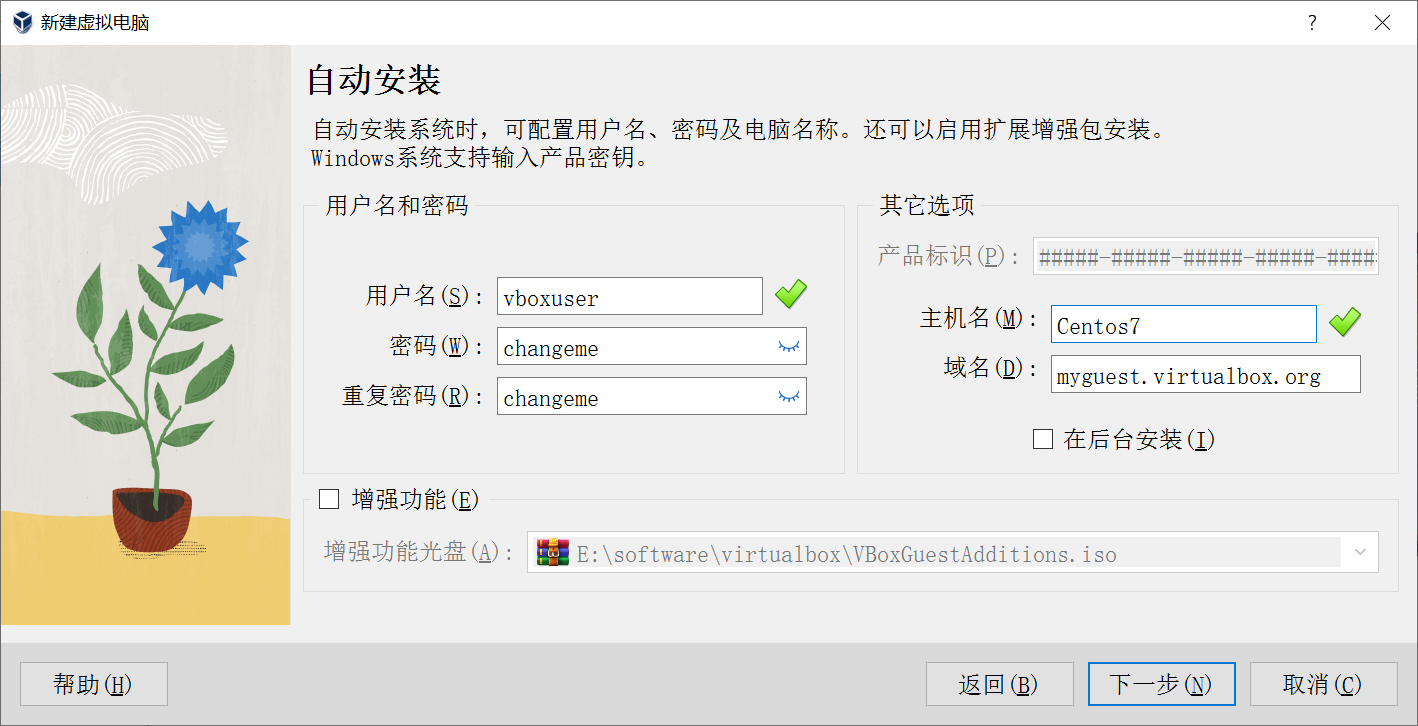 **使用默认设置就行,直接点击【下一步】**  **使用默认设置就行,直接点击【下一步】** 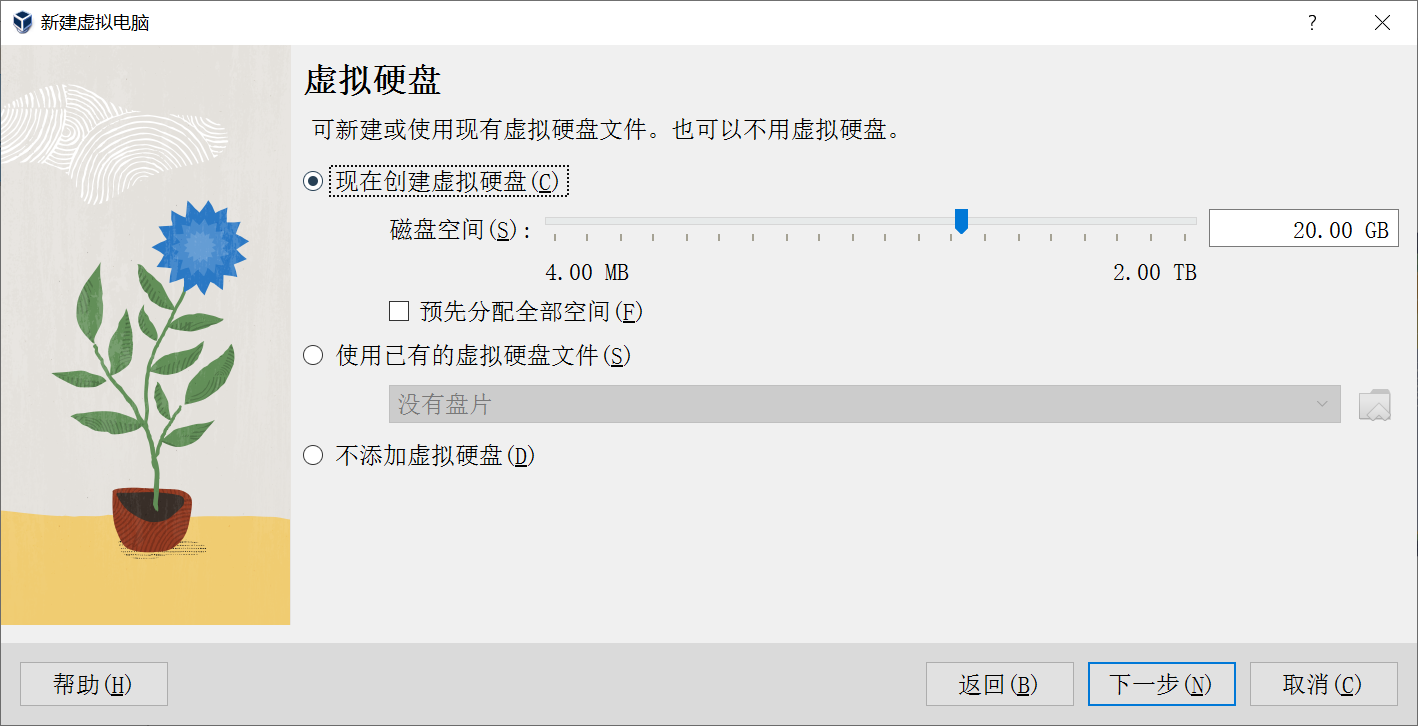 **点击【完成】,虚拟机创建成功** 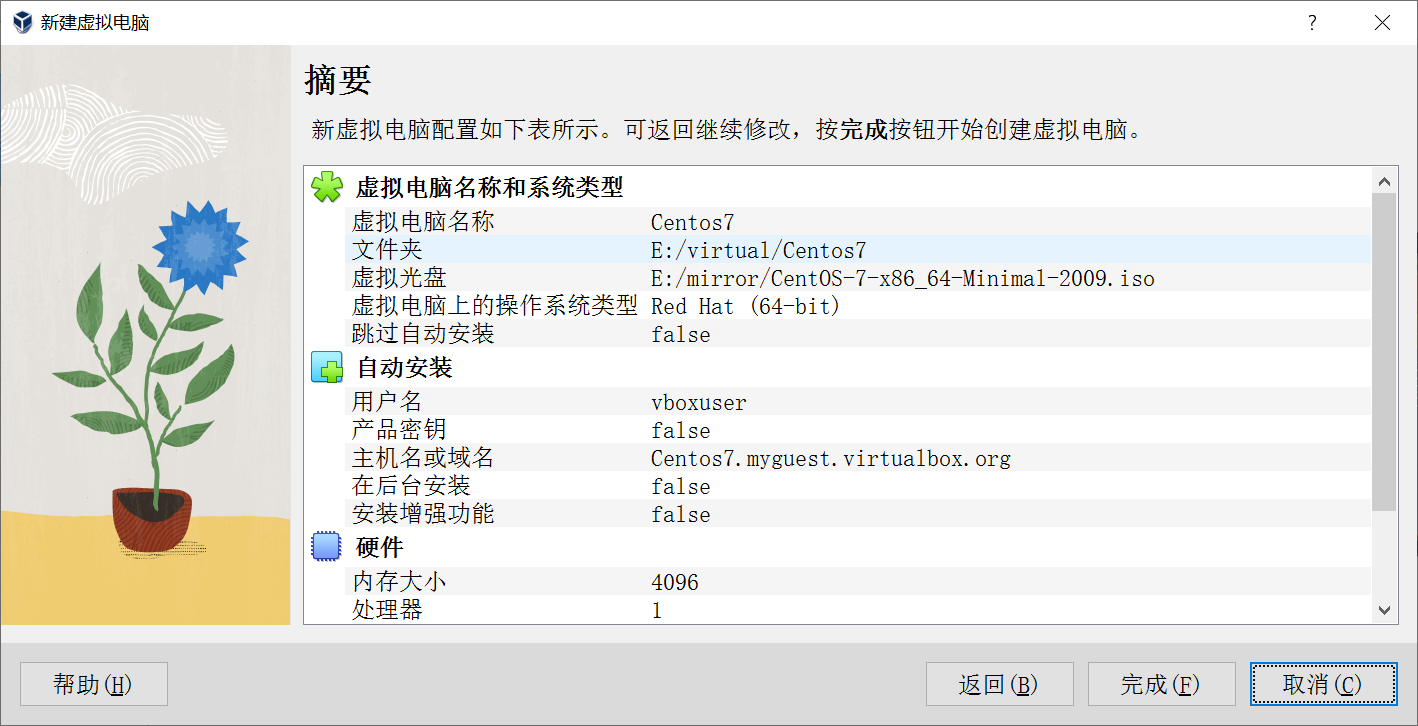 #### 3. 运行虚拟机 --- ##### 设置网络 **点击【设置】,默认的网络连接方式为【网络地址转换】,改为【桥接网卡】** 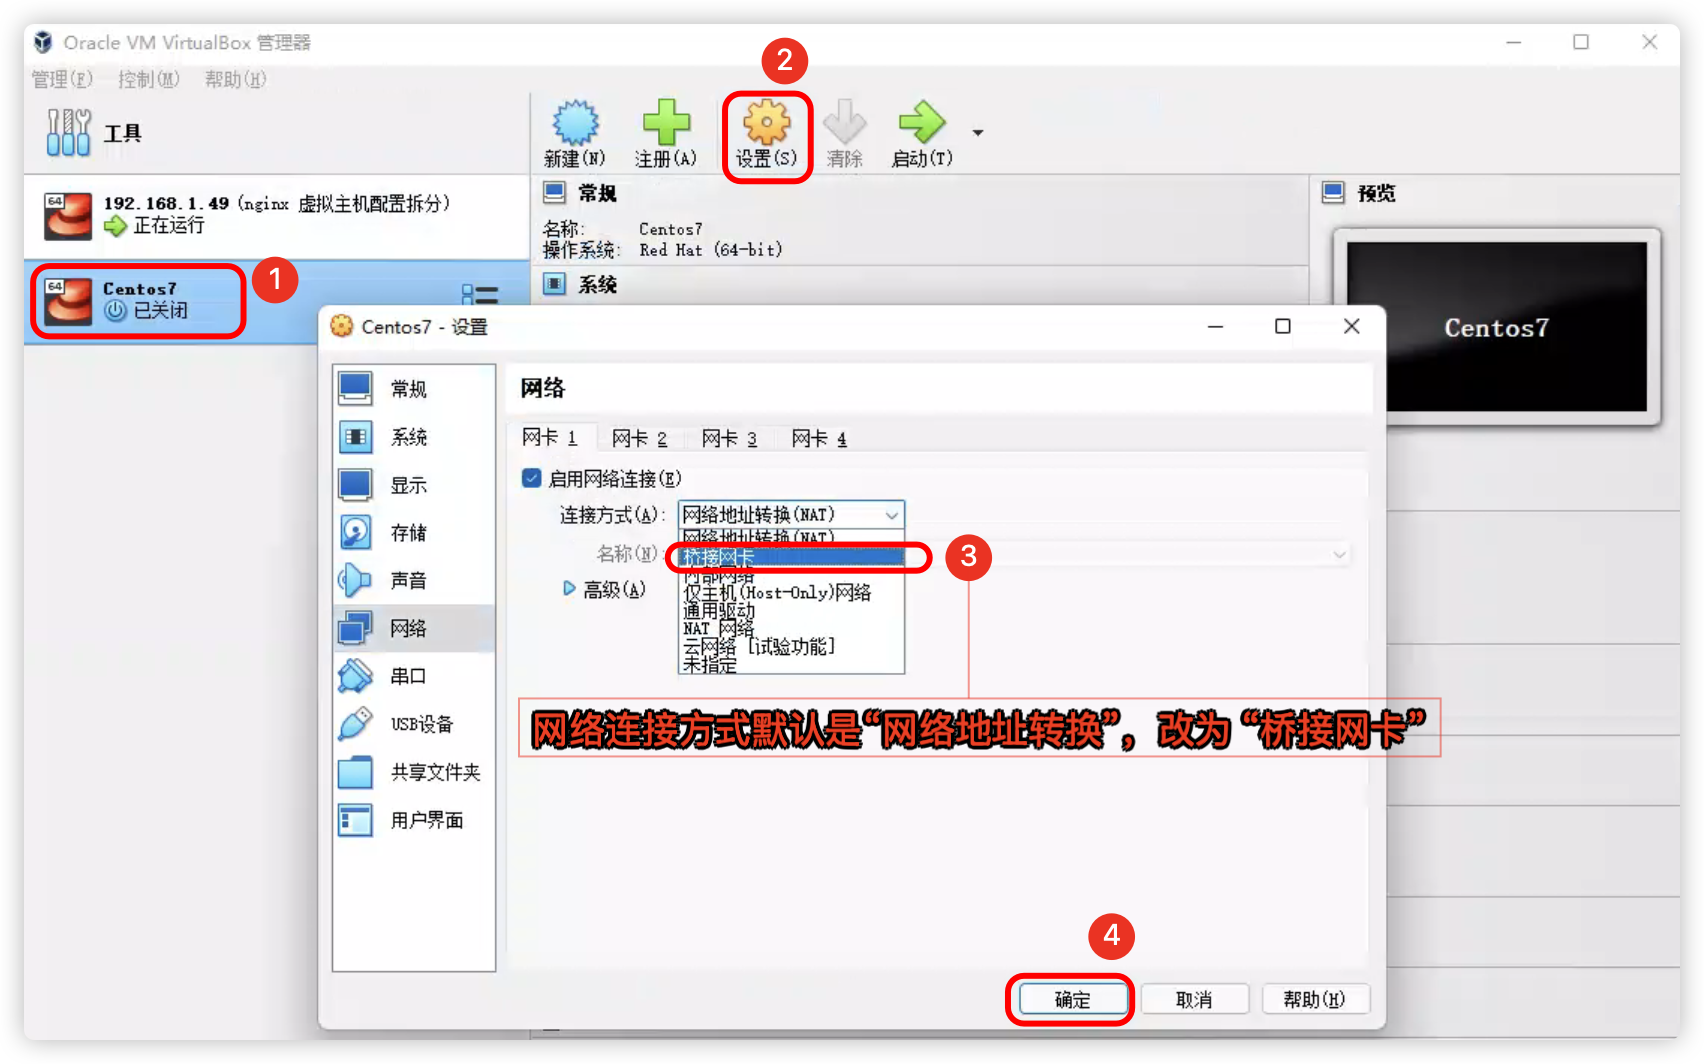 ##### 启动虚拟机 **点击【启动】运行虚拟机,按照下图序号依次点击** 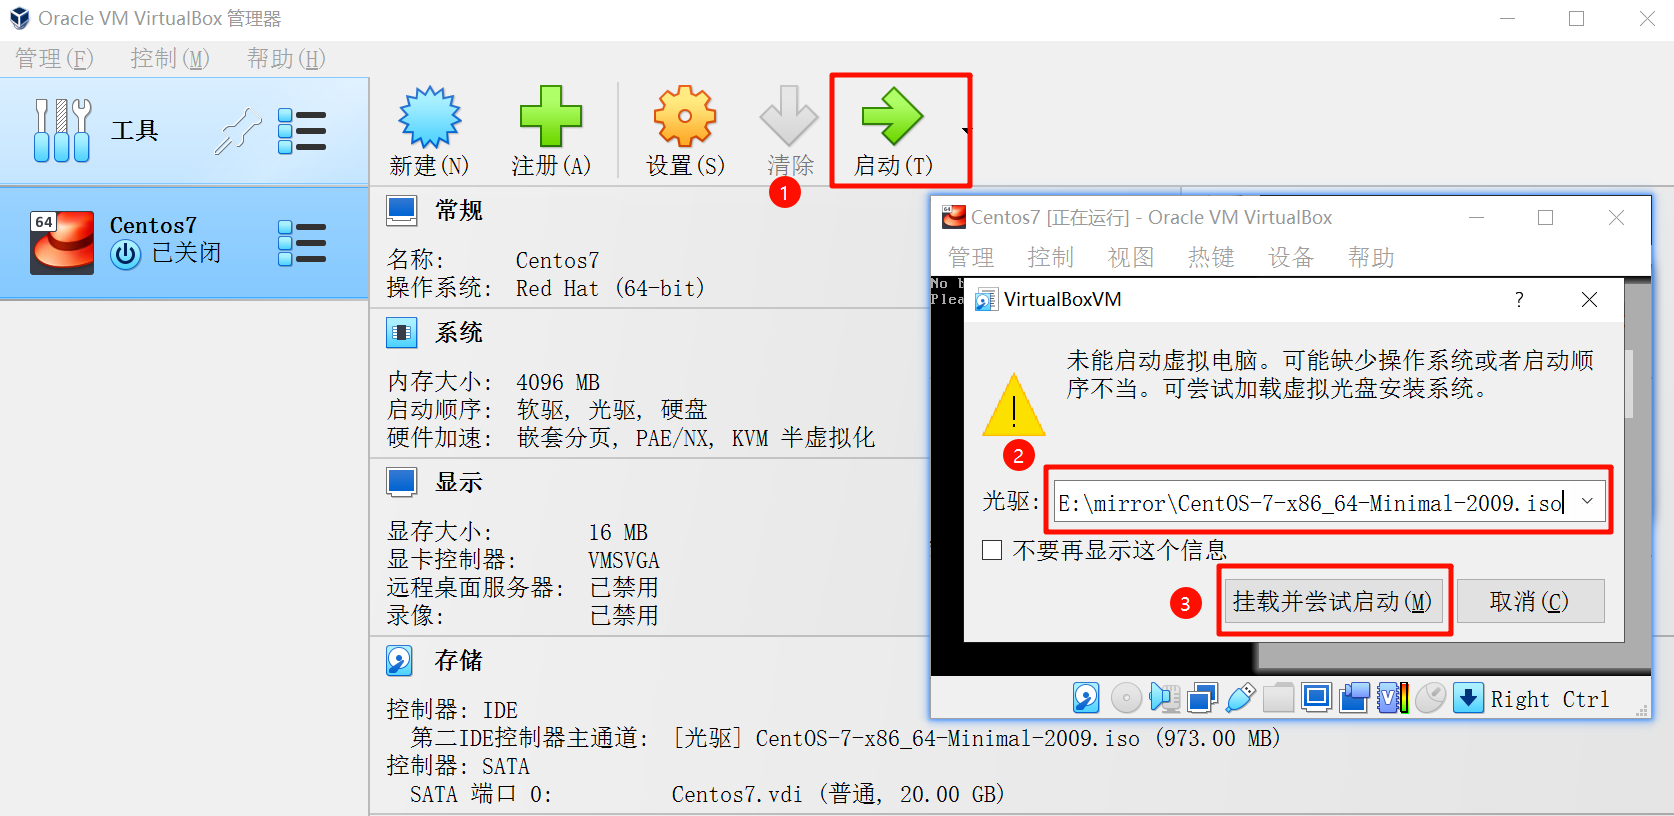 **接下来将开始安装 Centos,然后进行初始化设置** 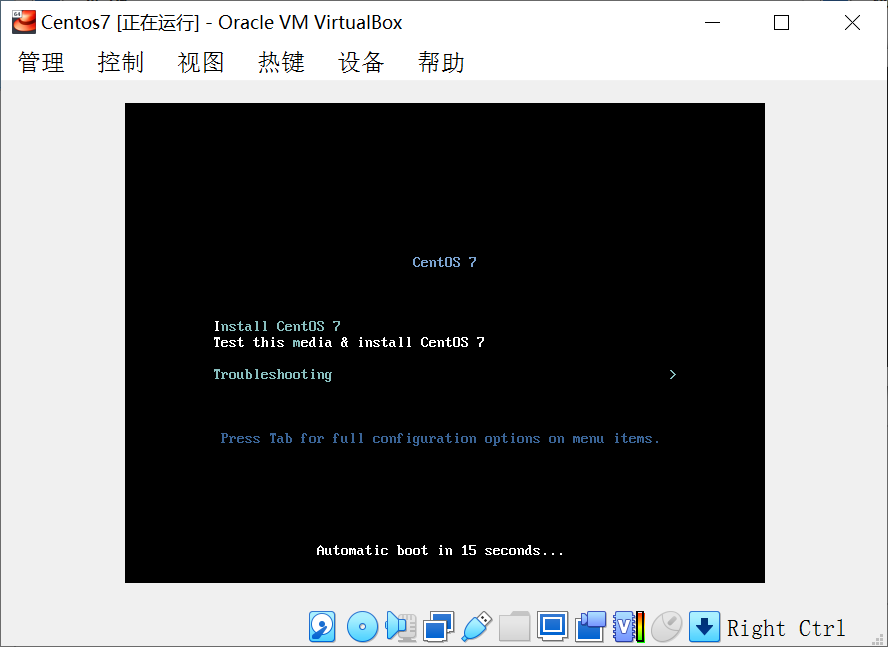 **选择语言,点击【继续】** 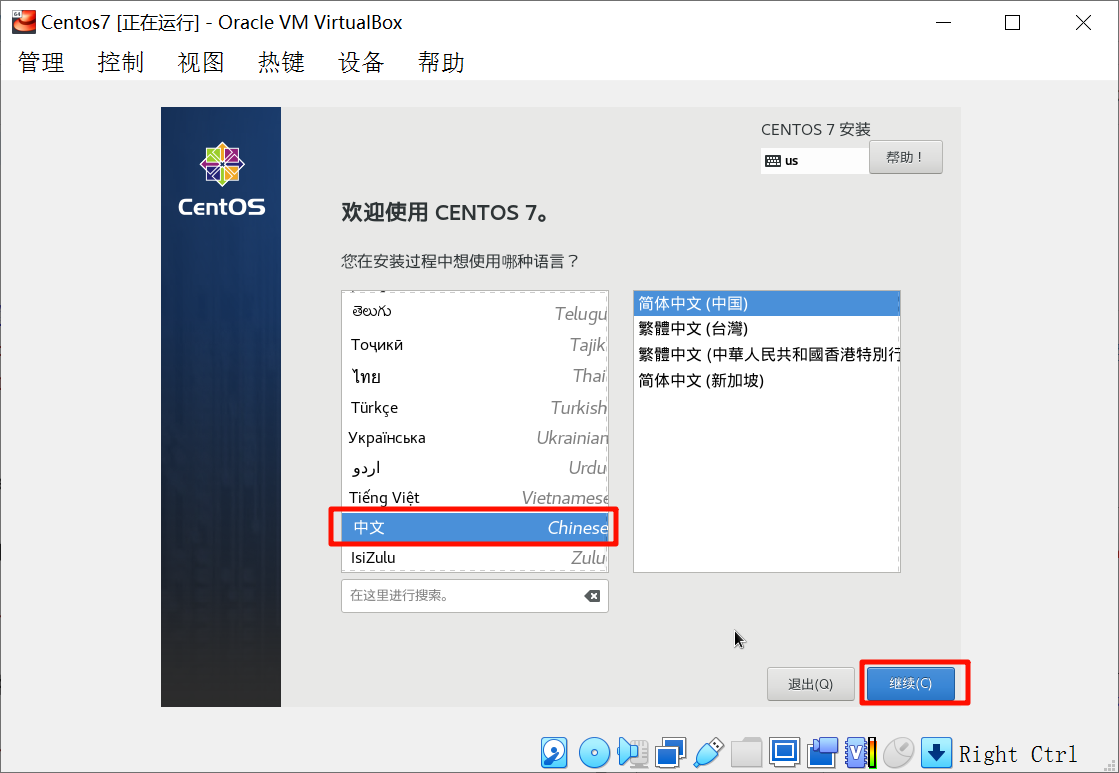 ##### 安装位置 **点击【安装位置】,然后点击其界面左上角中的【完成】(默认是自动分区),接下来点击【开始安装】** 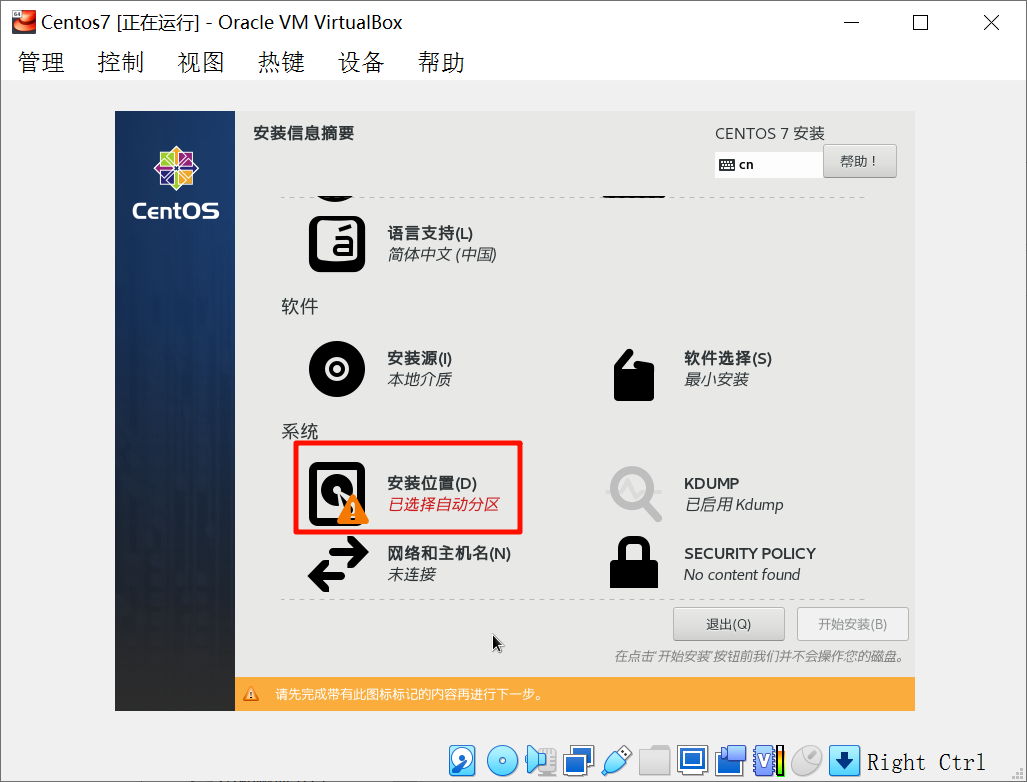 ##### 设置网络 **点击【网络和主机名】** 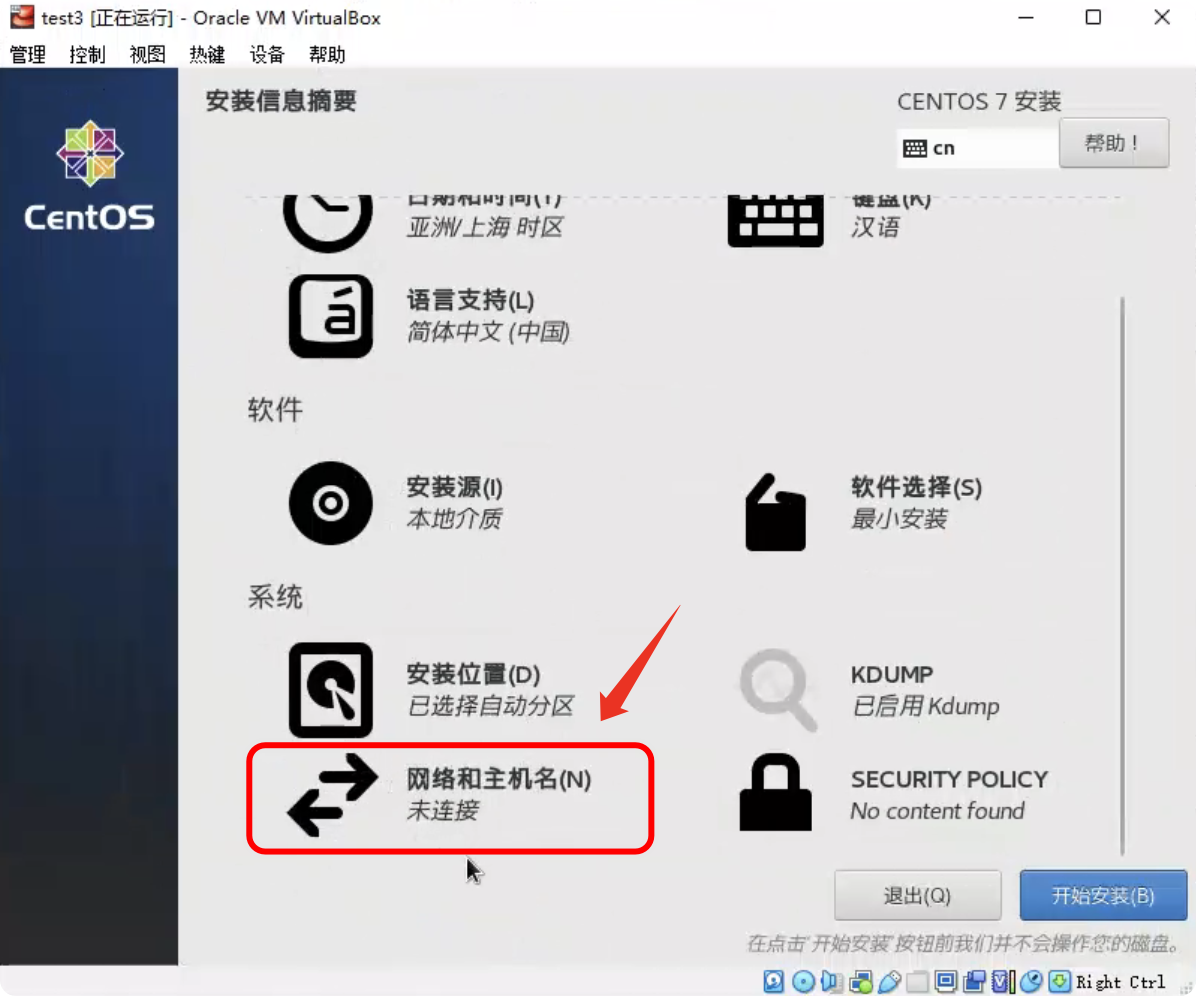 **右上角默认是【关闭】,点击修改为【打开】,然后点击左上角的【完成】,即可回到安装界面** 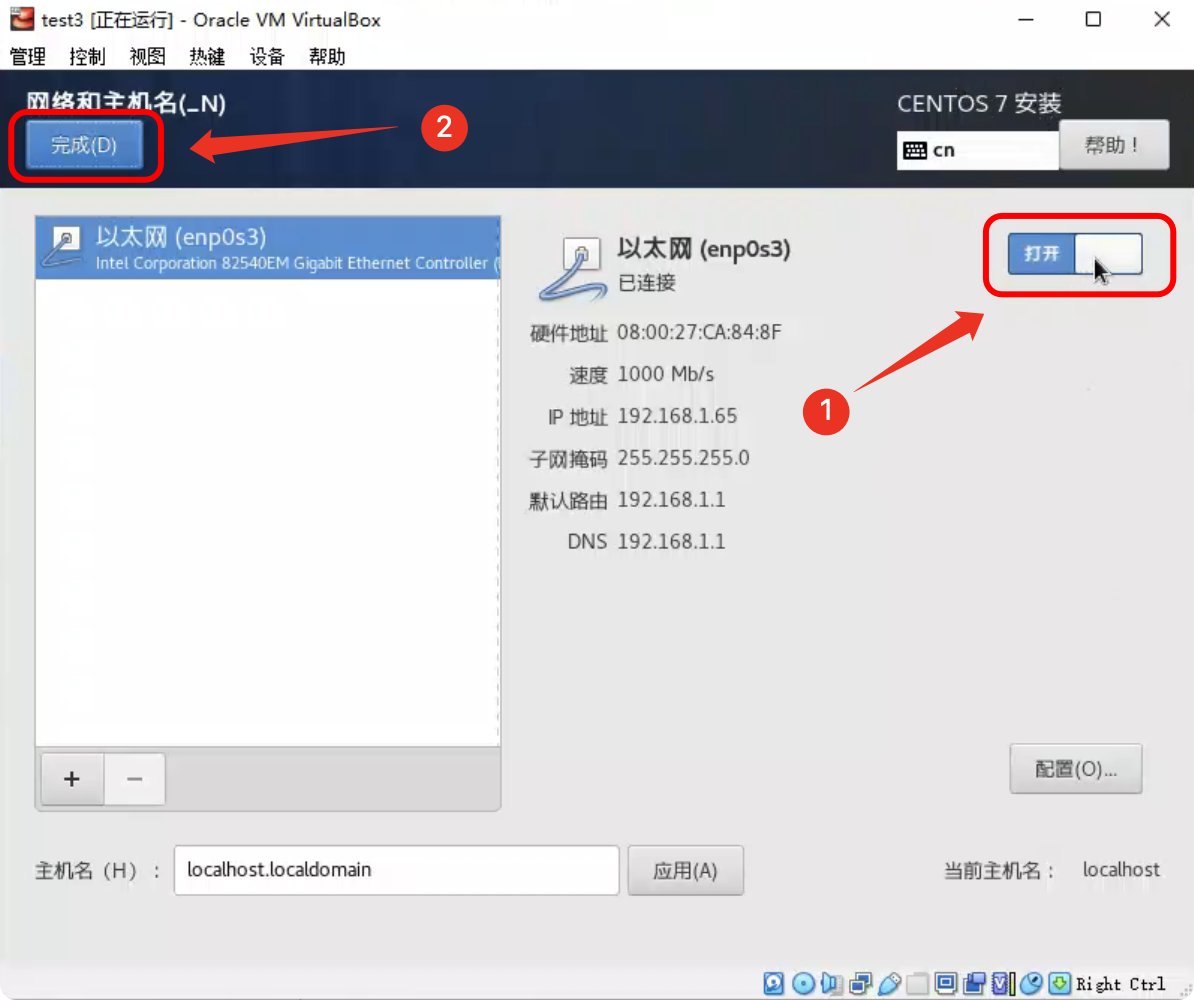 ##### 关闭 Kdump Kdump 是一个内核崩溃转储机制,默认是启用的,我们可以将它关闭掉 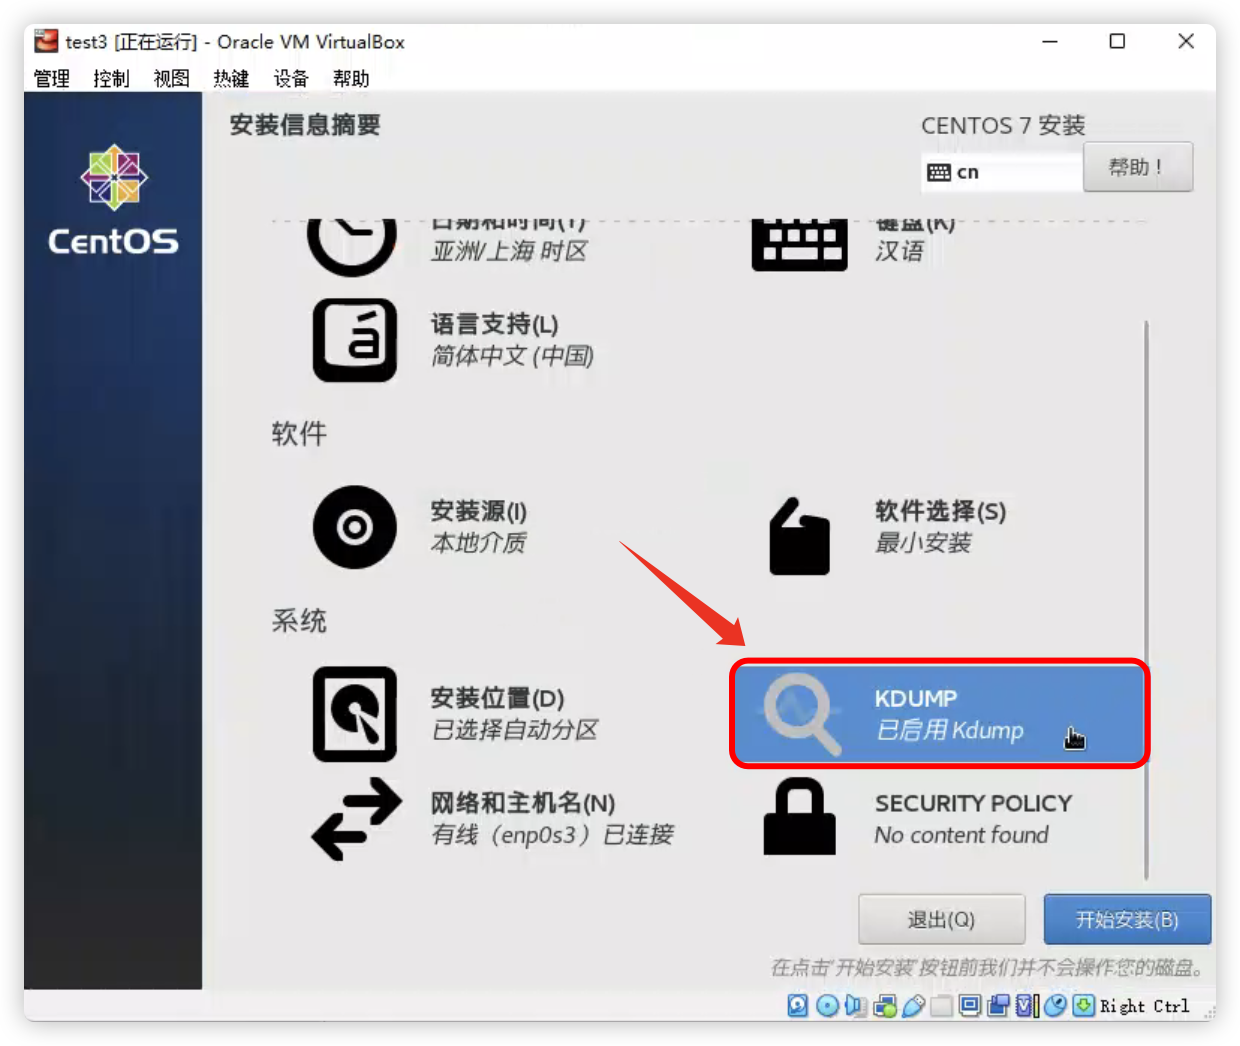 ##### 开始安装 **安装信息设置好后,点击【开始安装】** 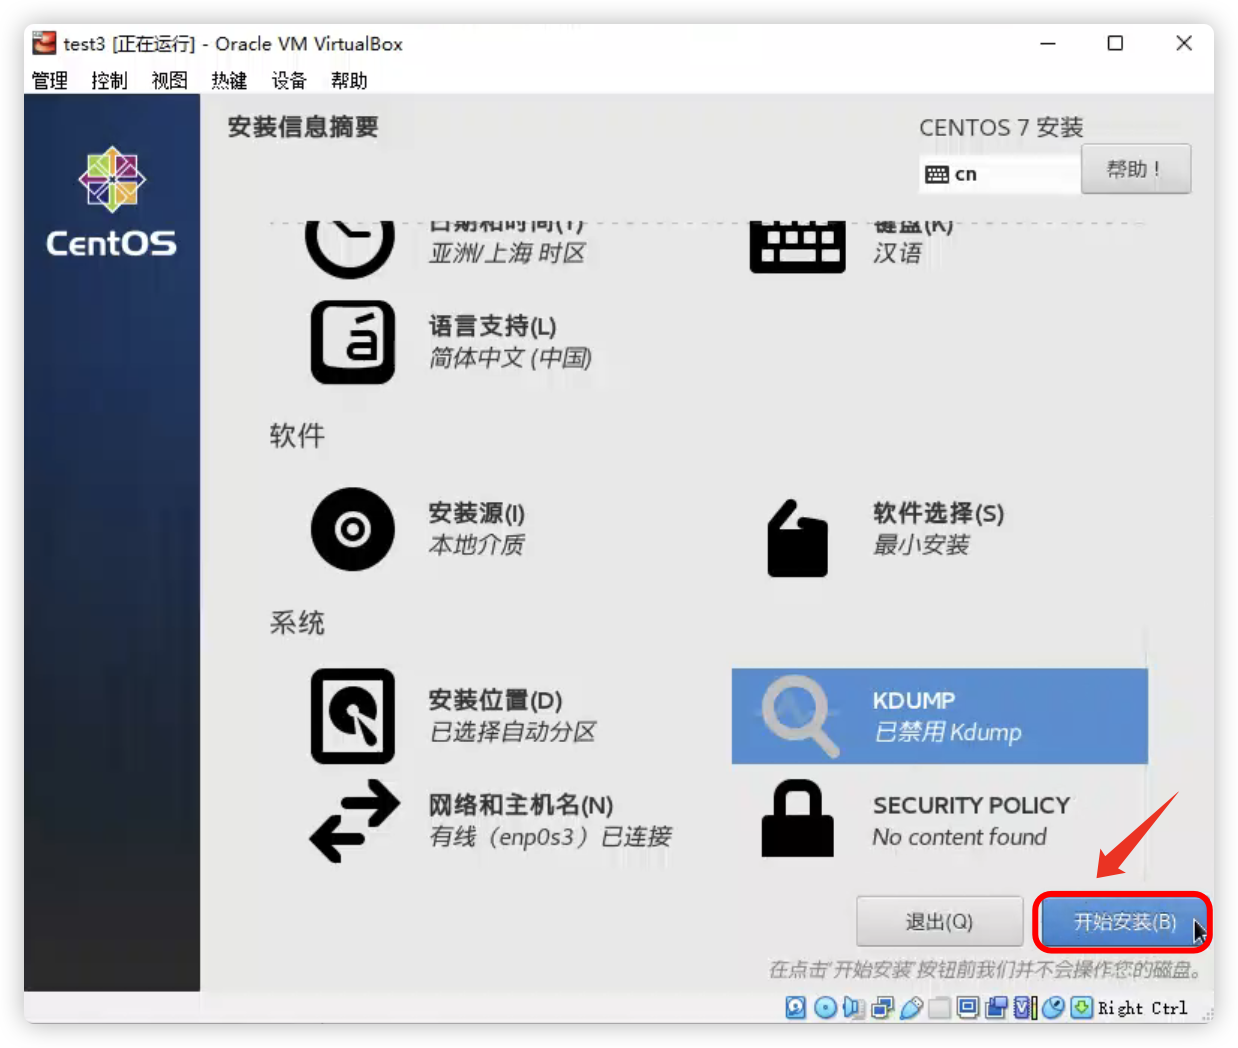 **然后就会开始安装操作系统了,在自动安装的过程中我们可以先设置 root 用户的密码** 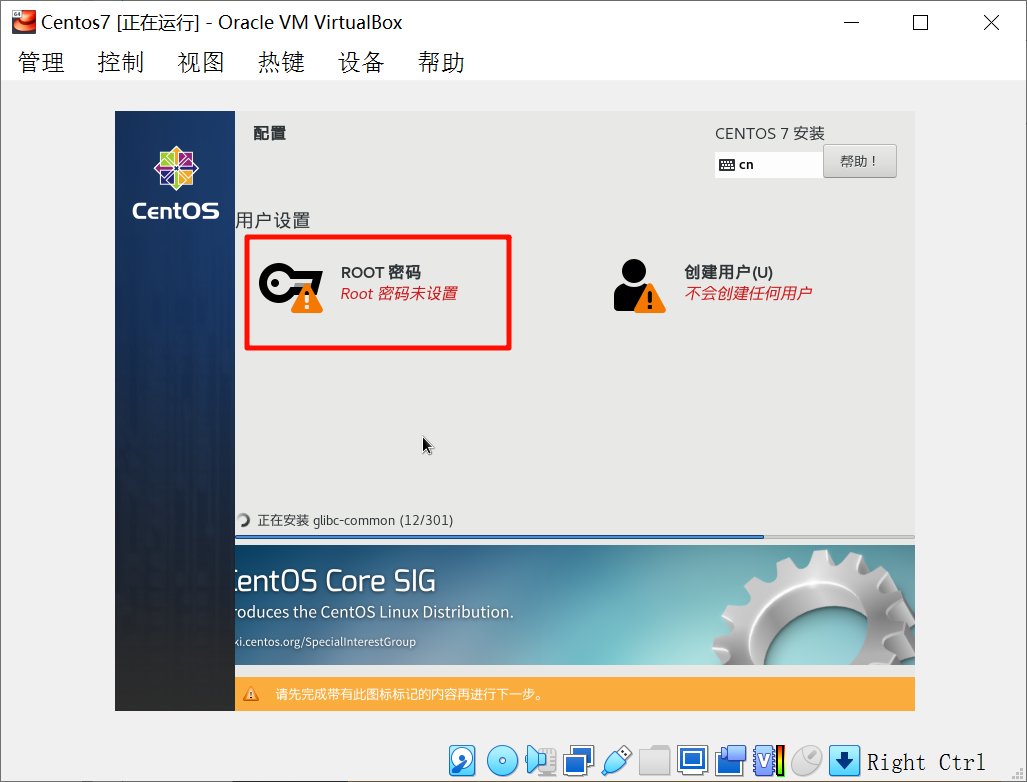 **安装完成后,点击【重启即可】** 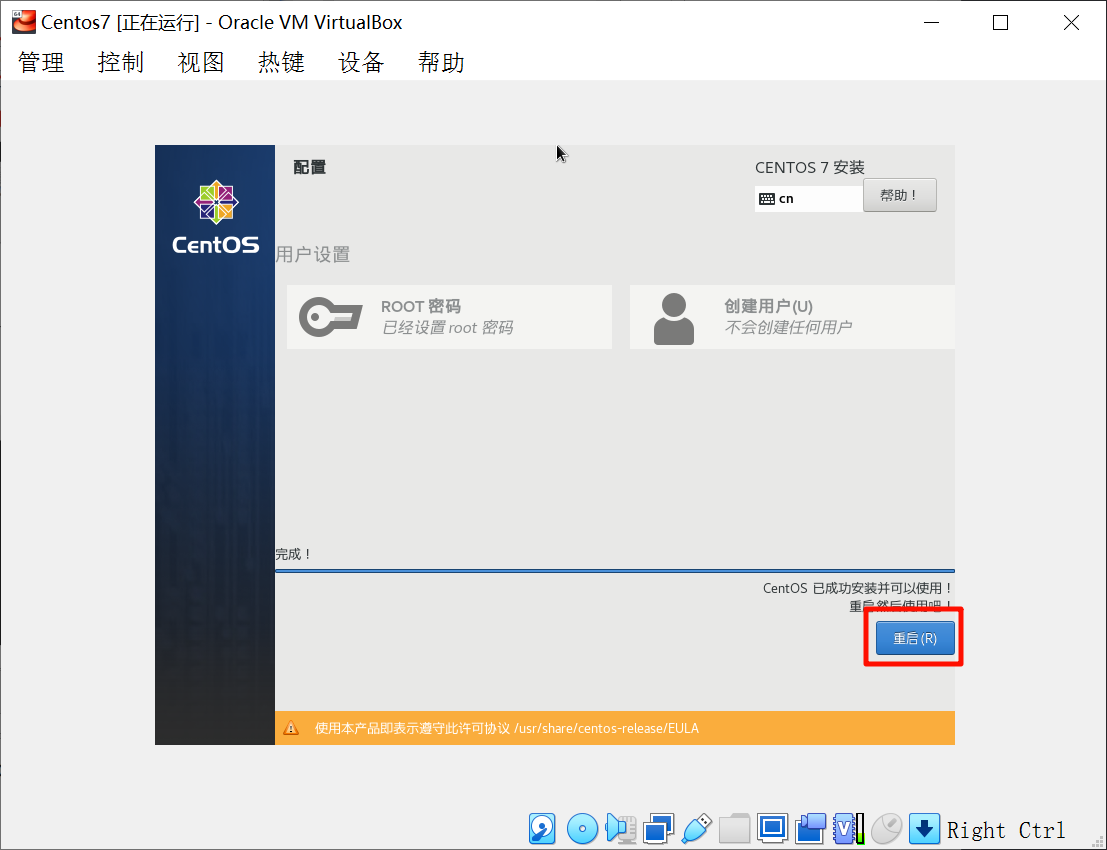 #### 4. 网络链接问题 --- 首先,我们要确保安装的虚拟机操作系统可以正常访问网络 ```bash # 测试网络 ping -c 3 baidu.com # 查看 IP 地址 ip addr ``` 如果没有网络,输出结果可能是下图这样的,继续往下看,查看解决方法 ``` mtu 1500 qdisc pfifo_fast state UP group default qlen 1000 ``` 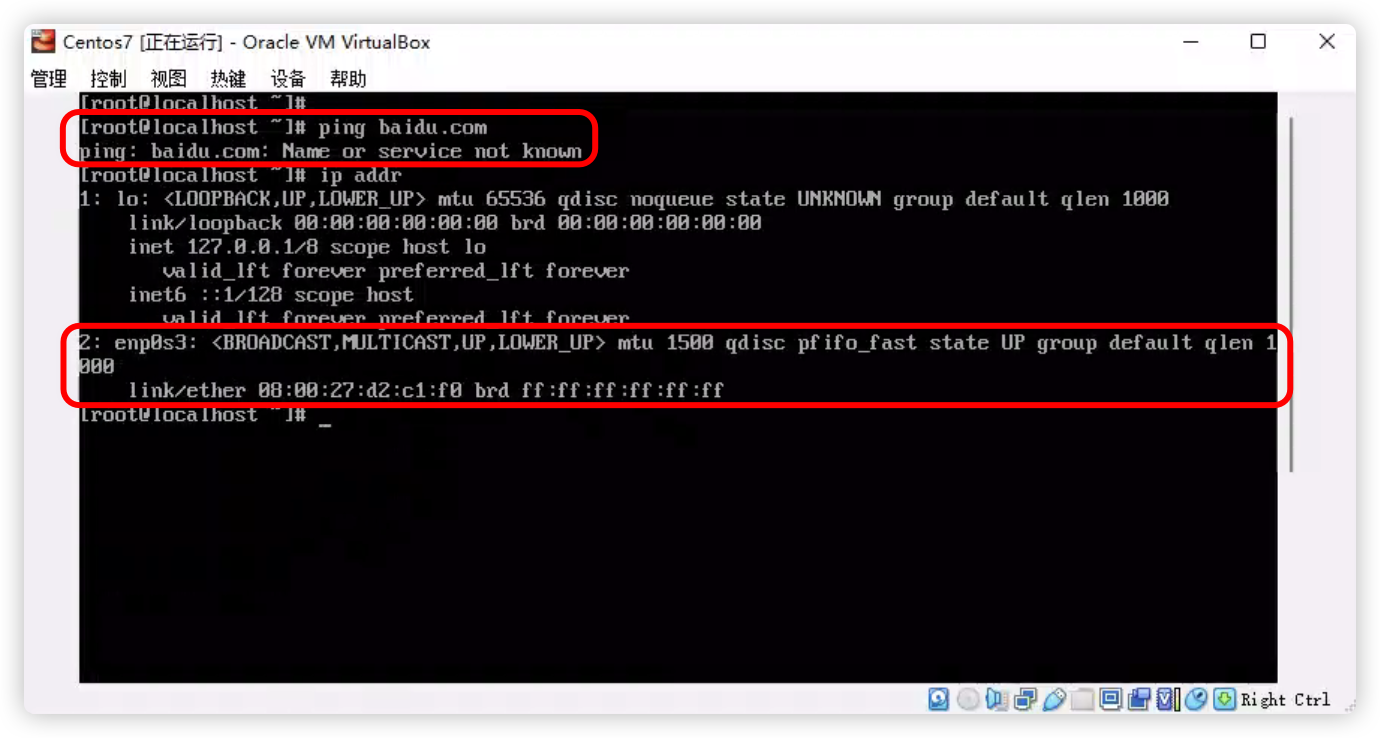 运行以下命令重启 enp0s3 网卡,就可以正常访问网络并且能看到局域网 IP 地址了 ```bash ifup enp0s3 ``` 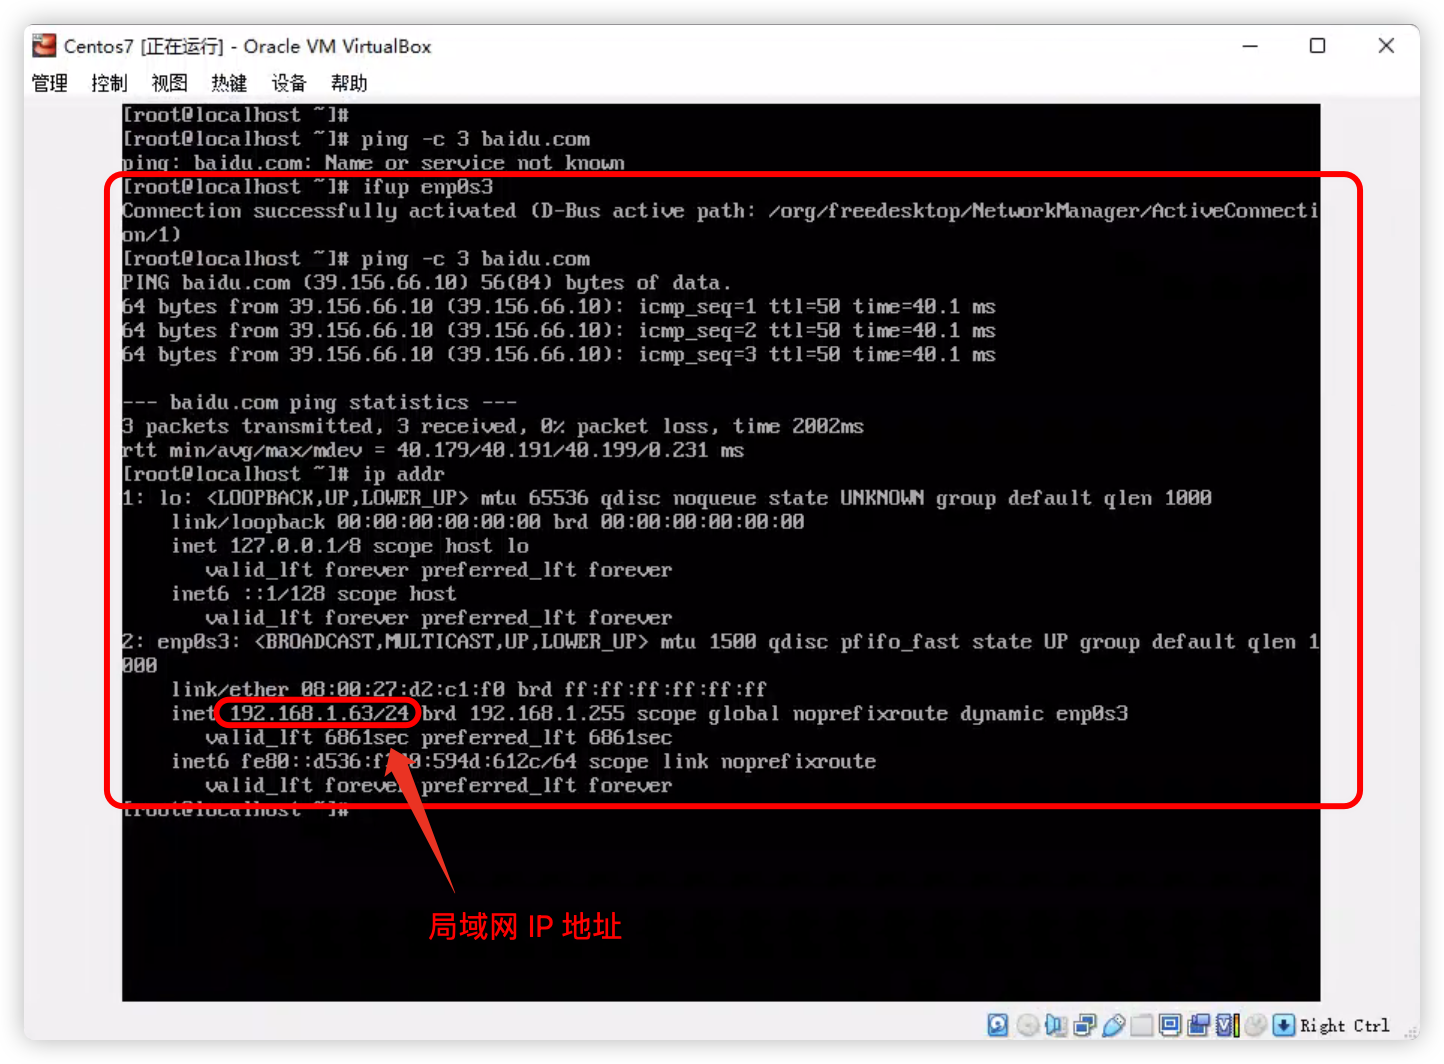 现在虽然解决了没有网络的问题,但是重启系统后可以发现又没有网络了 其实开机没有网络的本质原因是因为安装操作系统时,没有设置打开【以太网连接】,如下图 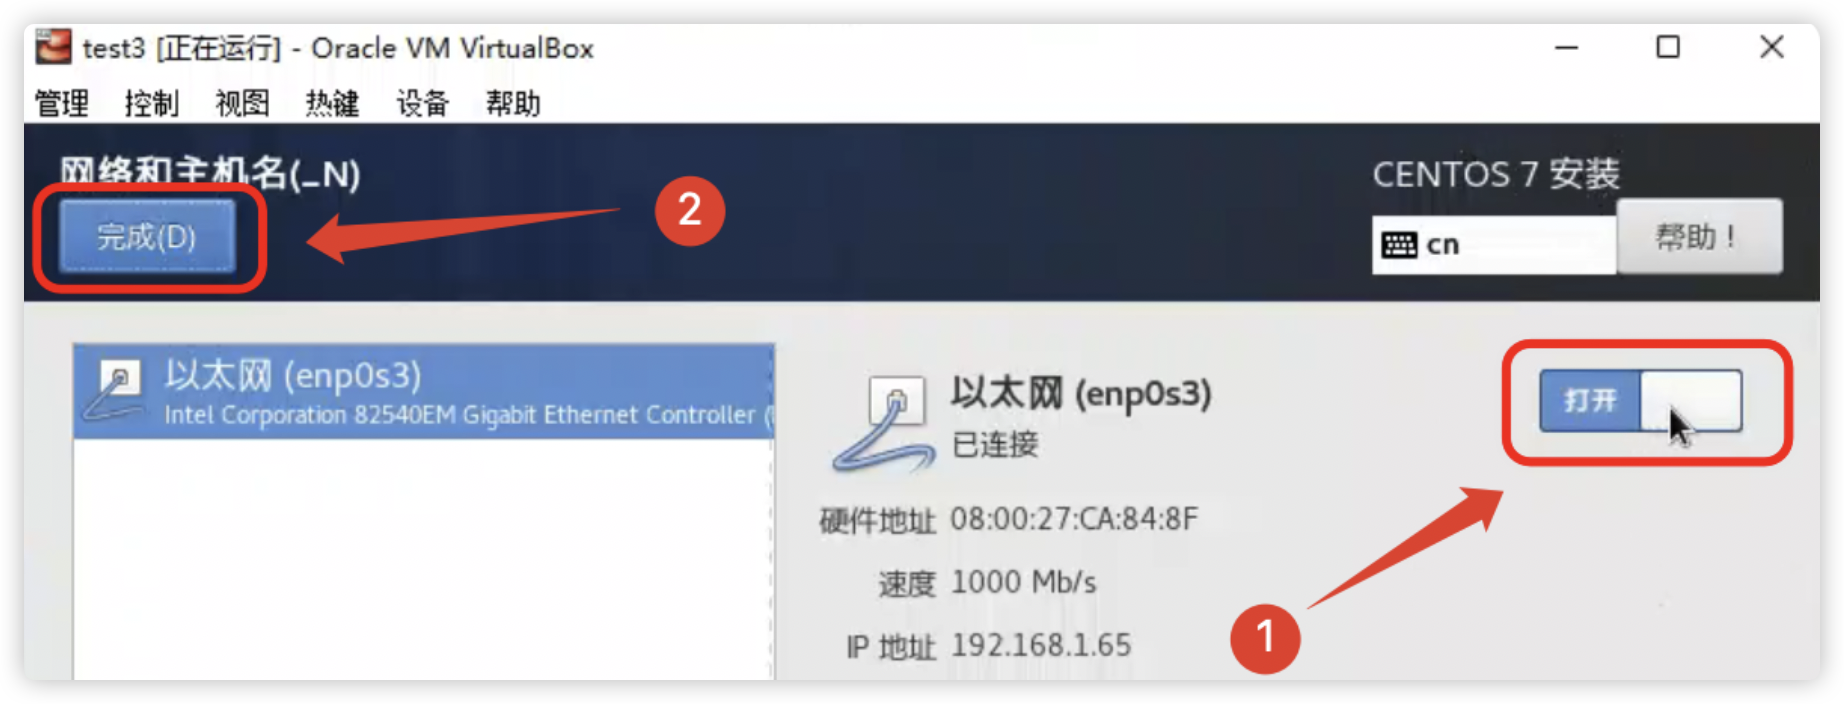 如果忘记设置打开【以太网连接】,我们只需要手动设置 enp0s3 网卡开机自启 修改网络配置文件 `/etc/sysconfig/network-scripts/ifcfg-enp0s3`,将文件内容中的 `ONBOOT=no` 改为 `ONBOOT=yes` #### 5. 安装常用工具 --- 因为我们是安装最小化的 CentOS 7,也就是只安装最基本的软件包和组件,不安装其他非必要的软件包和组件 但是,当我们使用虚拟机系统时,有些工具是经常使用的,可以运行以下命令安装它们 ```bash yum install wget vim lrzsz -y ``` | 软件包 | 说明 | | ------------ | ------------ | | vim | 终端编辑器 | | wget | 多用于下载源码包 | | lrzsz | 本地电脑和虚拟机系统之间进行文件传输 | 其他工具:[Linux 目录跳转的好工具 z.sh](https://www.itqaq.com/index/639.html)